In this advanced PowerPoint animation post I’ll show you how to make fun PowerPoint games for your classroom using a combination of triggers and animations.
Even if you are not a teacher, I highly recommend adding this trick to your toolkit as this advanced animations trick opens up a new fun world of games and interactivity!
Here are two examples of what you can do with this technique:
If you don’t have the time to work through this tutorial now, you can download the completed memory game template hereMemory Game Tutorial
For help building this up into a full-blown Jeopardy game in PowerPoint, see my other article here.
To download the complete memory game from this tutorial to use in your own creative projects click here.
1. Create your flash cards (both sides)
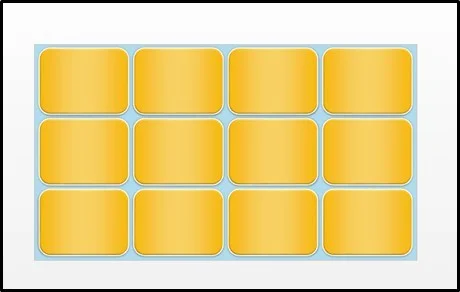
This first part to creating a PowerPoint game is fairly easy. Just create a bunch of rectangles on the slide. Do this by first going to Insert -> Shapes, then select and draw the rectangle.
Fill it in with any color or gradient or picture fill you like by clicking on the Format menu, then going to Shape Fill and choosing a color, a gradient, or a picture fill. Then, copy/paste (CTRL + C / CTRL + V) or duplicate (CTRL + D) it several times – I did a set of 12 here.
Make sure everything is aligned well (use the guides if you have PowerPoint 2013, or use the Arrange -> Align tools). This set of rectangles will be the part of the card that’s face down (i.e. the bottom, or Answer side), so these won’t be shown until a card is flipped over.
Now that you have the above done, make a copy, or duplicate, the whole slide (CTRL + D), and then go back to the original. This’ll come in handy in a little bit.
At this point, you need to decide which type of PowerPoint game you are creating. Are you making a flashcard like game (the same technique for creating the Jeopardy game in PowerPoint) or are you making a memory game?
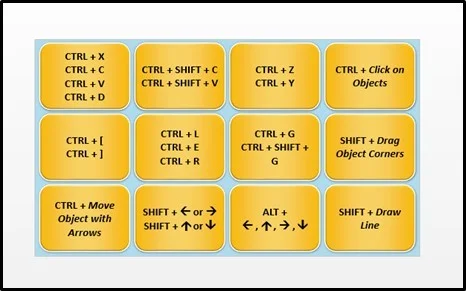
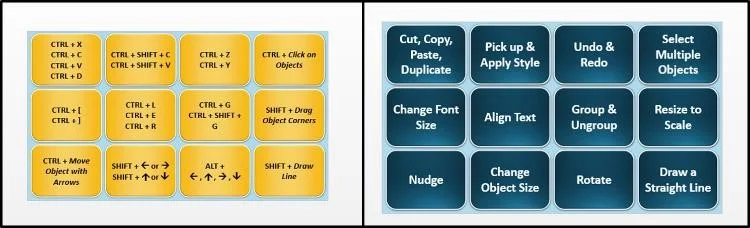
If you’re making flashcards, then write the “answers” to your flashcards on each of these cards. Since I’m making PPT shortcut flashcards, I’ll write my shortcuts here.
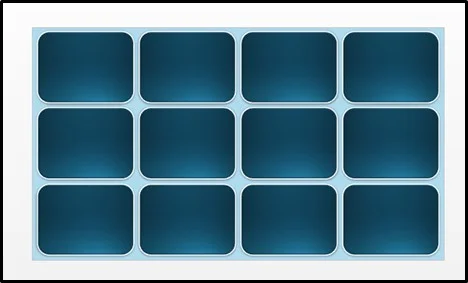
Ok, go to the copy of the slide that you just made. This will be the front of your card, or the “question” side – it will be the side that’s showing before you click anywhere. Change the color of the cards to differentiate from the other side.
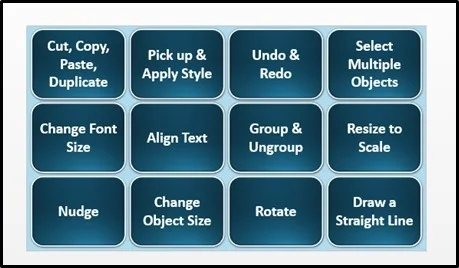
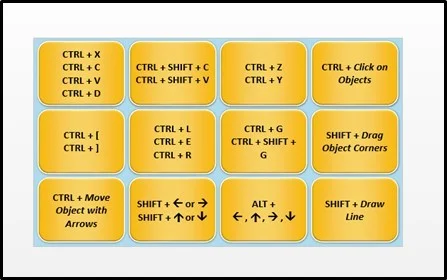
At this point, I’ll write the “questions” on each of these cards – in my case, these will be the command that I want the shortcuts to do, such as changing the font size or rotating an object. Below is my set of “question cards” filled in.
Below is a summary view of both sides of the flashcards.
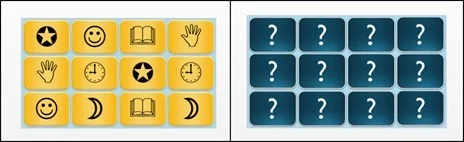
Note that if you’re making a PowerPoint memory game, you want to put both the “question” and the “answer” (or the matching pairs) on the back side – you can either put question marks on the front or leave that side blank, like in the example below.
2. Animate your flash cards
Now let’s animate our flashcards. There are a few different ways to do this, but here’s my favorite.
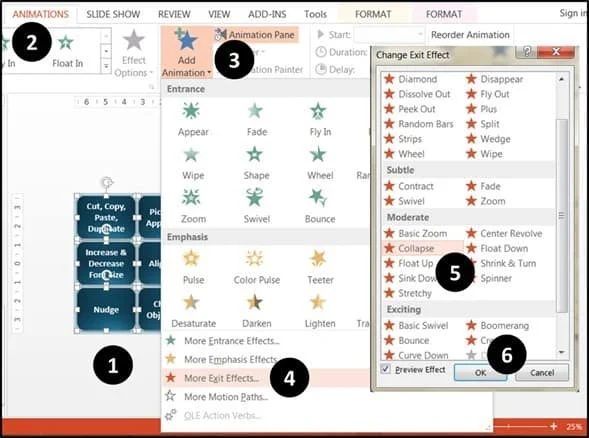
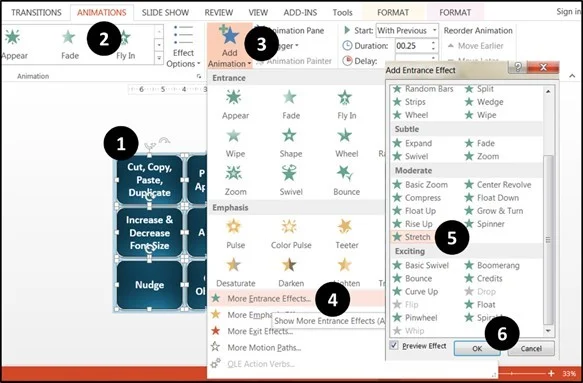
First, let’s go to our yellow “answer” cards and select all of them (CTRL + A), then add a Stretch entrance animation. Do this by first going to the Animation Tab, then going to Add Animation, then going to More Entrance Effects, and scrolling down to Stretch – hit OK.
Note: If you are using an older version of PowerPoint that does not have the Stretch effect available, you can use the Split entrance effect instead (just make sure it’s set to Vertical Out, so the left and right sides stretch out together) – this won’t look as smooth but it will still be ok.

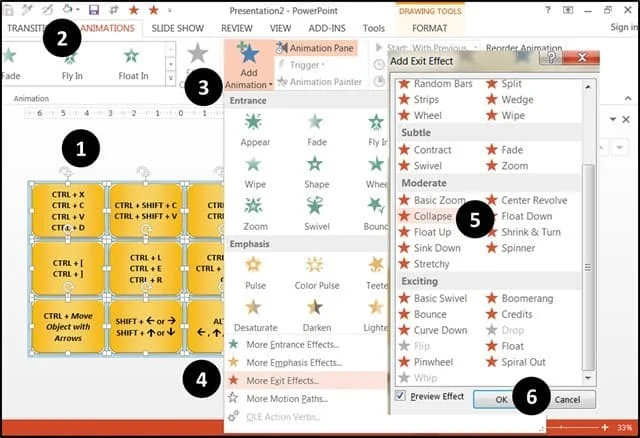
Now go to the front slide, with the blue “question” cards. Select all of them (CTRL + A) and then add a Collapse exit animation. Just like we did before, go to the Animations Tab, then to More Exit Effects, then select Collapse and hit OK.
Note: Again, if you are using an earlier version of PowerPoint, choose the Split exit effect. Make sure it goes into the middle horizontally (Vertical In).
Now that we have the animations set on both sets of cards, let’s put these together. Take the blue front cards, select all of them (CTRL + A), then cut (CTRL + X) and paste (CTRL + V) on top of the yellow back cards.

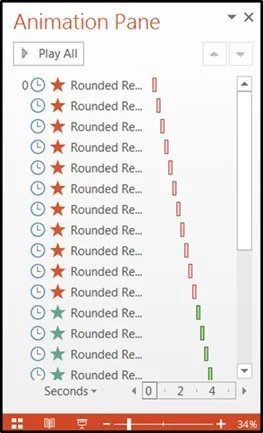
At this point, select all the animations (click on an animation and hit CTRL + A). Then, set the timing on everything to start After Previous and make the duration of everything .25 seconds
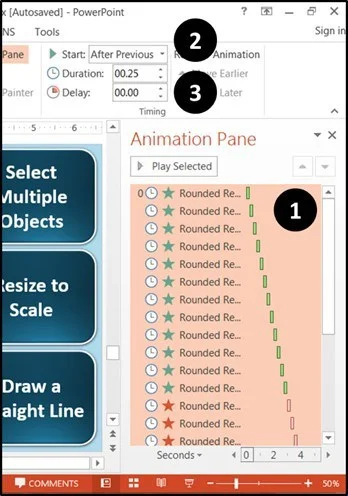
Finally, select all the exit effects (click on the first one, hold SHIFT, then click on the last one) and drag them up to be above the entrance effects. The final result should look like this:
Great – you’re now ready for the triggers. Get into a patient mood, as this can be tedious if you have a lot of cards (you will need to make 2 triggers for every card you have – so I had to do this 24 times!). But after you’re done, you’ll be really happy with your work – and you can reuse your creation again and again in the future. Ready? Let’s jump in.
3. Create your triggers
Now it’s time to make the triggers!
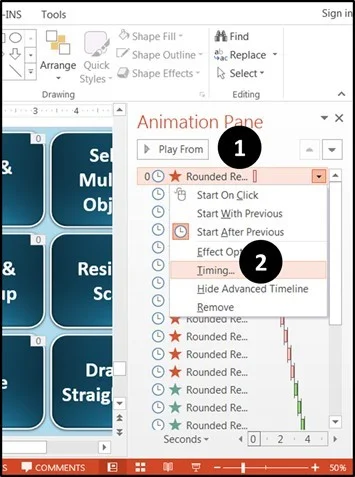
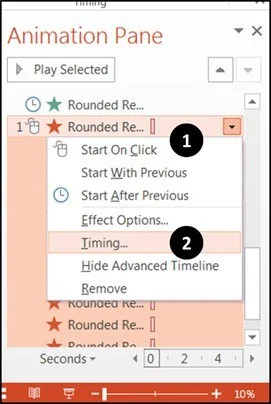
It’s actually pretty easy – you just have to do it numerous times to make it all work. From your Animation Pane, right click on the top animation, which should be the top left blue card (which says Cut, Copy, Paste, Duplicate in my case).
When the dialogue box comes up, click on Timing.
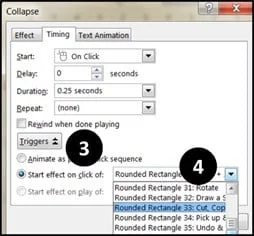
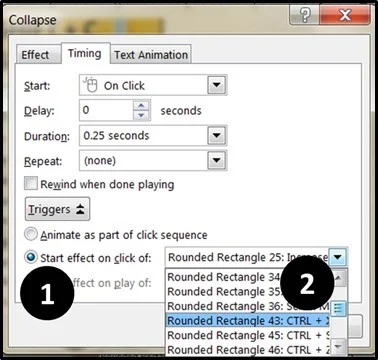
From the Timing box, go down to Triggers and click on “start effect on click of” and from the drop-down menu, scroll down to the Cut, Copy, Paste, Duplicate option (make sure that this is the same rectangle that had the animation you clicked on).
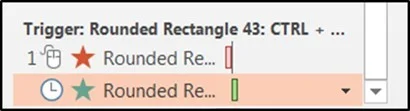
Now what this trigger does is it flips the top part of the card when you click it in presentation mode. To have the bottom part of the card (the one that says “CTRL + X / CTRL + C / CTRL + V / CTRL + D”) come up correctly, you’ll now need to have the bottom card’s animation occur right after this trigger.
So the bottom card’s animation will be the very first entrance effect in your Animation Pane (mouse over it to make sure you have the right one) – take and drag it to just below the trigger that you’ve just created.
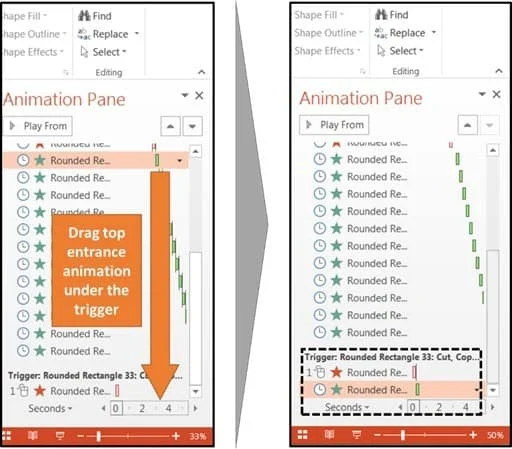
Test your work by going to presentation mode and clicking on the rectangle – the top should contract and the bottom should expand right after, creating a cool flip effect. If it doesn’t work somehow, check to make sure that the object of the trigger is the same one that has the exit animation and that the entrance animation is the card that’s right underneath.
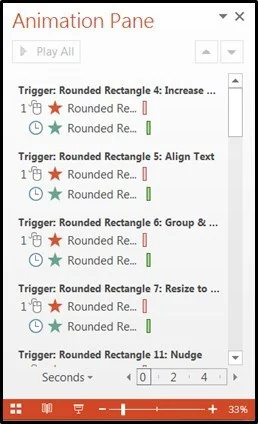
If it works, great job! Now you can do this for the rest of the cards. Repeat the process, adding a trigger to all of the exit effects from the top cards, then dragging the entrances of the respective bottom cards underneath. After you’ve done multiple ones, your animation pane should look something like this:
Once you’re done adding triggers to all the top cards – congrats, you’re halfway there! Now we have to repeat the process again with the bottom cards. This time, we’re exactly reversing the process – making the bottom cards have the trigger and the exit effect, and the top cards follow with the entrance effect.
Select all of the blue top cards by holding CTRL and individually clicking on them (don’t just Select All because it will grab the bottom cards as well, which you don’t want). Once they’re all selected, we need to add an additional entrance animation to them, so again, go to the Animations tab, click on Add Animation, then go to More Entrance Effects and click on Stretch. Hit OK. Now make sure they’re also at .25 duration and start After Previous.
Now with all of the top cards still selected (or select them again if needed), right click and choose Send to Back, then Send to Back again. Now all the yellow cards should be showing.
Note: An alternative way to do this is by using the Selection Pane and hiding all of the blue top cards so you can work with only the yellow bottom cards.
Select all of the yellow cards now by again holding CTRL and clicking on each one. Then, just like we did before, go to the Animations tab, then click on Add Animation, go to More Exit Effects and select Collapse. Hit OK. Again, if you have an earlier version of PowerPoint, just add a Split exit effect instead.
gain, make sure that these new exit are .25 seconds in duration, too.
Now repeat the process of adding triggers. Select the top exit effect out of the new ones you just added (it should again be the top left, or the card that says “CTRL + X , CTRL + C, CTRL + V, CTRL + D“). Right click, and go to Timing.
In the Timing menu, under Triggers, again click on the “Start Effect on Click of” option and find the rectangle that matches the one from your animation – in this case, it’s the card that says:
- CTRL+X (see guide here)
- CTRL+C (see guide here)
- CTRL+V (see guide here)
- CTRL+D (see guide here)
To see a list of the top 25 PowerPoint shortcuts, see our guide here.
Now you have your second trigger for this bottom card. The final step is to again drag the corresponding top card animation, which you just created a bit ago, underneath it. This ensures that the card will flip back to its original position when the bottom card is clicked.
Repeat this process until you have another set of triggers for the bottom cards – so for every card, you should have 2 trigger sets. Therefore, for these cards, I have 24 in total.
After you’re done, breathe a sigh of relief, go to Presentation Mode, and enjoy your work!
Conclusion
So that’s the basic process for how to create PowerPoint games using animations and triggers.
And although working with triggers to create games in PowerPoint requires some patience, in the end it’s worth it as you get to sit back and play with your creation.
You can use these techniques to create a variety of fun PowerPoint games like PowerPoint jeopardy, interactive flash cards or other fun memory games that you can use to engage your students and make your classrooms more interactive.
Once you’re done, make sure to save a copy of your game that you can use as a PowerPoint template in the future. That way you only need to tweak what you’ve already created, instead of rebuilding the entire game from scratch.
Have a way you think you’ll use this new trick? Let me know in the comments below, I’d love to hear it!
If you don’t have the time to work through this tutorial now and need something quickly, you can click here to download the finished memory game PowerPoint template.
To learn how to create animated fireworks in PowerPoint (and add some extra boom to your presentation), check out my guide here.
What’s Next?
About the Author

Spicy Presentations
Yulia Barnakova is passionate about helping people develop the skills and learning mindset to thrive in the digital age. She is always experimenting with emerging technologies and has been recognized by Microsoft as a Most Valuable Professional for her creative presentation technology tutorials, which have more than 8 million views on YouTube. Her recent TEDx Talk, Think You're Not Tech Savvy? Here's Why You Are, shows how everyone can (and must) develop the mindset and skill set to embrace technology.