Fireworks are another cool trick you can pull off in your presentations using PowerPoint animations.
There are a variety of different ways for how you can make fireworks in PowerPoint depending on the style you want – so in this tutorial I’ll just show you my favorite technique!
And there are three parts to making your custom fireworks in PowerPoint (all described in detail below):
- Make your firework explosion
- Make the tail for your fireworks
- Bring your fireworks to life with PowerPoint animations
This firework trick works in all versions of PowerPoint 2007 and later (and it should also work on the Mac version of PowerPoint too).
Creating Animated Fireworks in PowerPoint
The first step to making fireworks in PowerPoint is to create the explosion (ka-boom!).
You can see what the end result of the explosion looks like with a black and white background below.
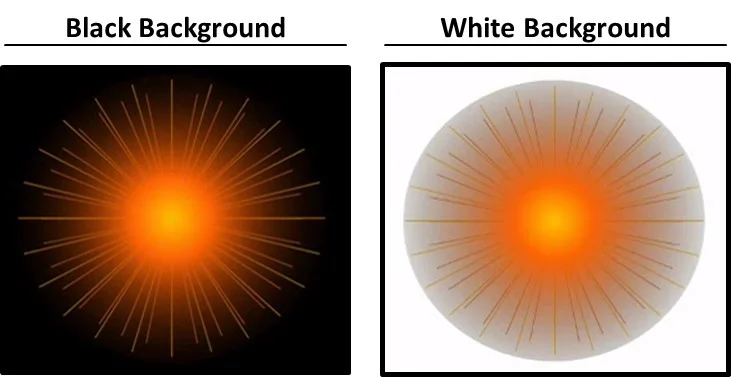
Below we’ll make each of these pieces and then combine them together to create our final explosion.
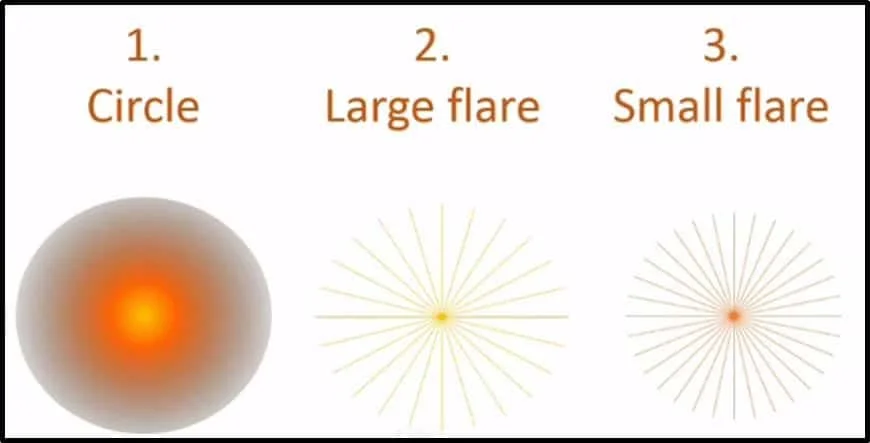
1. Create the circle
The circle is basically just a circle shape with a gradient effect.
So we have a radial gradient that starts from center, and you can make it whatever colors you like.
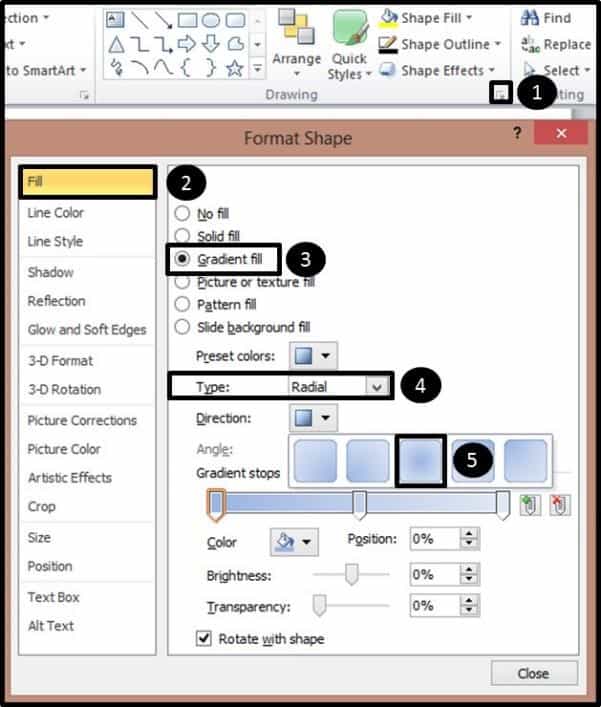
Now although the gradient is far from an exact science, below I will show you the exact setting I used. You can play around with this yourself to see what works best for your own project.
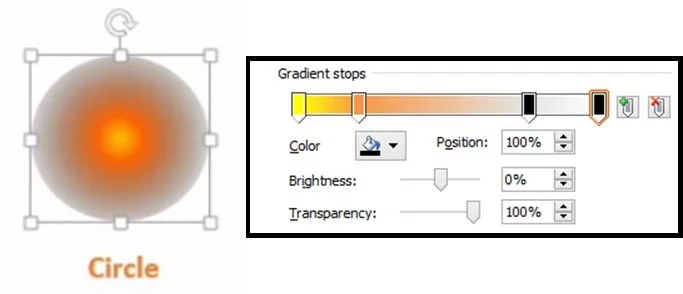
First color:
- Color (inner most color) – Yellow
Second color:
- Color – Orange
- Position – 19% position
Third color:
- Color – Black
- Position — 78% position
- Transparency – 90%
Fourth color:
- Color – Black
- Position – 100% position
- Transparency – 100%
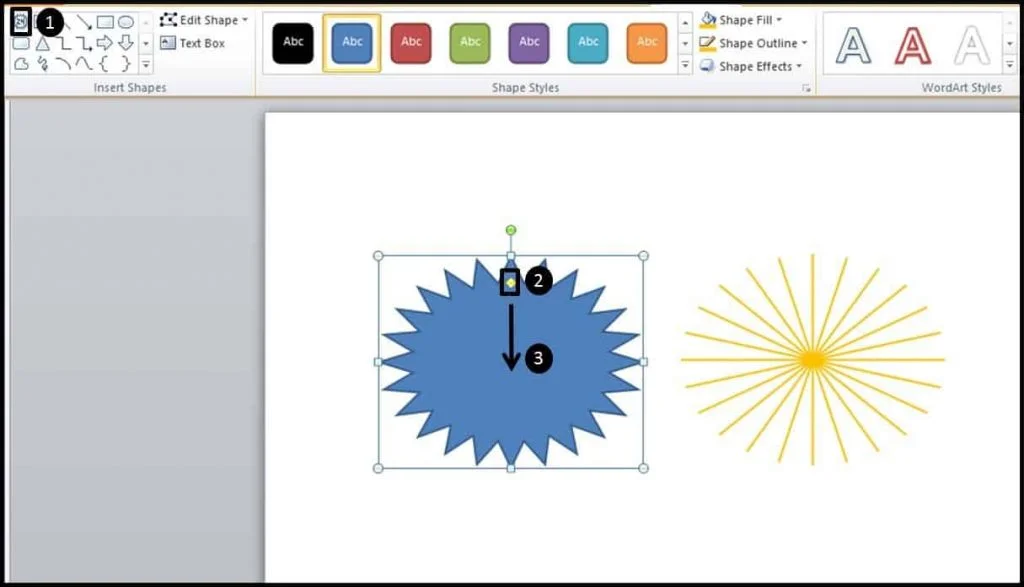
2. Create the large flare
The large flare is actually a 24 point star. You can get it by going to Insert tab and then the Shapes gallery and simply choosing it from the dropdown menu. Once you insert the 24 point star on your slide, grab the yellow dot adjuster, you can see that it collapses into this flare like effect.
If you pull the adjuster all the way down and change the outline to orange, you’ll get the shape you see on the right (almost looks like a dandelion!).
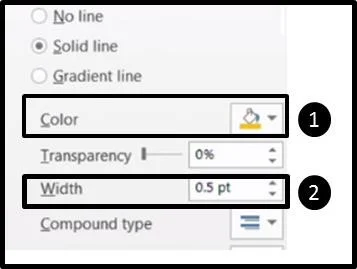
For the orange outline, pick the color and width you like; mine is set to 0.5 pt. Don’t worry about the fill, as we can’t even see that for this shape – we’re just working with the outline.
If for whatever reason you don’t have the 24 point star in your version of PowerPoint, you can simply create this same effect with 12 intersecting lines. Doing it with the star method just makes it faster
3. Create the small flare
So the last piece of the explosion animation is the small flare, which is a 32-point star. It’s the same process for inserting it – you can get it from the Shapes menu and simply adjust it.
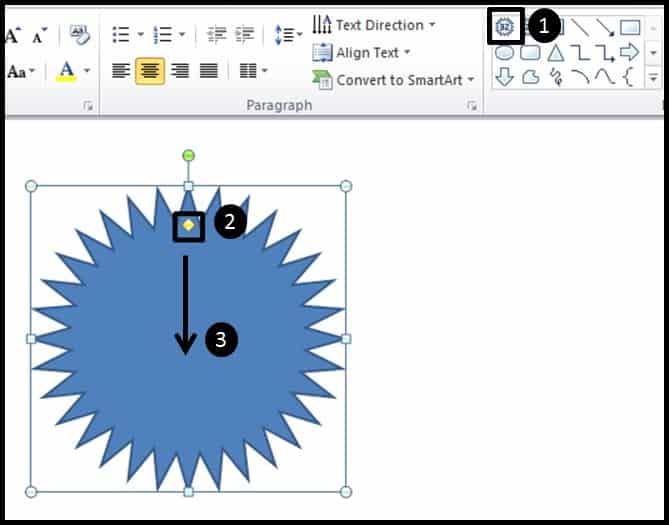
This piece has the same settings as the large flare, except it’s a darker orange color. So just use the adjuster and the color settings to set it up.
Once you have the three pieces finished, just align them on top of each other, making sure that the gradient circle is on top.
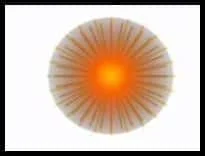
With the objects stacked on top of each other, if you change your slide background to black, your graphic should look like the picture below – now it’s starting to look like a firework!

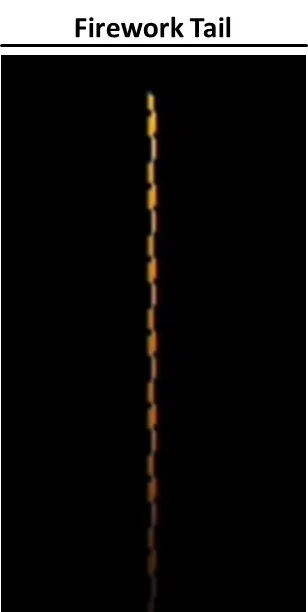
4. Make the firework tail
Making the tail for your firework is really easy; it’s just a rectangle with a gradient fill.
Here we have a linear gradient with a 270 degree angle, and you can see the specific colors I used down below.
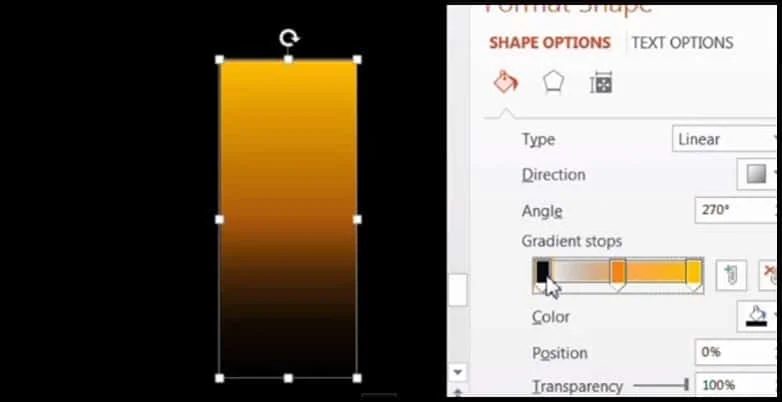
First color:
- Color – Black
- Transparency – 100%
Second color:
- Color – Orange
- Position – 50% position
- Transparency – 30%
Third color:
- Color – Yellow
- Position — 100% position
- Transparency – 0%
Another interesting piece you can play around with is the outline of your tail, playing with the different dashed options and widths to create different effects.
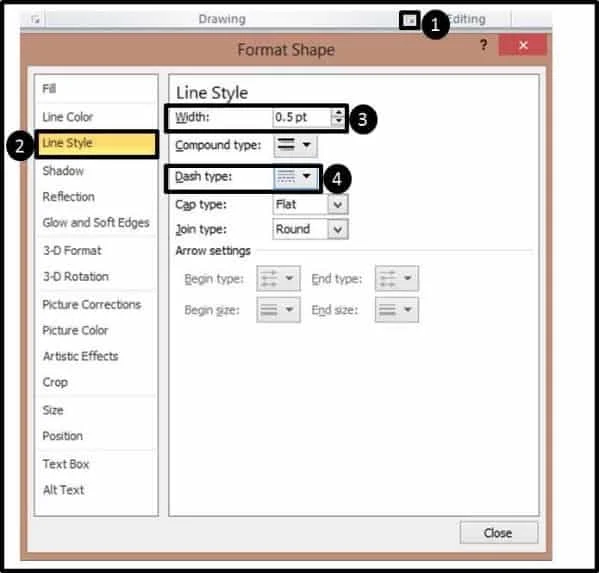
I personally liked the combination of a 0.5 width outline and the third option down (called “dash dot”) for the line to get the effect below:
Animate your fireworks
Okay, so now let’s get to the fun part where we bring your fireworks to life using PowerPoint animations.
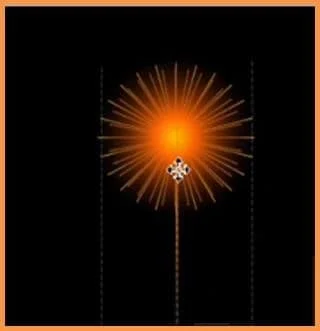
The firework part has 3 animations, and the tail has 2. But before we do anything else, let’s group the firework pieces together, starting with the the flare.
Select all the pieces, right-click them, select Group, then Group again (or hit Ctrl + G on your keyboard to group them together).

With the flare grouped, just move the tail to fit beneath the flare to create the firework.
Now select your flare again and let’s navigate to the Animation tab and add three animations:
1. Zoom entrance
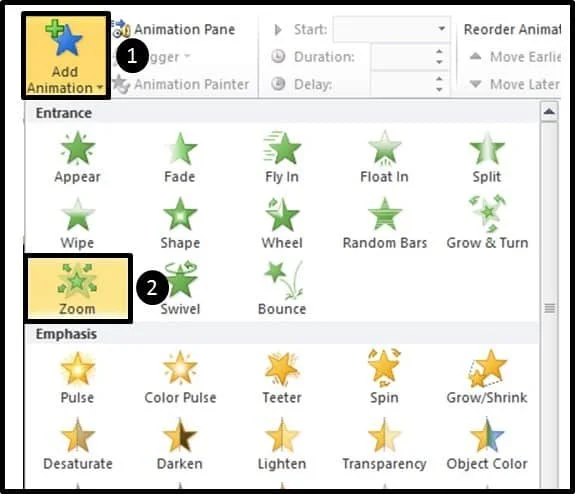
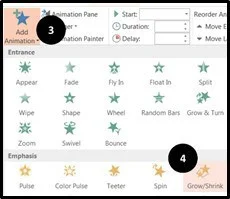
2. Grow/Shrink for emphasis.
3. Dissolve Out for the exit effect
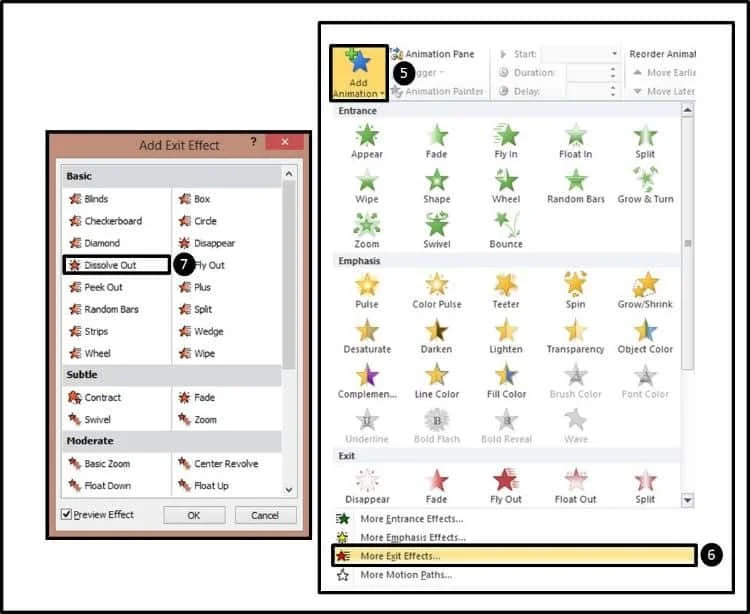
Note: Since we are adding multiple animations to the grouped object, make sure you use the “Add Animation” dialog box.
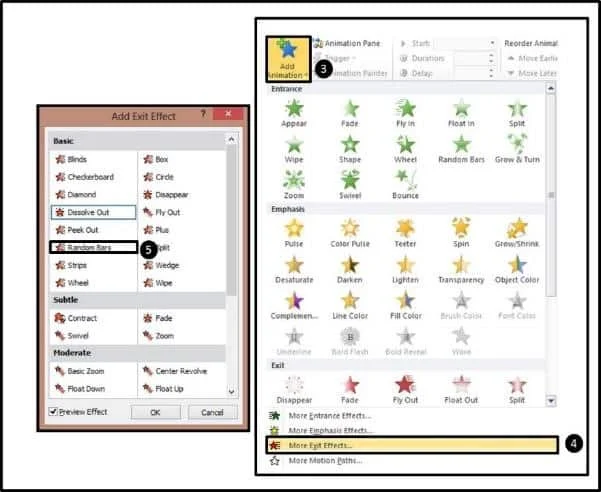
For the tail, we need to add two animations:
1. Add a Wipe entrance effect
2. Add Random Bars for the exit effect

Now, select everything within the Animation Pane, and change all the timings to be 00.25 in duration.
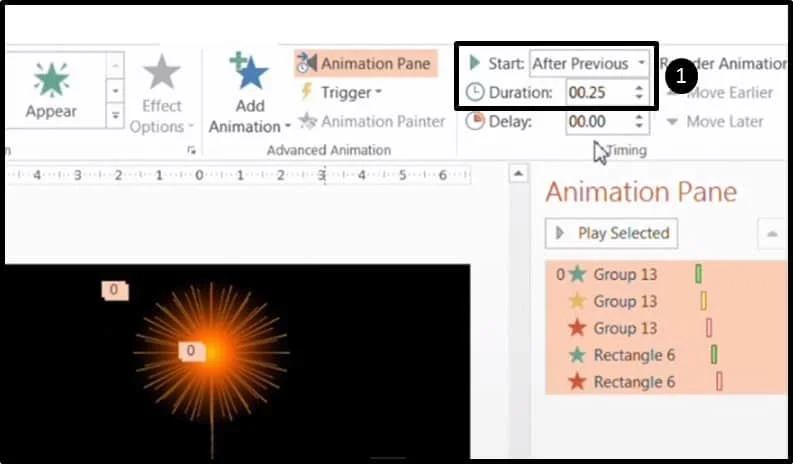
Let’s also set them all to start “After Previous.”
Now take the entrance for Rectangle 6, which is our tail, and move it all the way to the top, and take the exit of the tail (also Rectangle 6) and move it right after the entrance of the firework, then change it to “Start with Previous.”
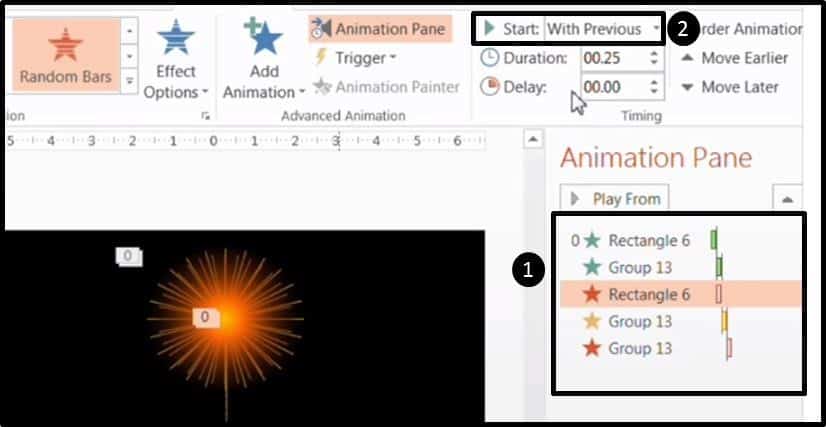
This sequence basically says that the tail goes up first, the burst appears as the tail disappears, then the burst explodes and disappears. Below you have a short video of the effect of what the combination of these animations should look like.
Conclusion
So that’s how to make fireworks in PowerPoint using nothing but default PowerPoint shapes and animations.
Yet another advanced effect you can add to your toolkit! I particularly like to use these on holidays as a fun addition to my presentations.
I’d encourage you to really play with different ways to both design and animate this firework sequence as it can be done in so many different ways…hey, you might even discover a technique you like even better!
For another cool effect, check out my City Night Scene tutorial to see yet another advanced PowerPoint technique, this time making a picture come to life with blinking lights and fast-moving cars (cue Tracy Morgan!).
To learn more ways to boost your PowerPoint skills, visit us here.
What’s Next?
About the Author

Spicy Presentations
Yulia Barnakova is passionate about helping people develop the skills and learning mindset to thrive in the digital age. She is always experimenting with emerging technologies and has been recognized by Microsoft as a Most Valuable Professional for her creative presentation technology tutorials, which have more than 8 million views on YouTube. Her recent TEDx Talk, Think You're Not Tech Savvy? Here's Why You Are, shows how everyone can (and must) develop the mindset and skill set to embrace technology.