In this post you’ll learn how to strikethrough text (or cross out text) in Microsoft Word, Excel, and PowerPoint.
Each software works a little bit differently: PowerPoint and Word both have the strikethrough command available in the Ribbon. In addition, for the Microsoft Office programs, if you navigate through the Font dialog box (or Format Cells dialog box in Excel) you get a bunch of other useful text effect options.
If you want to strikethrough text outside of the Microsoft Office suite (like inside a YouTube comment), you can check out the post by Online Sense here.
How to strikethrough text in Word
There are two ways you can strikethrough text in Microsoft Word.
Neither one is better nor worse, it just depends on the number of features you want to get access to. The Font dialog box method below gives you the most text formatting effects.
Use the strikethrough command in the Ribbon
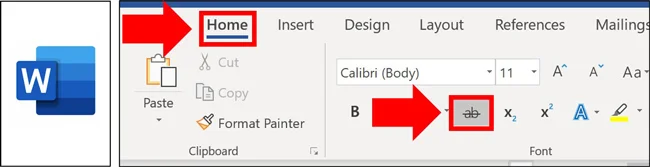
To use the Ribbon in Word to create the strikethrough effect, simply:
- Select the text you want to cross out
- Navigate to the Home tab
- Click the Strikethrough command
Note: If you are using the strikethrough effect to show edits and make comments, a better method is to use Microsoft Word’s built-in Comments command. To learn how to add comments in Word, read our guide here.
Use the Font dialog box strikethrough command

The fastest way to open the Font dialog box in Microsoft Word is with the Ctrl+D keyboard shortcut. If you don’t want to memorize a new shortcut, you can alternatively open it from the Home tab.
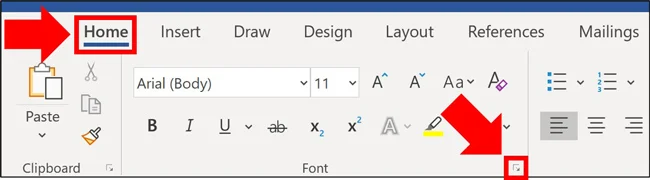
- Select the text you want to cross out
- Go to the Home tab
- Click the downward facing arrow in the Font group
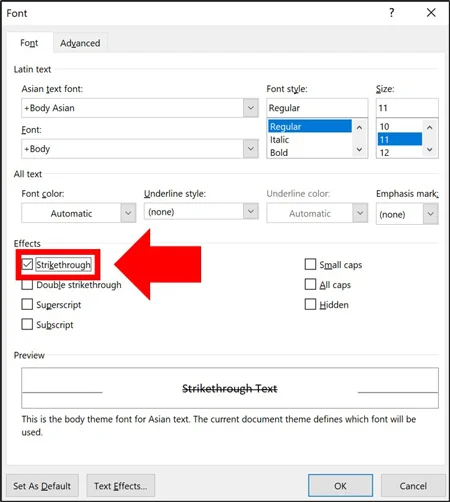
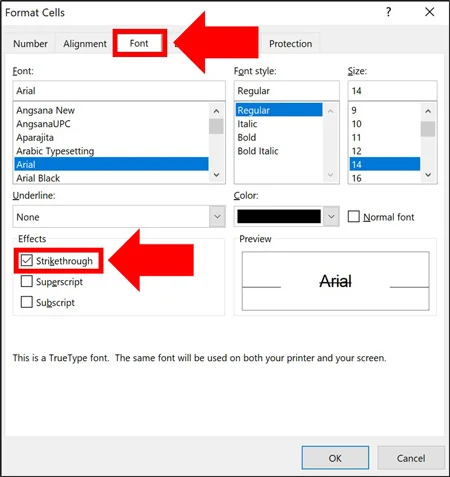
- Select Strikethrough (pictured below)
- Click OK
Take your PPT skills to the next level
Break free from PowerPoint struggle and reclaim your time. Amplify your PowerPoint knowledge with proven advanced methods taught in the PowerPoint Pro Membership.Text effect options in Word
Checking the box creates the crossed out text effect. To remove the text effect, simply open the Font dialog box again and un-check the box.
These options in Word are quite different than what you will find if you migrate to Google docs. To expand your knowledge and learn how to strikethrough on Google docs, read our guide here.
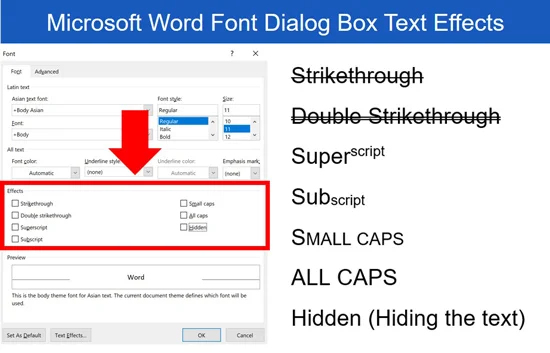
The advantage of using the Font dialog box is that it gives you seven other text effect options (as you can see in the picture above). Here are the keyboard shortcuts for each one:
- Strikethrough: Alt + K
- Double Strikethrough: Alt+L
- Superscript: Alt+P
- Subscript: Alt+B
- Small caps: Alt+M
- All caps: Alt+A
- Hidden: Alt+H
To expand your knowledge and learn how to use the Font dialog box to underline words only and change the underline color of your underline, read our guide here.
Note: To learn all the strikethrough shortcuts for Word, Excel, and PowerPoint, see our guide here.
Take your PPT skills to the next level
Break free from PowerPoint struggle and reclaim your time. Amplify your PowerPoint knowledge with proven advanced methods taught in the PowerPoint Pro Membership.How to do a strikethrough in Excel
There are 4 different ways you can strikeout text in Excel using the Format Cells dialog box.
The reason that there are so many options in Excel is that you can leverage cell borders to create the diagonal cross-out text effect (described below). But first, let’s start with the basics.
Strikethrough text in Excel

The fastest way to create the strikeout text effect in Excel is to use the Ctrl+5 keyboard shortcut. Simply select your text (or the cell with your text in it) and hit Ctrl+5.
Hitting the Ctrl+5 shortcut once applies the text effect. Hitting the shortcut a second time removes the text effect.
 If you don’t want to memorize the shortcut, you can also access the strikethrough command through the
Format Cells
dialog box.
If you don’t want to memorize the shortcut, you can also access the strikethrough command through the
Format Cells
dialog box.
- Select the cells you want to strikeout in your spreadsheet
- Select the Home tab
- Click the downward facing arrow in the Font group
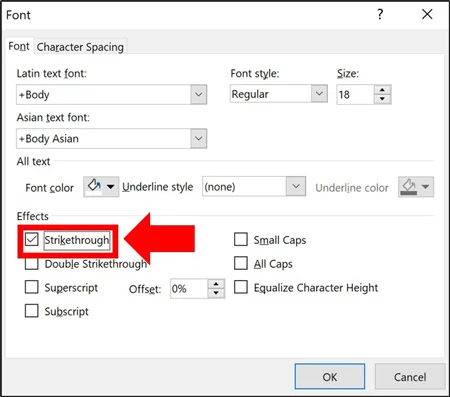
- On the Font tab select Strikethrough (see image below)
- Click OK
Just like any other program, applying the effect once strikes out your text. Applying the effect a second time removes it.
Also please note that the Format Cells dialog box is where you access the Superscript and Subscript commands. To learn more about this, read our guide here.
How to diagonally strikethrough text in Excel
 In this example, we are going to create a diagonal strikethrough and use the Format Cells keyboard shortcut.
- Select the cells you want to strikeout in your spreadsheet
- Hit Ctrl + 1 to open the Format Cells dialog box (or use the Ribbon command discussed above)
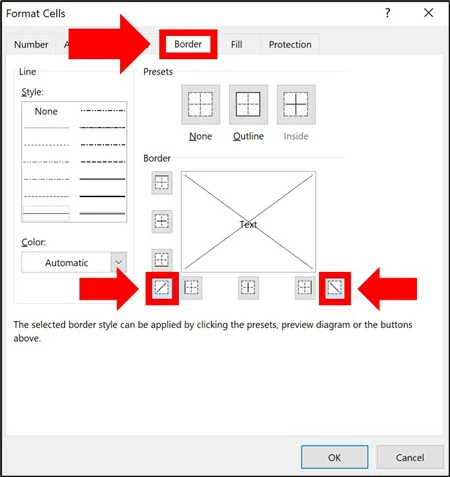
- Navigate to the Border tab
- Add the diagonal lines (picture below )
- Click OK
Applying a diagonal border once applies the effect to your cell. Applying it a second time removes it.
So if you later want to remove this diagonal crossed out effect, simply navigate back to the Format Cells dialog box (Ctrl + 1), navigate to the Border section and re-apply the diagonal cell borders.
Other text effect options in Excel
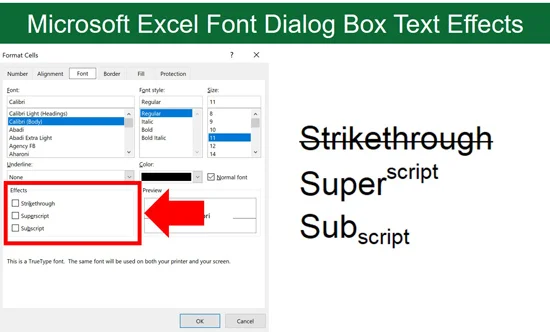
Inside the Format Cells dialog box in Excel, there are 3 other text effects you can apply to your text (as pictured above):
- Strikethrough: Alt + K
- Superscript: Alt + E
- Subscript: Alt + B
To expand your knowledge and learn how to copy and paste formatting in Excel, see the section on the Paste Special shortcut inside our guide here.
How to strikethrough text in PowerPoint
There are two different ways to cross out text in PowerPoint.
You can either use the strikethrough command in the Ribbon or use the Font dialog box. Which method is best depends on how many text effect options you want to apply.
Use the strikethrough command in the Ribbon
- Select the text you want to cross out
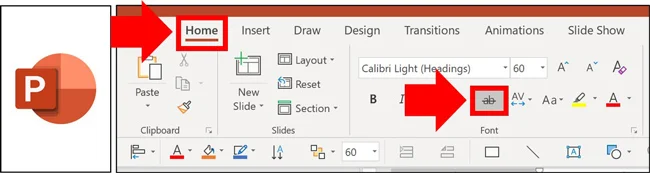
- Navigate to the Home tab
- Click the Strikethrough command
To later remove the crossed-out text effect, simply reapply the strikethrough command or select your text and hit Ctrl + Spacebar on your keyboard to wipe out the text formatting.

Use the strikethrough command in the Font dialog box
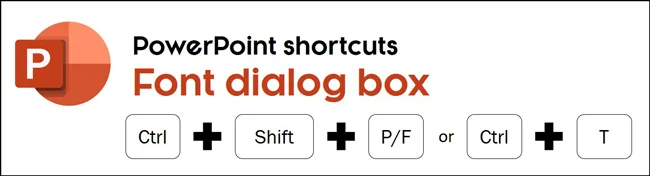
The fastest way to open the Font dialog box in PowerPoint is to use one of the following three shortcuts (they all do the same thing):
- Ctrl+T
- Ctrl+Shift+P
- Ctrl+Shift+F
If any of the above shortcuts do not work for you, check out our guide here.
If you don’t want to memorize one of the above keyboard shortcuts (which I highly recommend doing), you can also access the Font dialog box from your Ribbon as follows:
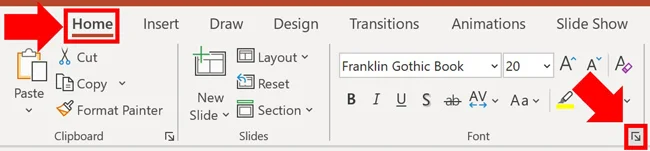
- Select the text you want to cross out
- Click the downward-facing arrow in the in Font group
- Select Strikethrough (pictured below)
- Click OK
Using the Font dialog box you do not get a live preview of the effect. After selecting the effect(s) you want, click OK to see it applied to your text.
Text effect options in PowerPoint
 In addition to the strikethrough command, the
Font
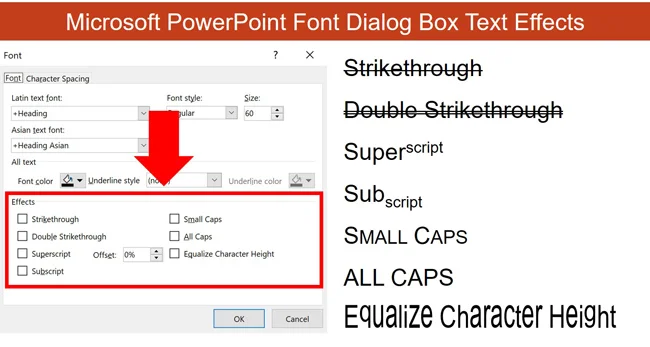
dialog box in PowerPoint gives you 6 other text effects you can apply to your text (as pictured below).
In addition to the strikethrough command, the
Font
dialog box in PowerPoint gives you 6 other text effects you can apply to your text (as pictured below).
- Strikethrough: Alt + K
- Double Strikethrough: Alt + L
- Superscript: Alt + P
- Subscript: Alt + B
- Small Caps: Alt + M
- All Caps: Alt + A
- Equalize Character Height: Alt + Q
Conclusion
As you can see, there are a variety of ways you can strikethrough text in the Microsoft Office suite.
And while it’s easiest to access the command through the Ribbon in Word and PowerPoint, the Font dialog boxe give you the most text effect options to work with.
If you enjoyed this article, you can learn more about our online courses and presentation resources here.
About the Author

Taylor Croonquist
Co-Founder, Nuts & Bolts Speed Training
Taylor Croonquist is a PowerPoint expert and trainer. Over a career spanning the globe, from consulting in New York and investment banking in China, Taylor has truly seen it all in PowerPoint. Through necessity and a natural tech savvy, Taylor honed his PowerPoint skills to the point of even blowing the minds of the Microsoft PowerPoint programming team. When he's not busy crafting PowerPoint training, you can find him reading a sci-fi series or scuba diving.
Take your PowerPoint skills to the next level
Get access to our complete training library, new tutorials every month, and the same techniques we teach in our corporate workshops. Join the 260,000+ professionals who have trained with us.
See Membership Options