In this post you’ll learn how to double underline text in Microsoft Word, Excel, and PowerPoint using keyboard shortcuts.
And it makes sense, right?
Why bother learning three different keyboard shortcuts (one for each program) when you can instead just learn a single shortcut that works in all three? That is speed training at its best!
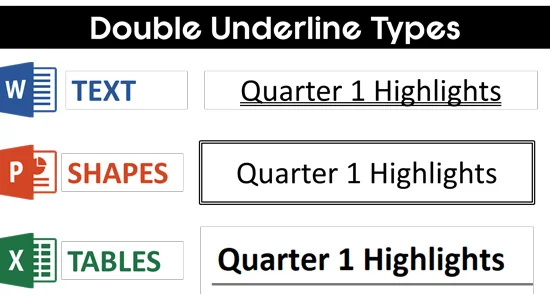
But before you dive in and learn this shortcut, let’s review what double underlines can look like in the Microsoft Office Suite. While in this guide I’m only going to show you how to double underline text, you can also add double outline borders to your shapes in PowerPoint and your cell borders in Excel.
Double Underline Text Shortcut (Word Only)

If you are using Microsoft Word, you can simply use the Ctrl+Shift+D shortcut to double underline your text.
Selecting your text in Word and hitting Ctrl+Shift+D immediately adds a double underline to your text. To remove the double underline, simply select your text and use the shortcut a second time.
I still recommend reviewing the section below as the Font dialog box is how you can control your underline style and underline color.
To expand your knowledge and learn how to underline text in Word (including changing the underline colors and underlining words only), read our guide here.
How to double underline text using the Font dialog box
The Font dialog box shortcut that you are going to learn works the same in Word, Excel, and PowerPoint. It is also the trick to applying a wide variety of underline styles and other text formatting.
To create the double underlined text effect, simply follow these steps.
1. Select your text or numbers
Whether you are in Word, Excel, or PowerPoint, the first step to adding or removing a double underline to your text is selecting the text you want to create the effect on.
2. Launch the Font dialog box
There are two ways to open the Font dialog box in Word, Excel, and PowerPoint so that you can control the formatting of your double underlined text.
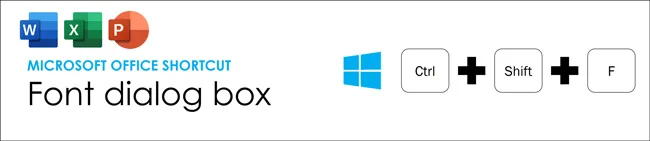
The fastest way is to use the Ctrl+Shift+F keyboard shortcut. If you frequently need to change the formatting and line styles of your underlined text, I recommend learning this keyboard shortcut.
Why waste time clicking commands in your ribbon when you can just hit a couple of keys on your keyboard?
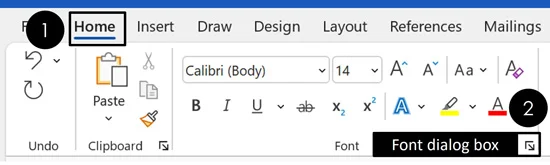
If you rarely need to change the formatting of your underlined text, or you forget the shortcut, you can always:
- Navigate to the Home tab
- Click the dialogal facing arrow in the Font group
3. Select the double line to double underline your text
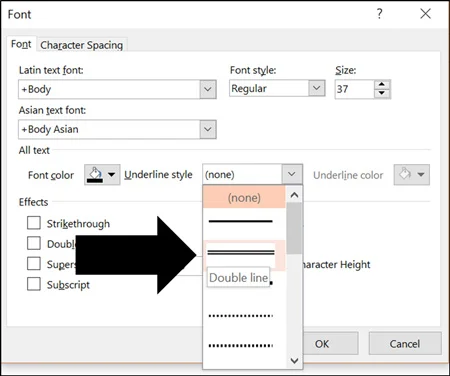
Within the Font Dialog Box, open the Underline Style drop-down and from the options and select the Double Line style. Although this is not called double underline, this is the style you are looking for to create the effect. If you later want to remove the effect, simply apply the effect a second time using the keyboard shortcut or select None in the underline style dropdown.
To expand your knowledge and learn how to clear any formatting in Microsoft Word (including double underlined text), read our guide here.
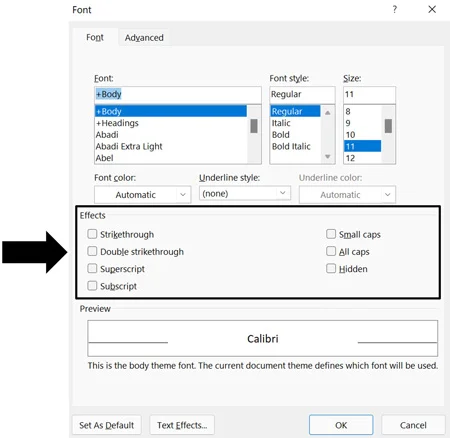
Other Font dialog box options
Once you are in the Font Dialog box, notice that you have a lot of other options to work. This includes the strikethrough, double strikethrough, superscript, and subscript options.
That means that if you memorize the Ctrl+Shift+F shortcut, you can get at all these options with one shortcut.
To expand your knowledge and learn how to use the strikethrough shortcut in Word, Excel, and PowerPoint, read our guide here.
Conclusion
So that is how to create a double underline in Word, Excel, and PowerPoint.
If you are using Microsoft Word and just need a standard double underline, I recommend using the Ctrl+Shift+D shortcut. That said, if you want to change the color of your double underline or style of your double underline, you will need to use the Font dialog box.
If you enjoyed the depth of this article and want to learn more about our training courses and other helpful resources, visit us here.
About the Author

Taylor Croonquist
Co-Founder, Nuts & Bolts Speed Training
Taylor Croonquist is a PowerPoint expert and trainer. Over a career spanning the globe, from consulting in New York and investment banking in China, Taylor has truly seen it all in PowerPoint. Through necessity and a natural tech savvy, Taylor honed his PowerPoint skills to the point of even blowing the minds of the Microsoft PowerPoint programming team. When he's not busy crafting PowerPoint training, you can find him reading a sci-fi series or scuba diving.