In this article, you will learn two different ways to protect your PowerPoint presentation by converting all your slides into pictures.
For example, your client insists that you send your presentation as a native PowerPoint file so that they can go through it slide by slide in Presentation Mode on their computer.
How do you do this while making sure that the content of your presentation isn’t easily edited or copy/pasted?
The fastest and least complicated way to protect your presentation is to turn all your slides into pictures.
There are two different methods for achieving this:
- A fast method, using the PowerPoint Picture Presentation file format
- A longer (sneakier) method, using the PowerPoint Photo Album command
The advantage of the first method is speed, the advantage of the second method is file size.
The fastest way to pull this off is to save your presentation directly as a PowerPoint Picture Presentation and you’re done!

Notice that the file size for the longer method is almost half the file size of the faster method (based on a deck of 31 slides). As such, if you are emailing a larger deck, the longer method is the way to go.
Below are the tutorials for both methods depending on whether you are looking for speed or file size.
You can also protect your presentation with a password in the Read Only Mode, see our guide here.
Trick #1: The Picture Presentation
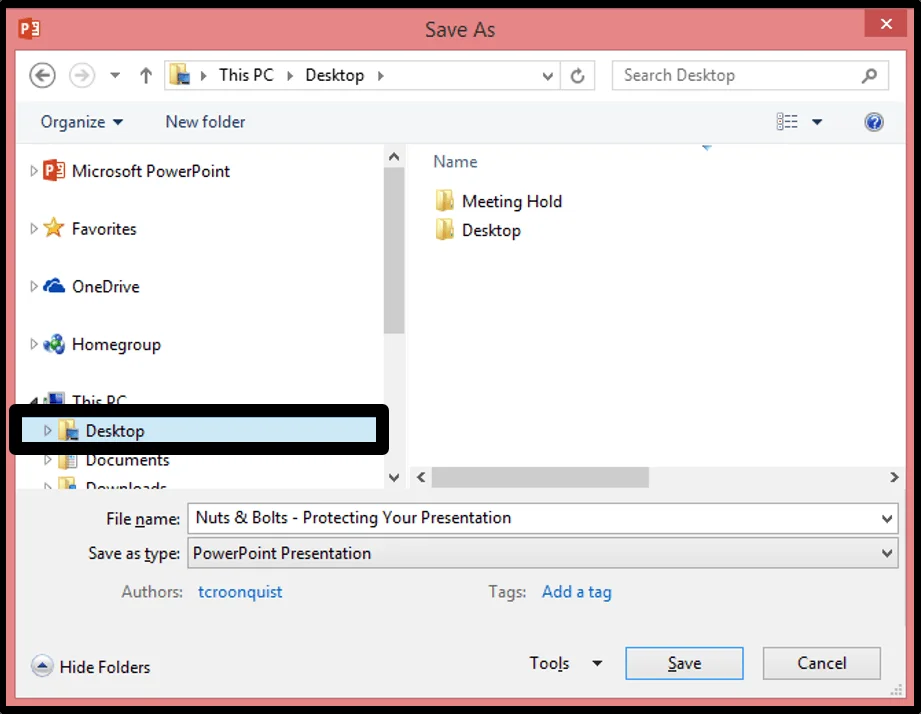
1. Launch the 'Save As' dialog box
Within your PowerPoint presentation, hit F12 on your keyboard, to open the Save As dialog box and select a location on your computer to save your presentation (I’ve selected the desktop below).
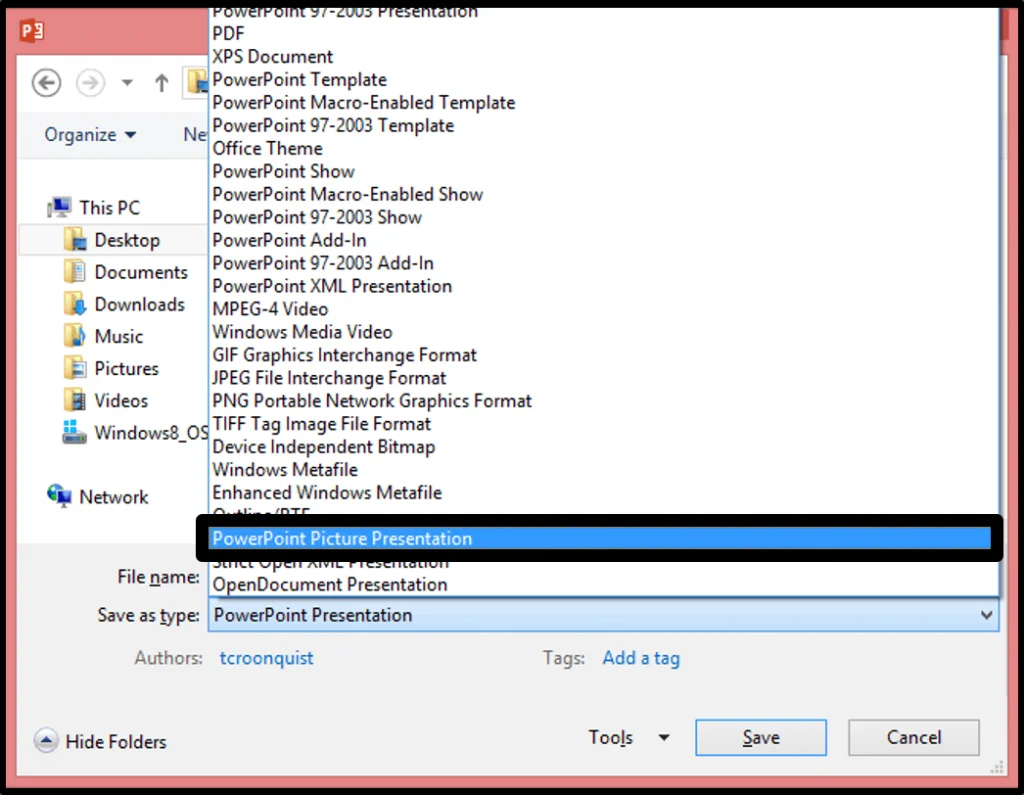
2. Select the 'PowerPoint Picture Presentation' option
Within the dialog box, scroll down to PowerPoint Picture Presentation.
3. Name and save your presentation
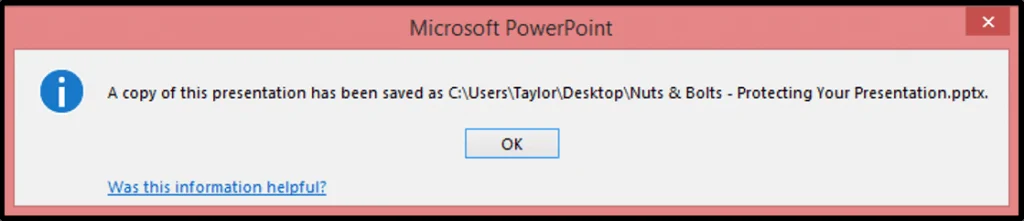
Rename your PowerPoint presentation, click Save and PowerPoint will go to work. When it’s done, you’ll get a message confirming that presentation has been saved to the location you selected.
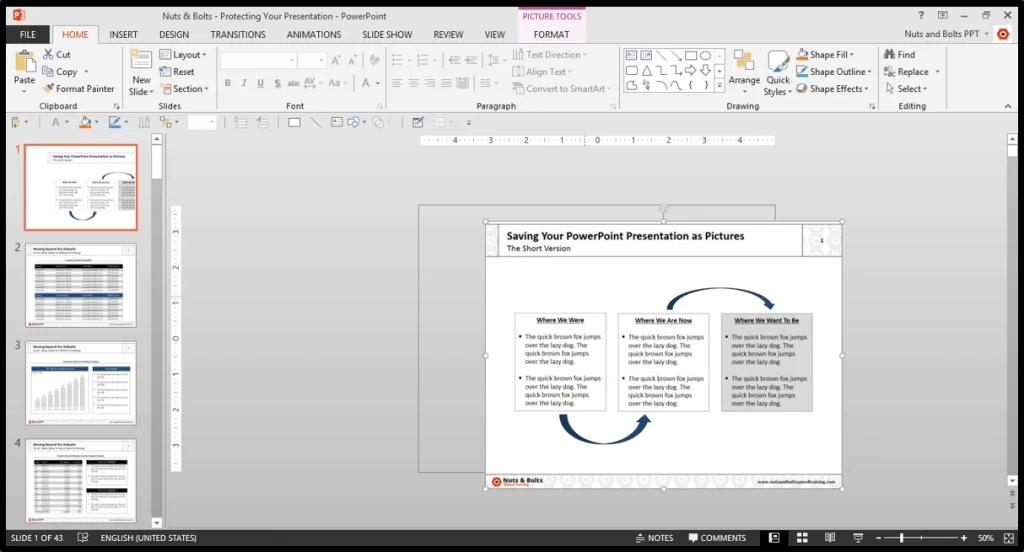
 Opening up your saved file and selecting a slide, you can see that the Picture Tools Format Tab opens. So all of the slides within your presentation are now pictures, where the content can’t be touched.
 Although this method is not as fast as the previous method, it is not only sneakier (which proves what you can accomplish by thinking outside of the box) but it leaves you with a smaller file size that you can more easily send via email.
Trick #2: The Photo Album Trick
1. Launch the 'Save As' dialog box
Within your PowerPoint presentation, hit F12 on your keyboard to launch the Save As dialog box.
Select a location that you will remember so that you can later retrieve the pictures (which we will do in the next step). I typically choose my desktop.
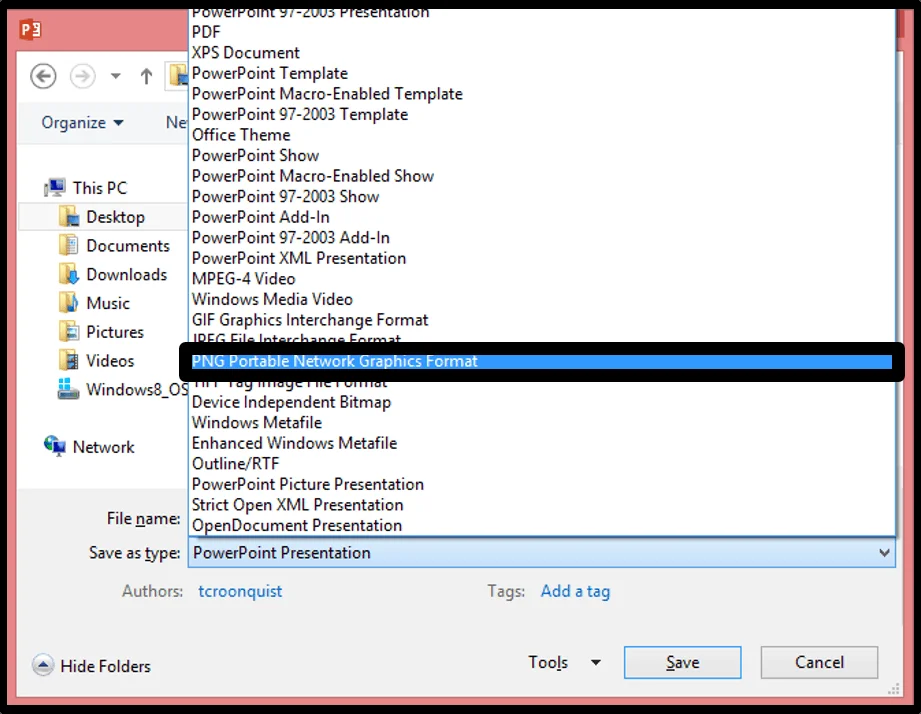
2. Select a picture file format
With a location selected, use the Save as type drop down and select a picture file format to save your slides in. I typically choose the PNG file format but JPEG work too.
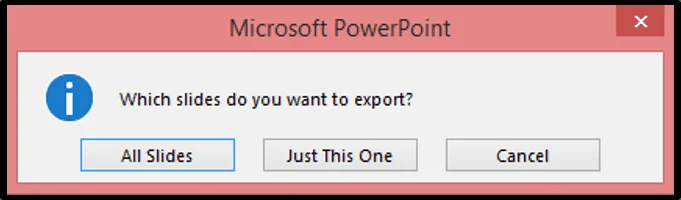
3. Click 'Save' to export all your slides as pictures
Once you’ve picked your picture file format, select Save, which presents you with a dialog box. Select All Slides on the left.
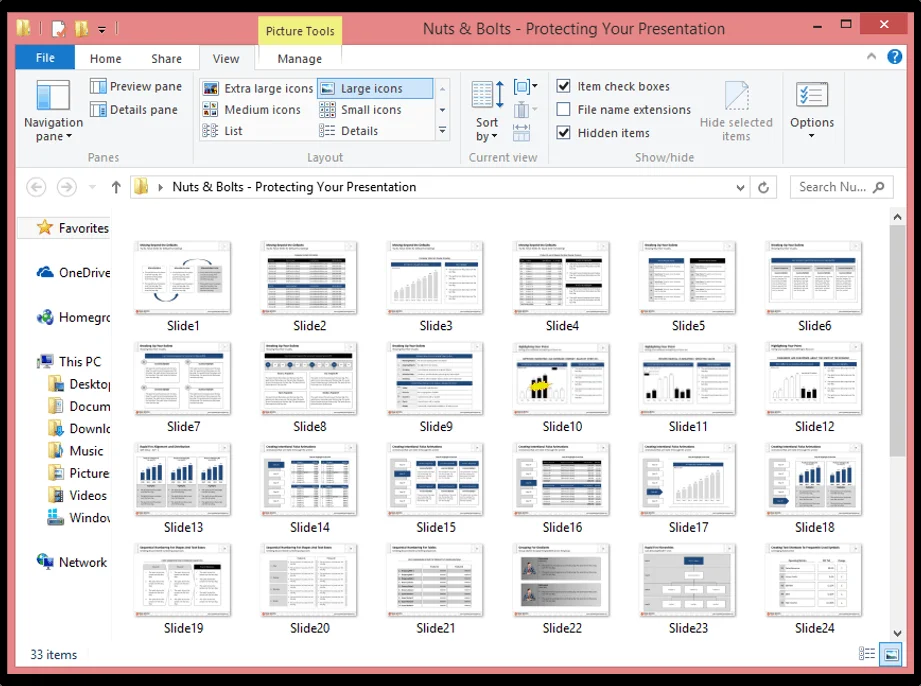
PowerPoint takes a moment to export all your slides as pictures and create a folder in the file location you chose in step 1 above.
 Once it’s done, you will get a second dialog box, select ‘Okay’.

So what just happened?
If you now navigate to the location you exported the slides as pictures to, you should have a folder named after your presentation, with each of your slides saved within it as a picture, named Slide 1 through however many slides you had in your presentation.
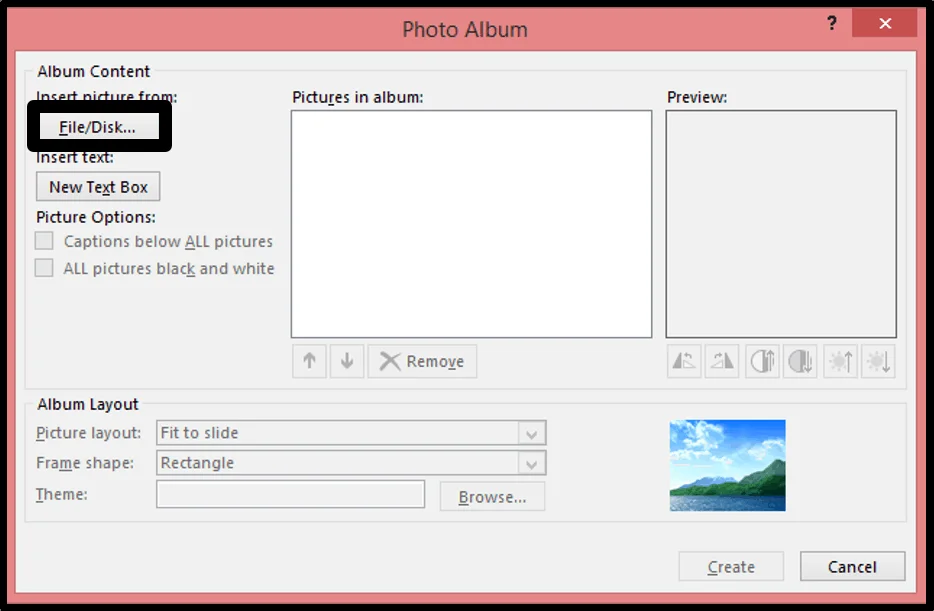
4. Open a blank document and insert a 'Photo Album'
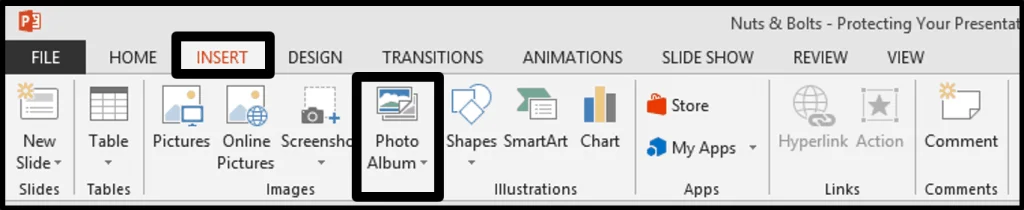
Inside your PowerPoint presentation:
- Navigate to the Insert tab
- Select the Photo Album command to launch the photo album dialog box.
5. Navigate to where your pictures are saved
Within the Photo Album dialog box, use the File/Disk command on the left to navigate to where you exported the pictures of your slides to.
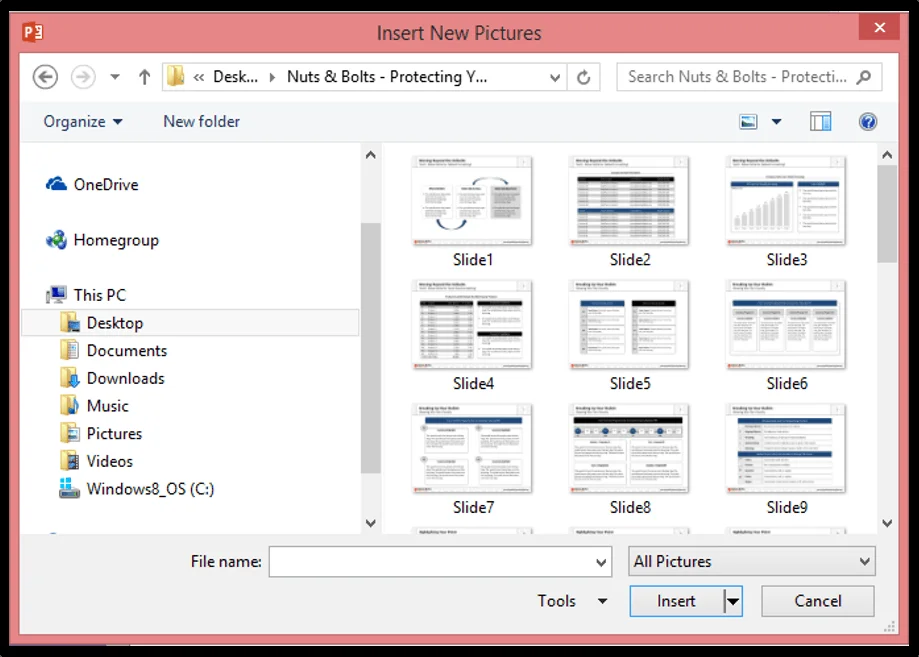
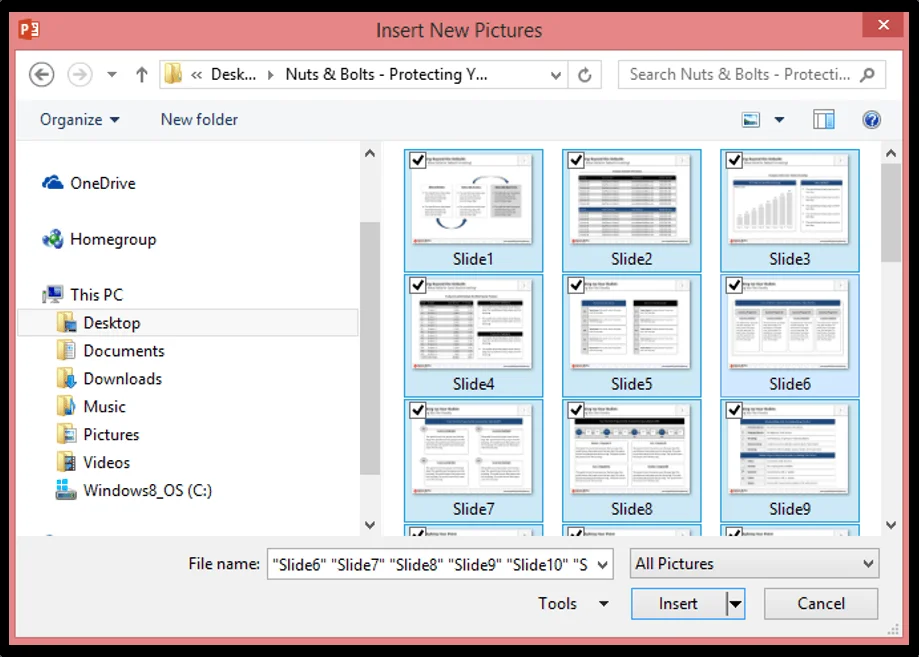
6. Select all of your pictures
Once you navigate to where the pictures are saved, select all the pictures within the folder. You can quickly do this by selecting one of the pictures and hitting CTRL + A on your keyboard for the Select All shortcut.
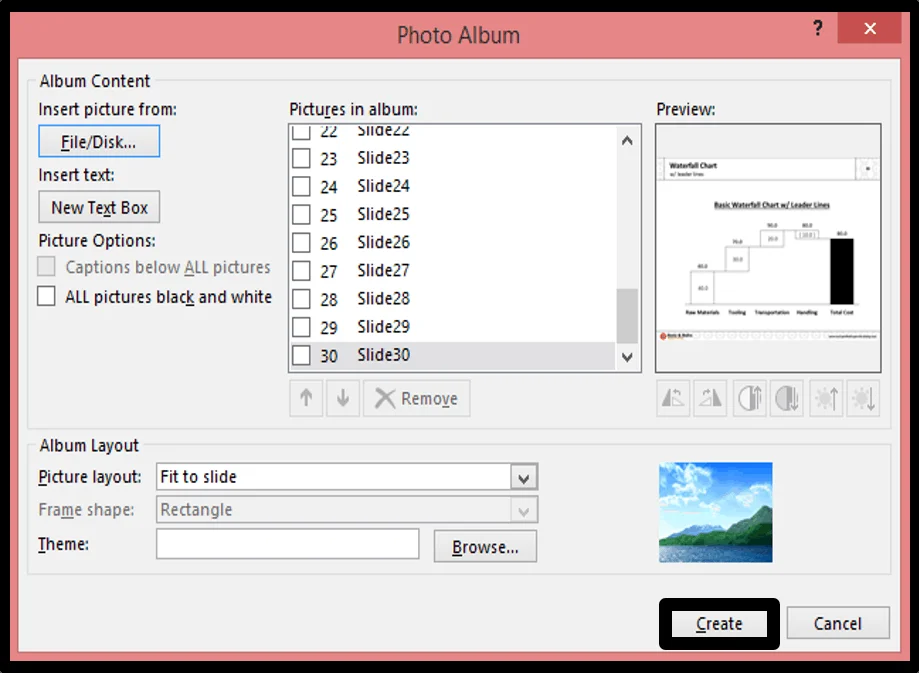
7. Select 'Create'
Once all of the pictures load into the Photo Album dialog box (notice they are all in the correct sequence) select Create.
8. Delete the first slide
Now that your new PowerPoint presentation is created, it has a title slide that says Photo Album. You can choose to keep this slide if you want to do something with it, otherwise select it and hit Delete.
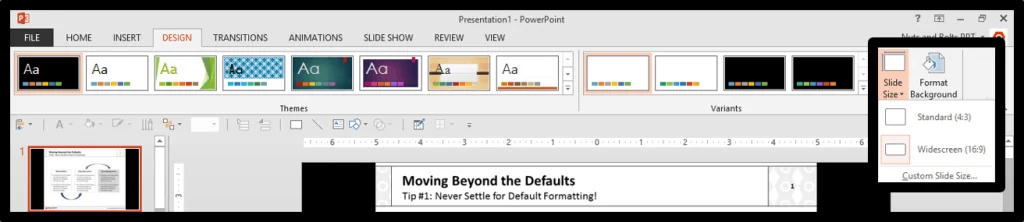
9. Fix the slide dimensions (optional)
If you are using PowerPoint 2013 and you don’t want the widescreen dimensions, navigate to the Design Tab in the ribbon, and select the ‘Slide Size’ command on the far right. Within the drop down, select Standard (4:3).
For additional details and help with changing your PowerPoint slide size, read our guide here.
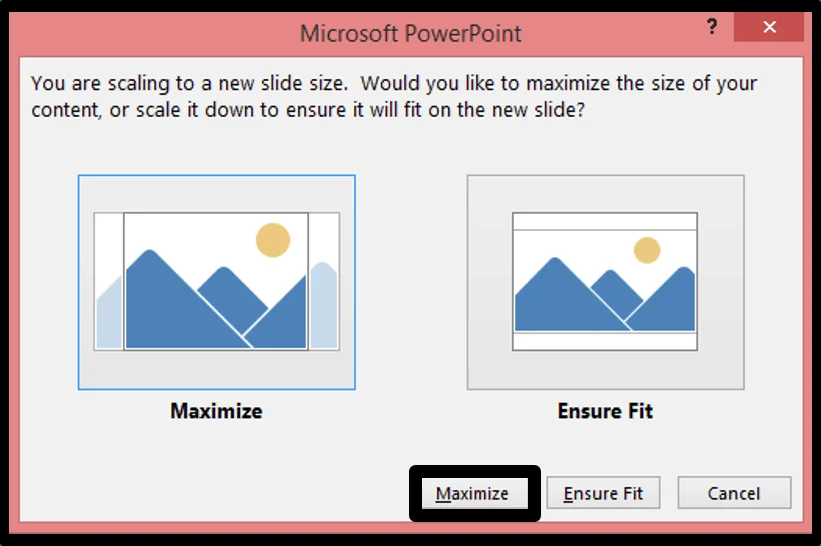
10. Select 'Maximize Slide'
You are now presented with a dialog box. Within the dialog box, select Maximize to revert your PowerPoint presentation to the 4:3 slide size.
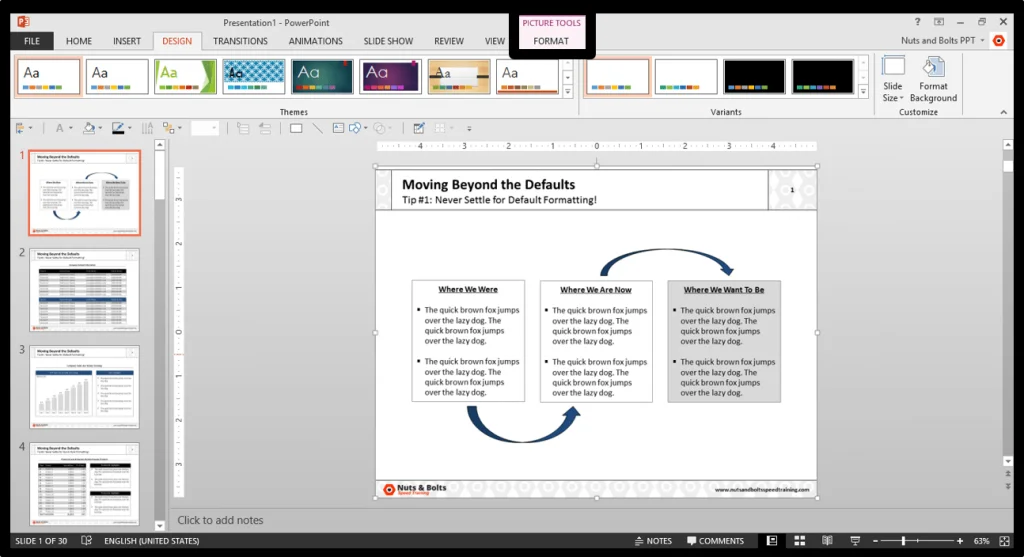
What do you now have?
The result is that you now have a native PowerPoint presentation, with all of your slides pasted in as pictures that cannot be directly edited. Notice that if you select the slide itself, the Pictures Tools Format Tab opens.
Note: Make sure you make all of your adjustments to your presentation BEFORE you export everything as pictures, like properly adding your slide numbers to your presentation (see our how to guide here).
Once your presentation is in this picture format, no one can edit it (including you). Any changes you want to make to your presentation, will have to be made to the original PowerPoint file, and then exported as pictures again.
11. Save your PowerPoint presentation
As a last step, make sure to save a copy of your new PowerPoint presentation. Either hit CTRL + S on your keyboard for Save, or F12 on your keyboard for Save As. Once it’s saved, you can then safely send it to your client without worrying about losing the PowerPoint slideshow functionality OR leaving your content unprotected.
This is a roundabout way to protect your presentation by turning it into a photo album.
Conclusion
Those are two different ways to protect your PowerPoint presentation by converting your slides into pictures. While this maintains the integrity of your content, you do lose all your animations or other special effects you applied to your slides.
I recommend using the PowerPoint Picture Presentation method simply because it is faster. The only downside of this method is it results in a larger overall file size.
If you do not need to present your PowerPoint presentation, an alternative method to protect your presentation is to convert PowerPoint to PDF.
If you enjoyed the depth of this article, you can learn more about our PowerPoint speed training courses and other free resources here.
What’s Next?
About the Author

Taylor Croonquist
Co-Founder, Nuts & Bolts Speed Training
Taylor Croonquist is a PowerPoint expert and trainer. Over a career spanning the globe, from consulting in New York and investment banking in China, Taylor has truly seen it all in PowerPoint. Through necessity and a natural tech savvy, Taylor honed his PowerPoint skills to the point of even blowing the minds of the Microsoft PowerPoint programming team. When he's not busy crafting PowerPoint training, you can find him reading a sci-fi series or scuba diving.