In this article, you will learn how to convert PowerPoint into the PDF file format using Microsoft Office.
You DO NOT need any 3rd party software programs, websites, or add-ins to get the job done.
If you have Microsoft Office (I’m using the Office 365 Subscription), there are three ways to convert PowerPoint into the PDF file format.
- Full page slides
- Handouts (with comments, notes, and/or multiple pages per slide)
- An editable Word document (then convert Word to PDF)
Why bother converting into the PDF file format?
There are two main benefits for converting PowerPoint into the PDF file format:
Benefit #1: It reduces your file size by as much as one-third, making it easier to share and email your file with your colleagues, bosses, and clients.
Benefit #2: It locks down your PowerPoint presentation and protects your content. That way someone can’t just copy and paste the content of your presentation.
If you want to further protect your PowerPoint presentation, you can alternatively add a password to open your presentation. This forces someone to enter the correct password to be able to view and edit your presentation. To see how to password protect a PowerPoint presentation, read our guide here.
Convert PowerPoint to PDF as full page slides
The fastest (and simplest) way to convert your .ppt or .pptx files into the .pdf format, is through the Save As dialog box. While you will learn how to print your slides in a variety of different formats as a PDF later in this tutorial, saving your presentation as a PDF is the fastest way to do it.
That said, you can only use this method to save your presentation as full-page slides. If you want to print multiple slides per page or include your speaker notes in your PDF, then you will need to use one of the following methods listed below.
1. Open the Save As dialog box
The fastest way to open the Save As dialog box in PowerPoint is by hitting F12 or Ctrl + Shift + S on your keyboard.
The Save As dialog box gives you a variety of different ways you can save your presentation, including converting it into the PDF file format.
2. Open the Save As Type dropdown
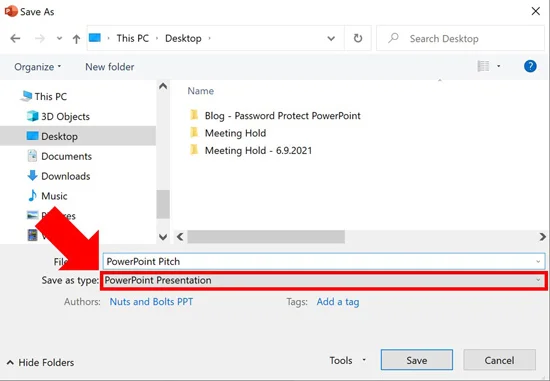
Inside the Save As dialog box, open the Save as type dropdown. By default, your PowerPoint presentation will start as the PowerPoint Presentation file type as you can see in the picture below.
3. Select the PDF file format
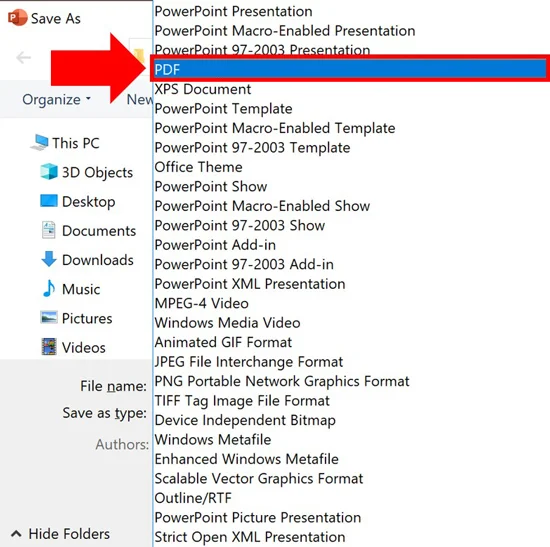
Inside the Save As Type dropdown you will see all of the different file types you can save your PowerPoint presentation as. including a PowerPoint template, older versions of PowerPoint, PNG, etc.
Scan through the list and find the PDF file format and select it as pictured below.
One of the options worth noting in the Save As Type dropdown is the PowerPoint Template option.
Creating a PowerPoint template is a great way to save time by creating the custom layouts you and your team specifically want to use for your pitches and presentation.
That said, before you choose this file type, make sure you set up your PowerPoint slide master correctly, so you have a template worth saving. To see how to create a PowerPoint template from scratch like this, read our guide here.
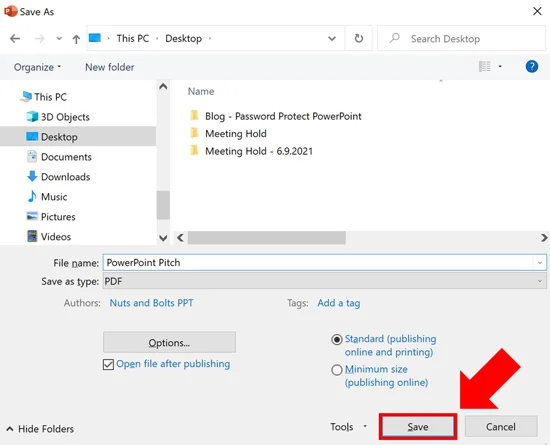
4. Choose a location and/or rename your PDF
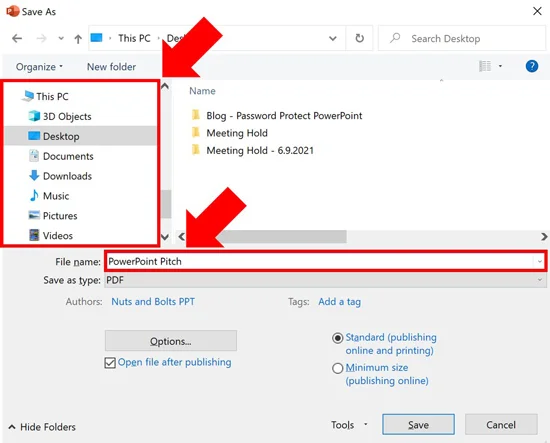
Choose a location on your computer to save your PowerPoint presentation as a PDF. You can also rename the file if you choose.
It is important to note that because the PowerPoint and PDF file types are different, you do not need to worry about overwriting your original PowerPoint presentation with the PDF version of your presentation that you are creating.
If you make no selection, your converted PDF file will save to the last place you saved your presentation with its existing name.
5. Click Save
Once you have made all of the selections above, simply click Save to start the PowerPoint to PDF conversion process.
Once the conversion process is complete, the PDF version of your presentation will open for you to review. This is a great time to look through your PDF to make sure you didn’t lose any of your content.
6 Types of PowerPoint Content That Will Not Convert to a PDF
Because the PDF file format is meant for printing (not presenting graphics), there are six different types of PowerPoint content you will lose in the PDF conversion process.
Below I’ve listed the type of content you will lose, and any workarounds if they exist.
1. PowerPoint Animations
So there is a NEW workaround you can use to get your animations into the PDF file format using some VBA code.
On his blog, Neil Mitchell has written a macro you can install to convert your PowerPoint animations into the PDF file format. See details on Neil’s blog here.
On the flip side, if you don’t install that macro, all of your PowerPoint animations will be removed when you convert PowerPoint to PDF.
This means that all your animated objects will be left where they are on your slide. It doesn’t matter what type of animation you had applied to them either (appear, disappear or motion path effect).
For example, if you have a list of bullet points with the Appear Animation effect applied to them, your bullets will just appear (as they are) without the animations applied to them.
Thankfully, you will not lose your bullet points.
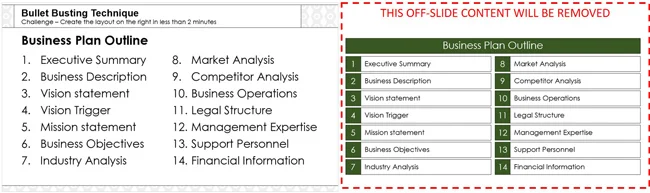
2. Off-slide content
All off-slide content including your speaker notes, comments, formatting guides and/or graphics outside of your slide space are removed when you save your presentation as a PDF. For example, all of the content to the right of slide in the picture below counts as off-slide content as it is not on the slide itself. As such, it will be removed.
If you have off-slide content that you don’t want removed, make sure to sweep through your presentation and move it onto your slide before you save your presentation as a PDF.
3. Slide transitions and special effects
All slide transitions and timings are removed in the PDF file format.
If you need to keep your transitions and other other effects, you will want to use a different method for protecting your presentation.
4. Zoom transitions
The PDF file format does support hyperlinks, and because Zoom Transitions are a fancy form of hyperlinks, the links between your slides will properly convert to the PDF file format.
That said, the Zoom Transition effect will not convert to the PDF file format. Only the hyperlink between the slides you are Zooming between.
To learn all about hyperlinking in PowerPoint (including zoom transition), see our guide here.
5. Zoom Transitions
If you have the Microsoft Office 365 Subscription, any 3D models will automatically be converted into a static picture.
As a side note, this is a great way to reduce your PowerPoint file size. Simply swap out any 3D models with static photos. To learn 6 different ways to compress your PowerPoint presentations, read our article here.
6. Videos, audio and other media file types
All media files in your presentation will be converted into static pictures. The static image will either be the first frame of your video or the the poster frame you set for your video.
On top of that, any audio files, narrations and other media files will be removed from your presentation. The PDF file format is not a media rich format.
Converting Speaker Notes and Multiple Slides per Page into the PDF file format
To convert your speaker notes into the PDF file format or print your presentation with multiple slides per page, you’ll need to use the Microsoft Print to PDF printer and adjust your print layout.
The following steps assume that you have already added speaker notes to your presentation and have properly set up your Notes Master and/or your Handout Master. To learn all about how to add and format your speaker notes in PowerPoint, read our guide here.
To expand your knowledge and learn more about printing multiple slides per page in PowerPoint, read our guide here.
1. Open the Print dialog box

The fastest way to open the Print dialog box is using the Ctrl + P keyboard shortcut.
If you don’t like keyboard shortcuts, you can alternatively:
- Click the File tab
- Select Print in the backstage view
If you want to expand your knowledge and learn the top 25 PowerPoint shortcuts that will save you time, read our guide here.
2. Select the Microsoft Print to PDF printer
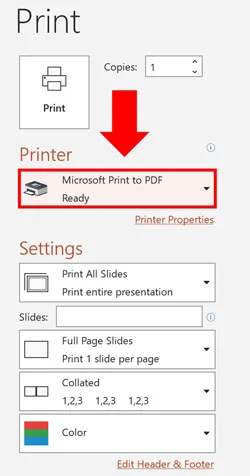
Inside the Print dialog box, open the Printer dropdown and select the Microsoft Print to PDF printer.
The Microsoft Office Suite includes this Microsoft Print to PDF printer so that you can quickly and easily turn any Microsoft Office document into the PDF file format. You do not need to buy any third-party software or applications to do this.
3. Select the correct Notes Page or Handout layout
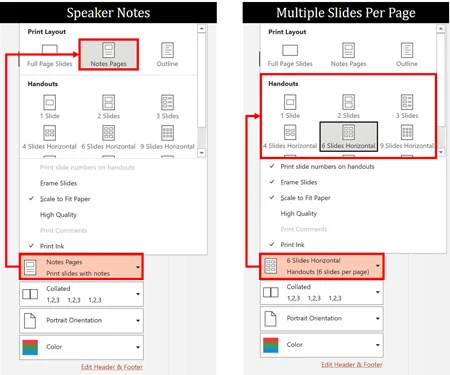
Next make the proper layout selection based on how you want your PDF presentation to look.
If you want your Speaker Notes below your slide, you will want to select the Notes Pages layout (picture on the left). If you want to print multiple slides per page, select the appropriate Handouts layout (picture on the right).
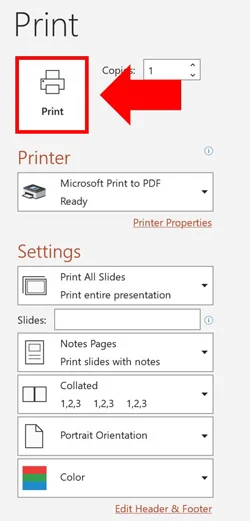
4. Click Print
After making any other final printing adjustments or customizations, click Print.
5. Choose a location and name for your PDF
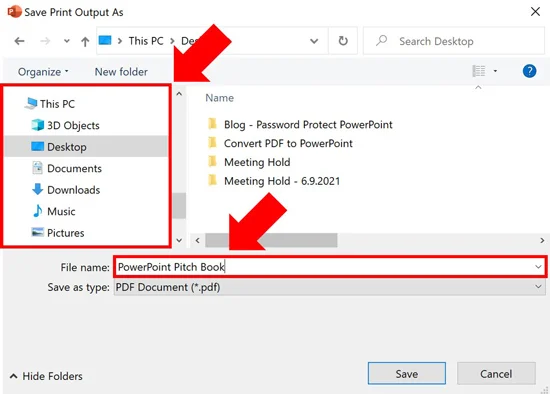
Inside the Save As Print Output dialog box, select a location on your computer to save your PDF and name the file.
While you can just print to your desktop, I recommend saving the PDF in the appropriate client or project folder so you do not forget where it is. You also do not need to worry about your PDF overwriting your original PowerPoint presentation as the PowerPoint and PDF file types are different.
6. Click Save

Although we are printing your presentation as a PDF with speaker notes or multiple slides per page, the final step is to click Save (not print).
This saves your presentation in the PDF file format with your speaker notes below your slides.
Final Thoughts
So those are the two different ways you can convert PowerPoint into the PDF file format, natively within the Microsoft Office program.
If you plan on converitng your presentation into the PDF file format, remember that not all types of PowerPoint content will properly convert. In this case, make sure you build your presentation with the conversion process in mind, avoiding things like animations, videos or special effects that cannot be translated into the PDF file format.
You can use these same techniques to convert your other office documents into the PDF file format too.
If you enjoyed this tutorial, you can learn more about our free PowerPoint training courses and other helpful presentation resources here.
About the Author

Taylor Croonquist
Co-Founder, Nuts & Bolts Speed Training
Taylor Croonquist is a PowerPoint expert and trainer. Over a career spanning the globe, from consulting in New York and investment banking in China, Taylor has truly seen it all in PowerPoint. Through necessity and a natural tech savvy, Taylor honed his PowerPoint skills to the point of even blowing the minds of the Microsoft PowerPoint programming team. When he's not busy crafting PowerPoint training, you can find him reading a sci-fi series or scuba diving.