Vector graphics are hands down one of the FASTEST and EASIEST ways to jump start your next PowerPoint presentation.
For PowerPoint beginners, they are great pre-built graphics that you can quickly customize and re-arrange to make your slide (and more importantly, you) look good.
For PowerPoint pros (like we aim to make you here on our blog), vector graphics provide an incredibly malleable raw material from which you can build just about anything you like.
In the tutorials below, I’ve included both basic and advanced techniques to help you get more bang for your buck when using vector graphics in PowerPoint.
A big thanks to Mike and Jennifer from GetMyGraphic.com for donating this zipper graphic to us for these tutorials!
Why go vector?
Let’s talk about what vector graphics actually are and why should you use them.
What is a vector graphic?
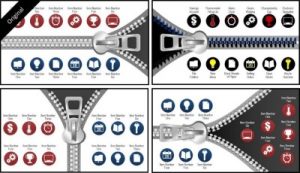
It’s basically just a picture made up entirely of PowerPoint shapes that you can use in a variety of ways (like this zipper graphic, used in 4 different ways).
Once you go vector, you’ll never go back
Why are vector graphics awesome? They’re great for:
- Inspiration: You can take your slide idea or content to a list of pre-built vector graphics to figure out what works best for your message.
- Speed: Find your inspiration and get a jump start on your layout…you don’t have to waste time trying to build the graphic out yourself.
- Edit-ability: You have full 100% customization control over a vector graphic. You can recolor it, type into the shapes, resize the graphic (without losing quality) or break it apart and rearrange the pieces however you see fit.
Customizing a vector graphic in PowerPoint
And then decide that you want the zipper to be halfway across the slide (instead of on the far right), you can simply break it apart and extend it (see tutorials below).
Now, while these graphics are potentially build-able from scratch in PowerPoint, I can’t even BEGIN to imagine how long it would take to create them (and have them look this good)!
So unless you’d want to try building this zipper as your own personal challenge, why on earth waste your time?
You’ll never “out build” something in PowerPoint that’s already been built!
Note: Vector graphics are also great for building custom animations. To see how to create an animated scene with vector graphics, read our article here.
Below I’ve included some basic and some advanced techniques for working with vector graphics that you can use to get more bang for your buck in PowerPoint with any vectors you buy.
A big thanks to Mike and Jennifer from GetMyGraphic.com for donating this zipper graphic to us for these tutorials!
Warning: EPS flies no longer import into PowerPoint 2016
If you’re using PowerPoint 2016 (Office 365 version), you can no longer use the popular EPS vector file format (due to security concerns.
To see how to work around this EPS issue, read our guide here.
Basic vector graphic techniques
Basic vector graphic techniques video tutorial
You are currently viewing a placeholder content from Youtube. To access the actual content, click the button below. Please note that doing so will share data with third-party providers.
More InformationUngrouping a vector graphic
Starting with your vector graphic selected, begin un-grouping the graphic (CTRL + SHIFT + G for PC users) and your graphic will begin breaking down into its individual shapes (depending on the complexity of the vector graphic, you may have to do this a number of times).
After un-grouping this zipper graphic twice, you can see that it is made up of dozens of different PowerPoint objects.
Customizing a vector graphic
With your vector graphic un-grouped or broken down, you can then freely format and edit ANY of the individual shapes, just as you would with any other set of PowerPoint objects.
Notice below that I’ve formatted some pieces of the icons and applied a custom gradient fill to the zipper teeth.
From a formatting perspective, the sky is the limit with vector graphics in PowerPoint…so let your creativity run wild.

Rotating parts of a vector graphic
Keeping in mind that everything in your graphic is simply a set of grouped shapes, you can customize your vector graphic by moving and/or rotating these shapes.
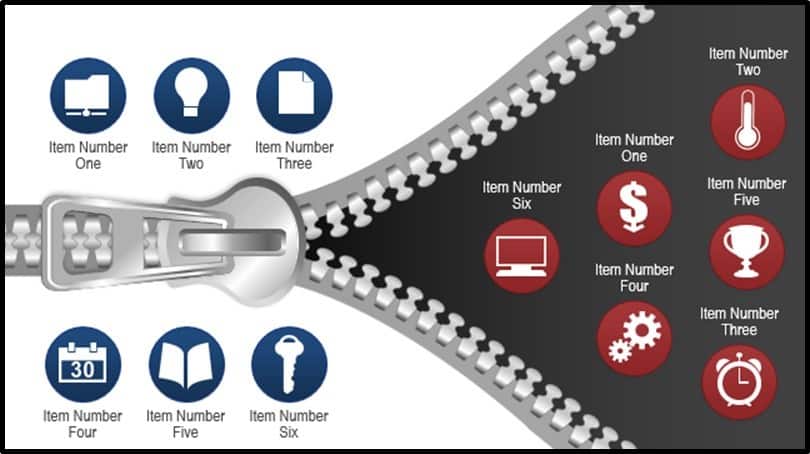
For example, in the zipper graphic, I can rotate the zipper itself, by holding the ALT key on my keyboard and hitting the left arrow key, creating the impression that the zipper is zipping the slide open instead of zipping the slide closed.
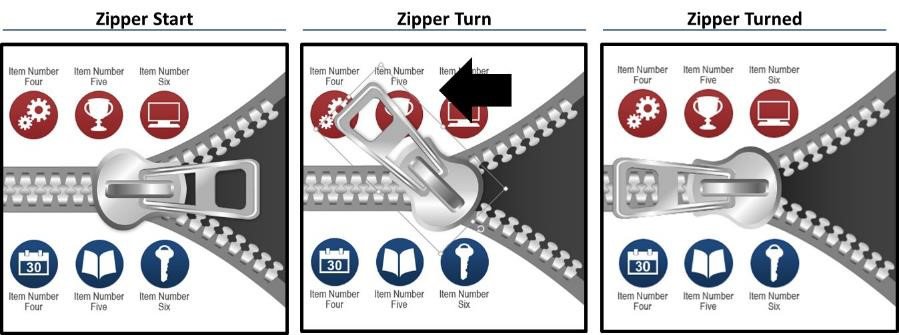
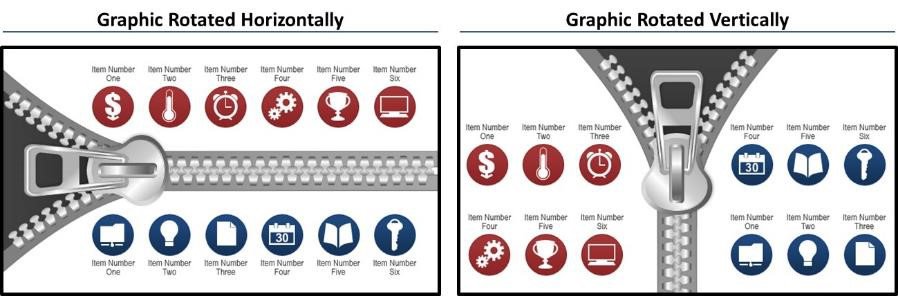
Rotating the entire vector graphic
Keeping in mind that everything in your graphic is simply a set of grouped shapes, you can customize your vector graphic by moving and/or rotating these shapes.
For example, in the zipper graphic, I can rotate the zipper itself, by holding the ALT key on my keyboard and hitting the left arrow key, creating the impression that the zipper is zipping the slide open instead of zipping the slide closed.
Extending the vector graphic
With a few clever PowerPoint tricks, you can get more bang for your buck out of your vector graphics by extending them in new and interesting ways.
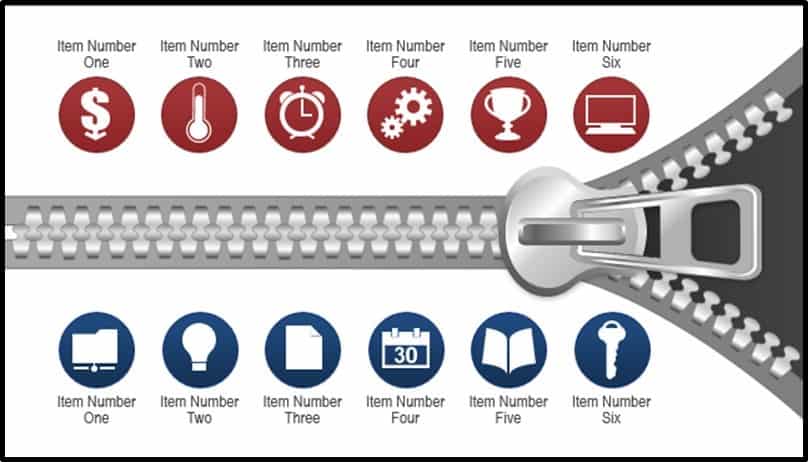
For example, below I’ve taken the zipper graphic halfway across the slide, zipping open the slide and revealing the different icons (see how to do this in the tutorial below).
Advanced vector graphic techniques
Beyond the basics above, vectors graphics are a great starting point for building even more complex visuals and advanced layouts.
You can mix and match the different pieces of multiple vector graphics together to create your own unique layout, or even extend a vector graphic across your slide (as demonstrated below).
Doing so will give you a new arsenal of ideas that you can take to your graphics to get more bang for you buck in the future.
You are currently viewing a placeholder content from Youtube. To access the actual content, click the button below. Please note that doing so will share data with third-party providers.
More InformationA big thanks to Mike and Jennifer from GetMyGraphic.com for donating this zipper graphic to us for these tutorials!
Since you don’t have the actual zipper graphic to work with, below are the highlights for how you can take a vector graphic, and customize it to meet your needs.
Two PowerPoint tools that are useful for extending vector graphics:
- The Merge Shapes tool in PowerPoint 2013 (a.k.a. the Combine Shapes tool in 2010)
- The bonus feature of the Duplicate command
Hopefully the tips below gives you some inspiration for what you can do with your own vector graphics in PowerPoint.
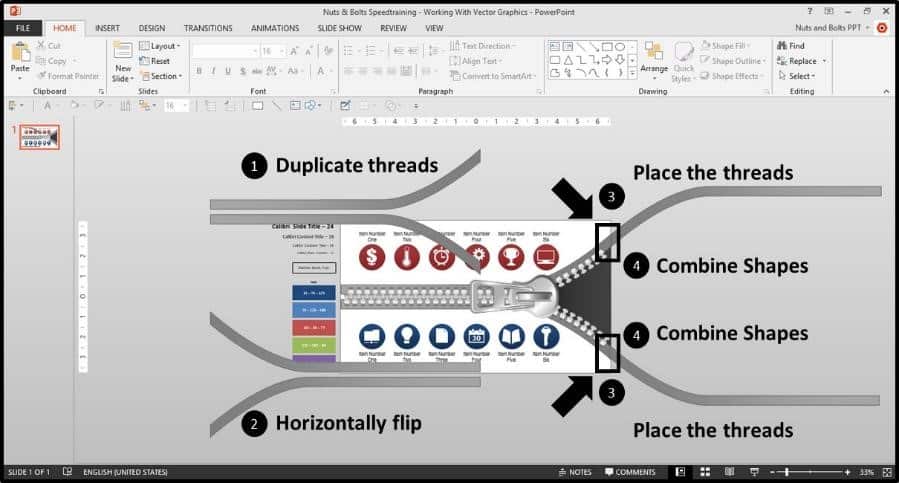
Extending the vector graphic
- Duplicate the background threads (CTRL + D for Duplicate)
- Horizontally flip the threads using the rotate command (a part of the Arrange tool)
- Hook the threads up so that they are running off the right of the slide
- Use the Combine option within the Merge Shapes tool in PowerPoint 2013 to make the pieces a single shape (PowerPoint 2007 users will have to settle for grouping).
Note: PowerPoint 2010 users need to use the Combine Shapes tool which is not in the ribbon. You need to add it using the More Commands option at the end of your QAT. You can download our QAT (all set up) by clicking here with instructions of how to set it up.
Next you want to extend the background triangle and use Edit Points mode (right-click the shape and select Edit Points) to cover the extended zipper area.
In Edit Points mode, you can right-click the the edges of the shape and add new points to the shape. With the new points added, you can then stretch them out to warp the shape to cover the entire area.
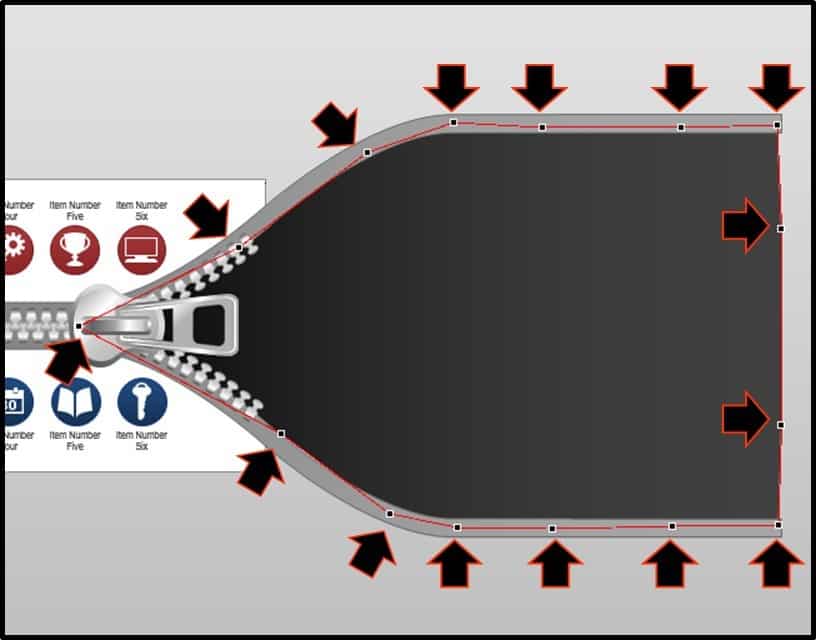
With the background triangle extended, you can then drag the entire graphic into position to fit your slide.
Now we just need to add additional zipper teeth.
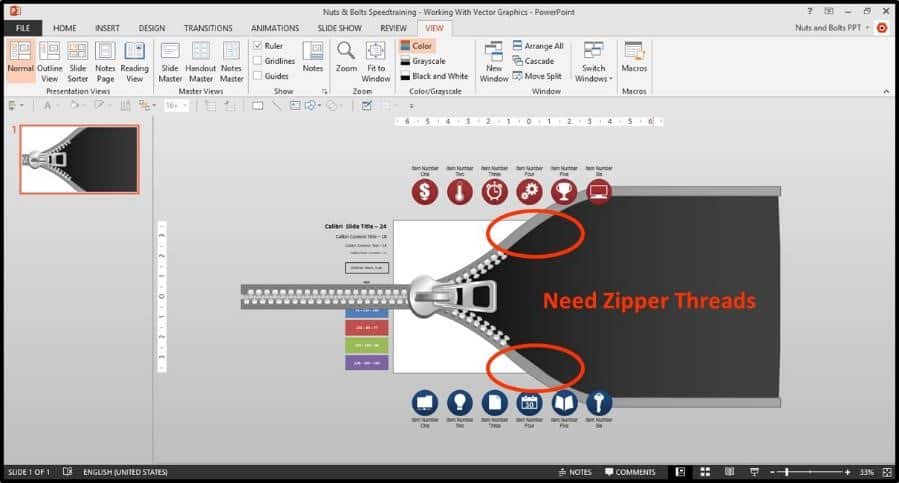
Adding more zipper teeth
The trick to adding the zipper teeth to the graphic is using the Duplicate command, CTRL + D on your keyboard for PC users.
First duplicate the second to the last zipper tooth, place the new tooth on top of the last one, and then hit CTRL + D to duplicate again, and the new zipper teeth will automatically jump into position.
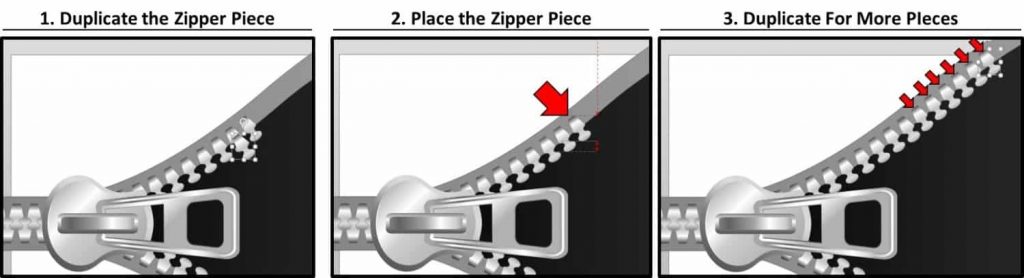
Repeat for the bottom zipper teeth and you’ll end up with a graphic like this.

Bonus vector graphic techniques
Although the previous vector graphic works fine for printing or presenting your slide, if you want to show your slide to someone it might look a bit messy.
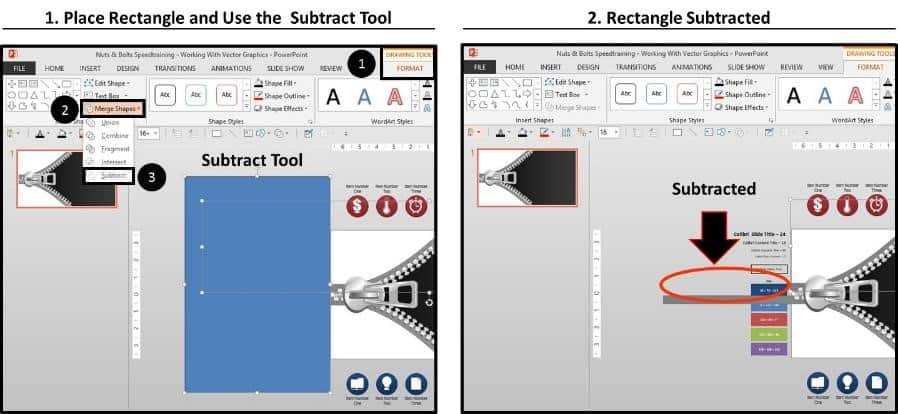
You can clean up the edges using the Subtract option within the Merge Shapes tool if you have PowerPoint 2013 or 2010 (a.k.a. the Combine Shapes tool).
To do this, simply place a rectangle (or any other PowerPoint shape) over the areas that you want to remove. First select the object that you want to keep (the zipper thread), then select the rectangle that you are cutting away.
With both objects selected, navigate to the Drawing Tools Format Tab, select Merge Shapes in PowerPoint 2013 and then select Subtract, and the piece of the graphic is removed.
Note: PowerPoint 2010 users need to use the Combine Shapes tool which is not in the ribbon. You need to add it using the More Commands option at the end of your QAT. You can download our QAT (all set up) by clicking here with instructions of how to set it up.
Continue adding rectangles and subtracting the different pieces around your vector graphic. You need one rectangle (or any other PowerPoint shape) for each piece that you want to subtract from the graphic.
After you’re done, the extended graphic perfectly fits your slide!
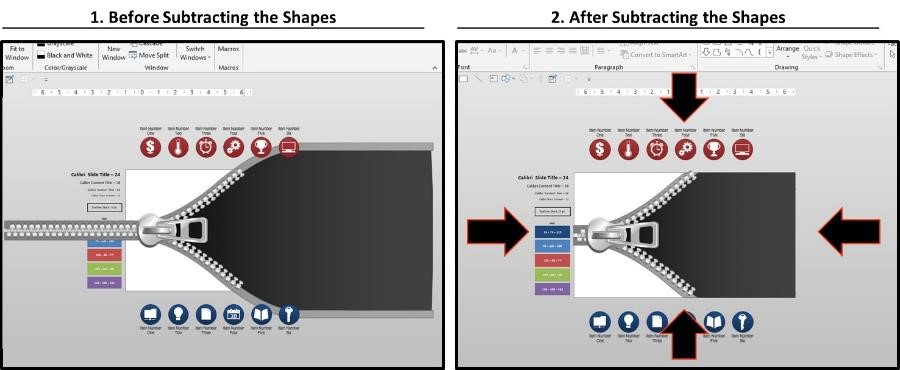
With the edges of your graphic trimmed, you can then place your icons and you are ready to go