How do you zoom in on something in PowerPoint without PowerPoint first centering in on your slide?
This was a great question we got from subscriber Derek (thanks Derek!).
And it’s not so intuitive…
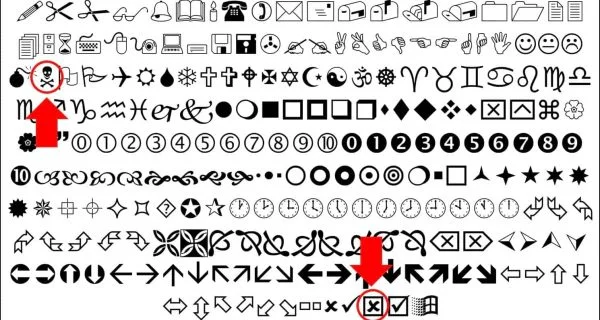
For example, let’s say you want to zoom in on a specific icon or two to edit them, like in the picture below. How do you do it without scrolling around, driving yourself crazy?
In this tutorial, you’ll learn 3 different ways to zoom in PowerPoint, plus a few sneaky places you might never have thought of zooming in PowerPoint before.
Looking for the NEW Zoom Transition?
If you want to learn all about the brand new Zoom Transition in PowerPoint that was added in 2016, see our other guide here.
The problem with the standard PowerPoint zoom
The problem with the standard PowerPoint zoom, is that PowerPoint automatically goes to the center of your slide as you zoom in.
The center zoom is great if the object that you want to edit is in the center of your slide, but if it’s not, that means you have to use the scroll bars to find what you are looking for.
The problem with the scroll bars is that they are hard to control, often jumping you over to the next slide as you try to find the object that you want to edit.
So instead of making your life easier (which is what they were designed to do), they make it harder.
3 Ways to Zoom in on an Object
There are three different ways you can zoom in on a PowerPoint slide:
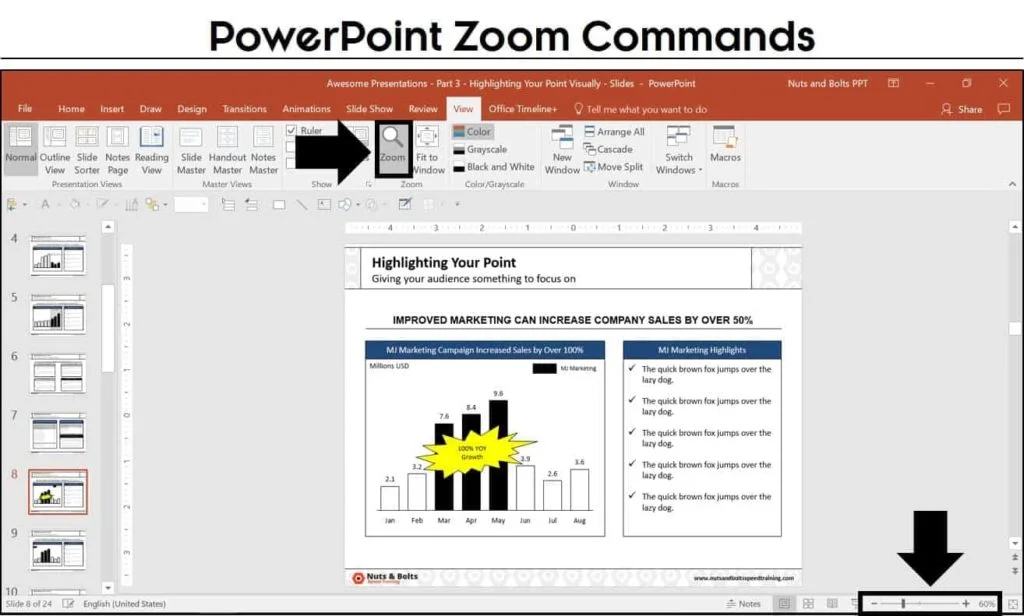
- The View tab Zoom command (zoom dialog box)
- The Zoom slider at the bottom of the screen
- The CTRL + mouse spin wheel shortcut (my personal favorite because it’s universal, as you’ll see in a second)
If you are looking for the new zoom transition, you can learn more about what that is on the Microsoft blog here.
Pro Tip: Use the ‘Fit to Window’ tools
After zooming in on something in PowerPoint, you can quickly refit your PowerPoint window in one of two ways:
- ‘Fit slide to current window’ in the lower right-hand corner your screen
- ‘Fit to Window’ in the View tab

Zoom in on a Picture in PowerPoint
To zoom in a on a specific picture (or object) in PowerPoint, all you need to do is first select the object before you zoom.
Once you select an object, any of the 3 zoom methods described above will zoom you specifically in on the object:
- The zoom dialog box
- The zoom slider
- Using CTRL plus your mouse spin wheel
This zoom trick works on anything that you can select in PowerPoint, including zooming in on a table, zooming in on a chart, zooming in on a text box, etc.
Note: If you are trying to zoom in on a picture to show a specific part of it, you can also just crop your picture down to the desired piece.
To learn all about how to crop pictures in PowerPoint, read our step-by-step guide here.
If you have multiple objects that you want to zoom into and edit in PowerPoint, the fastest way to do that is to:
- Select and zoom in on your first object
- Edit or format your first object
- Hit Fit Slide to Current Window
- Select and zoom in on your second object
- Edit or format your second object
- Hit Fit Slide to Current Window
If you have more than two objects, you can continue zooming in and out of your slide in this way to make all of your adjustments.
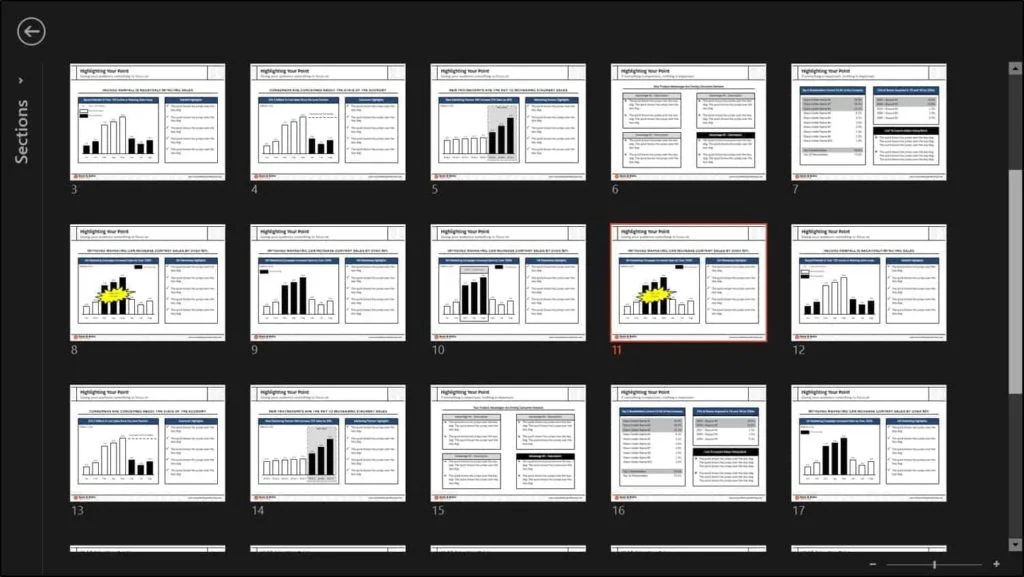
PowerPoint Thumbnail Zoom
Besides zooming in on a slide while editing it, you can also use the CTRL + mouse spin wheel shortcut to zoom in on the thumbnail images of your PowerPoint slides on the left.
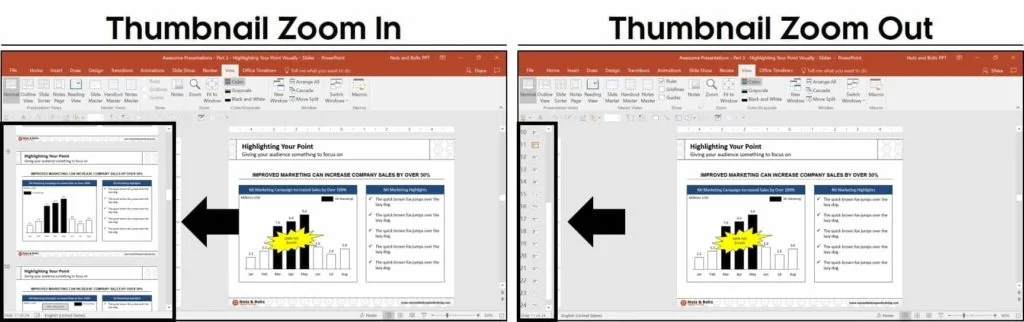
Zooming in on the thumbnail images allows you to control how much of your presentation you see, and how much slide editing space you give yourself on the right.
Zooming in allows you to get a big thumbnail image of each of the preceding and following slides, while zooming out gives you an idea of how many slides are in your presentation.
Slide Sorter View Zoom
Another place you can zoom in PowerPoint to see the overall flow of your presentation, is Slide Sorter View.
To open the Slide Sorter View, simply click the slide Sorter command at the bottom of your screen.
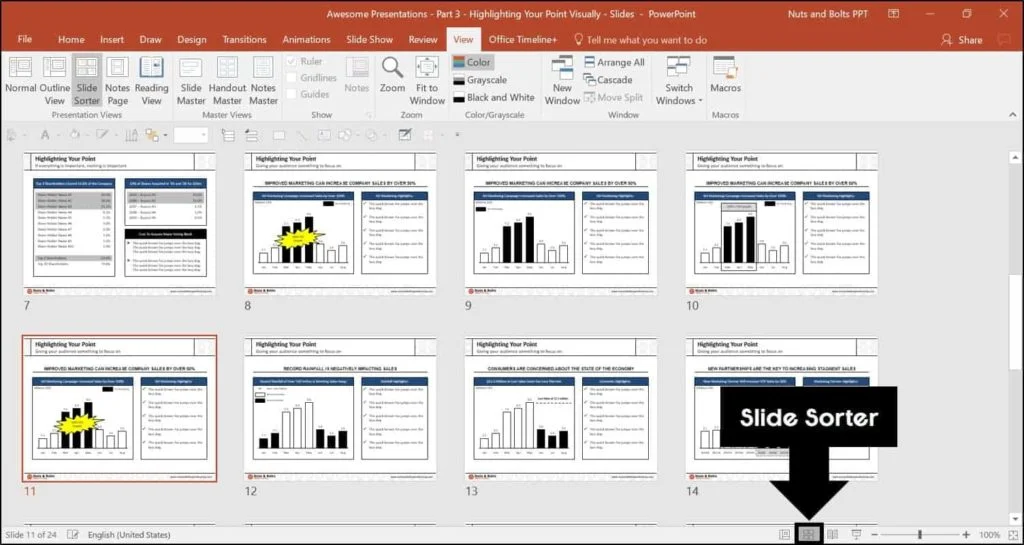
All three zoom methods work in the Slide Sorter View:
- The zoom dialog box
- The zoom slider
- Using CTRL plus your mouse spin wheel
Zooming in and out of the Slide Sorter View is useful when you want to see the overall flow of your slides within your presentation at varying levels of detail.
Slide Show View zoom
Two other places you can zoom in PowerPoint are the Slide Show Mode (F5) and Presenter View (SHIFT + F5) of your presentation.
To see these PowerPoint shortcuts in action, check out the video below.
Start Slide Show PowerPoint Shortcuts
There are four keyboard shortcuts for starting slide show in PowerPoint:
| Start slide show from the beginning | F5 |
| Start slide show from the current slide | ALT + F5 |
| Start Presenter View from the beginning | SHIFT + F5 |
| Start Presenter View from the current slide | ALT + SHIFT + F5 |
Once you are in one of the presentation views of your slides, you can zoom in or zoom out by either using the CTRL + mouse spin wheel shortcut (if you have a mouse), or you can use the keyboard shortcuts listed below.
| Zoom in (Slide Show Mode) | CTRL + = |
| Zoom out (Slide Show Mode) | CTRL + – |
- Zooming in allows you to focus on a specific section of your slide (focusing your audience’s attention on that section).
- Zooming out allows you to see all the slides in your presentation as thumbnails.
This is often an easier way to navigate the slides in your presentation if someone wants to go back and see something, rather than trying to remember where it was in your presentation.
Note: There are quite a few different ways to navigate between the slides in your presentation. To learn more, see this section of our shortcuts page here.Conclusion
Knowing how to properly zoom in and out of the objects you want to edit in PowerPoint will save you a ton of time.
The key to remember is that PowerPoint will use the object you have selected as the focal point of your zoom.
If you enjoyed this tutorial and want to learn more about our other PowerPoint tutorials and free resources, visit us here.
What’s next?
About the Author

Taylor Croonquist
Co-Founder, Nuts & Bolts Speed Training
Taylor Croonquist is a PowerPoint expert and trainer. Over a career spanning the globe, from consulting in New York and investment banking in China, Taylor has truly seen it all in PowerPoint. Through necessity and a natural tech savvy, Taylor honed his PowerPoint skills to the point of even blowing the minds of the Microsoft PowerPoint programming team. When he's not busy crafting PowerPoint training, you can find him reading a sci-fi series or scuba diving.