In this guide, you’ll learn how to draw in PowerPoint in the Presentation View using the different keyboard shortcuts.
First off, there are two different places where you can draw, add ink, or annotate your PowerPoint slides. You can draw on your slides in the Normal View of your presentation using the Draw tab (which we will not cover in this article). The other place you can draw on your slides is in the Presentation View using what I call the PIES shortcuts.
- P for Pen
- I for Highlighter
- E for Eraser
- S for All Slides dialog bo
The main difference between these two different ways of annotating your PowerPoint slides, is that when drawing on your slides in the Presentation View, the ink is not automatically saved to your presentation. That said, you are given the option to save the ink to your presentation when you end your slideshow.
To expand your knowledge and learn all the different ways to start your PowerPoint slideshows so that you can draw on them using these shortcuts (including some hidden keyboard shortcuts), read our guide here.
Table of Contents
[Watch] How to draw in PowerPoint w/ keyboard shortcuts
You are currently viewing a placeholder content from Youtube. To access the actual content, click the button below. Please note that doing so will share data with third-party providers.
More InformationTo see our top 25 PowerPoint PowerPoint shortcuts for saving time when building and editing slides, read our guide here.
PowerPoint Pen shortcut (Ctrl+P)
Using the Pen shortcut (Ctrl+P in in Slide Show mode) allows you to draw on your PowerPoint slide with your stylus, pen, or finger.
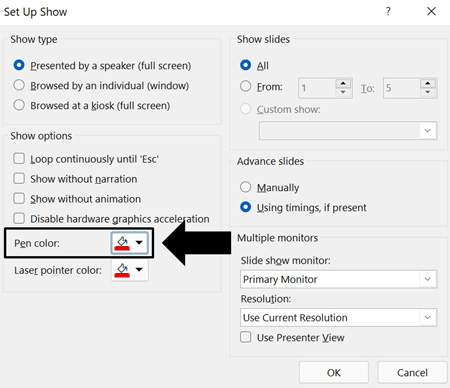
If you do not want to use the default red pen color, you can change the default color of your Pen in the Slide Show dialog box. To change your default pen color simply:
- Click the Slide Show tab in your ribbon
- Select Set Up Slide Show command
- Change the pen color in the dialog box pictured below.
If you do not have a touchscreen computer with a stylus, the Pen shortcut makes drawing on your slides easy as you can circle things, check boxes, and underline things with your mouse as you talk.
To expand your knowledge and learn how to use PowerPoint’s built-in laser pointer instead of drawing on your slides, read our guide here.
Note: Hitting Ctrl+P in the Normal View of PowerPoint is the keyboard shortcut for Print. So, it is two shortcuts in one depending on which PowerPoint view you are in.
PowerPoint Highlighter shortcut (Ctrl+I)

Using the Highlighter shortcut (Ctrl+I in Slide Show Mode) allows you to highlight things on your PowerPoint slides using a stylus, pen, or finger.
Different from the Pen shortcut, the highlighter is useful for quickly highlighting words in a paragraph or highlighting the aspects of a chart you are talking about.
Note: Hitting Ctrl+I in the Normal View of PowerPoint is the Italics keyboard shortcut. So, just like the Pen shortcut, it is a double-dipping keyboard shortcut depending on the view you are in.
PowerPoint Eraser shortcut (Ctrl+E)
The Eraser shortcut is one you need to be careful with when annotating your slides in the Presentation View. That is because there is a HUGE difference between hitting Ctrl+E and hitting E on your keyboard.
Hitting Ctrl+E in the Presentation View turns your mouse cursor into an eraser, allowing you to erase specific Pen or Highlighter markings you’ve added to your slide. If you are talking and marking up your slides as you speak, this is the Eraser shortcut you are looking for.
On the other side, if you simply hit the letter E on your keyboard, PowerPoint immediately erases EVERYTHING you have drawn on your slide. In other words, all your ink annotations are erased, and you cannot undo the action. When you want to wipe all the ink off your slide, this is the shortcut you should use.
As these two shortcuts are typically hard to remember which is which in the middle of a presentation, I recommend remembering that Ctrl+E allows you to CONTROL what you erase from your slides, while simply hitting the letter E does not.
Note: Keep in mind that if you press the Escape key to end your presentation, PowerPoint gives you the option to keep or discard your ink annotations.
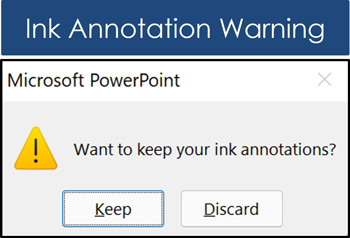
If you select Keep, then all your ink annotations, sketches, and scribbles are saved to your slides that you can then edit in the Normal View. The ink is added as a normal PowerPoint object that you can annotate, update, and/or delete.
If you click Discard, all the ink annotations you’ve added to your slides in the Presentation View are permanently deleted and cannot be undone).
PowerPoint All Slides dialog box shortcut (Ctrl+S)
The All Slides dialog box shortcut is the final shortcut in the PIES shortcut series and allows you to jump back and forth between your slides while giving your presentation.
This is the same shortcut for Save (Ctrl+S) when working in the Normal View of your presentation. I hit this approximately twenty times a minute when working in PowerPoint to ensure I do not lose any of my work.

Hitting Ctrl+S in the Presentation View of PowerPoint shows you all the slides in your presentation, allowing you to select a slide you want to jump to and select Go To. As you can see in the picture below, the slide titles are listed, giving you an idea of which slides you want to jump to.
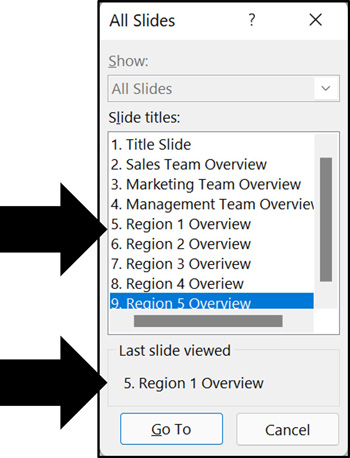
Note: After using the All Slides dialog box once, it tells you at the bottom of the dialog box the last slide you viewed. This makes it easy to jump back to the slide you were previously discussing after you are done.
Conclusion
The PIES shortcuts for drawing on your PowerPoint slides are as follows:
- P for Pen (Ctrl+P)
- I for Highlighter (Ctrl+I)
- E for Eraser (Ctrl+E)
- S for All Slides (Ctrl+S)
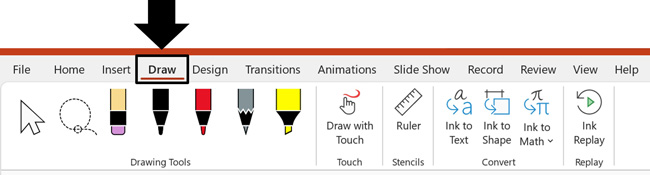
You can also draw on your slides in the Normal View of your presentation by using the Draw tab in your ribbon picture below.
Remember, the main difference between drawing on your slides in the Normal View of PowerPoint is that the ink is automatically added to and saved to your presentation. When using the PIES shortcuts in the Presentation View, you are given the option to save your ink, but if you by accident hit discard, you will lose all your ink annotations.
If you enjoyed this article, you will love our other PowerPoint tutorials and other free PowerPoint resources that you can learn more about here.
🔒 Unlock the PowerPoint Shortcuts Trusted by Industry Leaders KKR, American Express, HSBC, and More!
Join over 114,880 professionals from diverse fields including consulting, investment banking, advertising, marketing, sales, and business development who have supercharged their PowerPoint game with our proven methods.
✅ Customize compelling presentations effortlessly.
✅ Master time-saving techniques for faster deck creation.
✅ Boost your career prospects with top-notch PowerPoint skills.
Get FREE access to the Critical PowerPoint Shortcuts module of our premium training course by entering your name and email below.
DISCLAIMER: PC Users Only!
We respect your privacy and will keep your info safe and confidential.