This ultimate guide to grouping will take you from beginning PowerPoint user to advanced PowerPoint user in no time!
It covers it all – taking the supposedly boring topic of how to group objects in PowerPoint and showing you just how much is possible!
If you are brand new to grouping in PowerPoint, simply scroll down the page and soak it all in. Otherwise, use the table of contents on the left to through the advanced topics.
How to group in PowerPoint

Grouping allows you to make two or more PowerPoint objects into a single ‘grouped’ object that you can more easily move around and manage on your slide.
For example, here’s how you can group pictures together in PowerPoint:
- Simply holding the Shift key down, select your pictures
- Hit Ctrl + G on your keyboard

If you don’t want to learn your keyboard shortcuts, you can also group objects together by:
- Select and Right-Click your objects
- Open the Group command
- Select Group
The same is true if you want to group text or any other PowerPoint objects together. Just be aware that not everything can be part of a group as detailed here.
Take your PPT skills to the next level
Break free from PowerPoint struggle and reclaim your time. Amplify your PowerPoint knowledge with proven advanced methods taught in the PowerPoint Pro Membership.How to rename groups in PowerPoint
Once objects are grouped together, you can make them easier find and work with by naming them within the Selection Pane. That said, keep in mind that this is an OPTIONAL task.
This is only beneficial when you are working with lots of objects on your slide AND naming the individual groups makes sense (like when adding trigger animations like we show you how here.
Otherwise, renaming your groups in the selection pane is a waste of your time. With that said, here is how to rename your groups in PowerPoint.
1. Open the Selection Pane

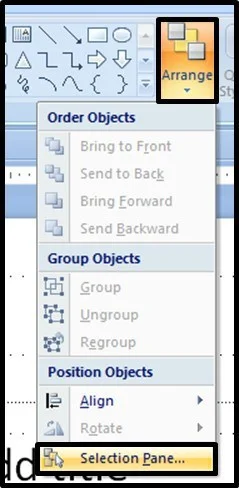
In PowerPoint 2010 or 2013, hit ALT + F10 on your keyboard to open the Selection Pane. In Microsoft 2007, navigate to the Home Tab, open the arrange tool dropdown and select the Selection Pane at the bottom of the dropdown (see picture below).
2. Notice the groups in the Selection Pane
Within the Selection Pane, you can see any groups of objects that you currently have on your slide (there might not be any).
On my slide I currently have three groups of objects (Group 1, Group 2 and Group 4), none of which are very descriptive of WHAT is actually grouped…so we’ll rename them.
Note: The reason the groups are not sequentially number (Group 1, 2 and 3) is that PowerPoint keeps a running total of the groups you’ve made and unmade. So it’s normal to see non-sequentially numbered groups on a slide, which is why naming them something more descriptive can be convenient.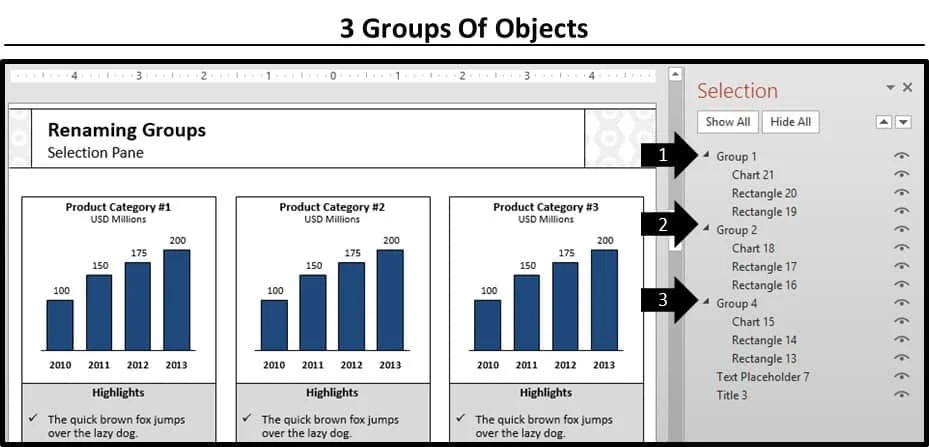
3. Rename your groups
To rename your groups in the Selection Pane, simply double-click the name in the Selection Pane. With the group selected in the Selection Pane, you can alternatively hit F2 on your keyboard.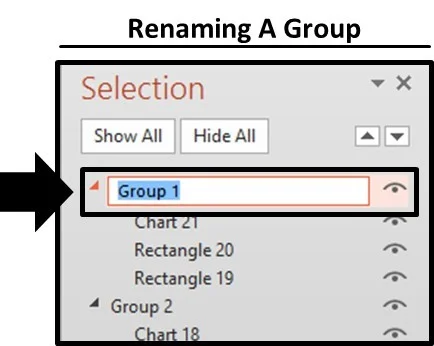
With the name highlighted, you can then rename the group to something more descriptive. I’ve renamed my groups as follows.
Group 1 → Product 1Group 2 → Product 2Group 4 → Product 3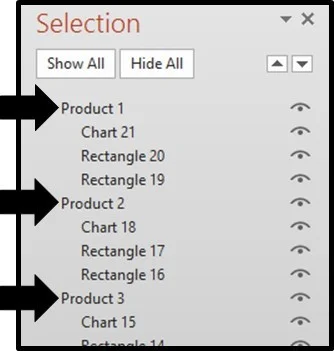
When not to waste time renaming groups
Although naming groups CAN make working with busy slides much easier, I want to point out that you lose your group names whenever you ungroup your objects.
For example, continuing my example above, after naming my group to ‘Product 1’, if I now ungroup that Product 1 group, I will FOREVER lose the ‘Product 1’ name.
If I then group those objects back together again, PowerPoint will go back to a default ‘group’ name, forcing me to rename it again to ‘Product 1’ (assuming I really want that ‘Product 1’ group name for those objects).
As such, if you are just starting to build out your slide and you know you will be frequently grouping and ungrouping objects then heed this advice:
>> THEN DON’T WASTE TIME NAMING YOUR GROUPS.
Otherwise, you will unintentionally WASTE a lot of time naming and renaming groups your PowerPoint groups, instead of focusing on the most important aspect of your presentation…your content.
If you are going to name your groups, it’s usually best to do it at the end of your slide design process (unless you are using them for trigger animations as we show you here) and only invest the time if it actually makes working with your slide easier.
How to Ungroup in PowerPoint

Ungrouping objects is the opposite of grouping. It breaks apart your grouped set objects down into the individual pieces so you can format and/or rearrange them anyway within your layout.
To ungroup a group, simply select your group of objects (only grouped objects can be ungrouped) and hit CTRL + SHIFT + G on your keyboard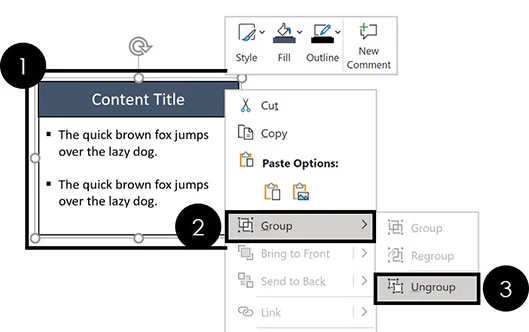
You can also Ungroup your objects using your mouse. To do that, simply:
- Right-Click a set of grouped objects
- Select the Group command
- Click Ungroup
Doing so, your group of objects is be broken back into the individual PowerPoint shapes (or smaller subset of groups).
Note: You might need to ungroup your set of objects multiple times to get back to the individual pieces.
PowerPoint objects that cannot be grouped
If you’ve ever tried grouping objects together in PowerPoint and it doesn’t work…then you have just discovered what few people realize…NOT all PowerPoint objects can be part of a group.
Here is a quick list of objects that can NEVER be part of a PowerPoint Group, but that doesn’t mean they can’t be ungrouped (see uncommon objects that can be ungrouped here).
A. Tables
Amongst the many downfalls of tables in PowerPoint, tables cannot be part of a group (ever). If you decide not to ungroup your table, it’s usually best to first layout your other objects on your slide, and then using the alignment tool, fit the table into the correct position within your layout.
B. SmartArt graphics
Although a special type of PowerPoint group itself, SmartArt graphics themselves cannot be part of a group with other objects, including other SmartArt graphics.
C. Content Placeholders
Content placeholders are defined as anything set on your Slide Master that is editable in the Normal View of your presentation. This includes things like titles, sub-titles, page numbers, etc. These content placeholders cannot be part of a group and there is currently no workaround that I’m aware of.
The vast majority of objects can be grouped:
Everything else in PowerPoint can be part of a group, including other groups of objects that you have already grouped, pictures, images, charts, shapes, text boxes, vector graphics, etc.
D. Videos, 3D Graphics & other multimedia
Most of the multimedia objects you can insert into PowerPoint cannot be part of a group.
For example, if you narrate your PowerPoint presentation or add music, you cannot group those objects as part of your layout.
To learn how to narrate a PowerPoint (with audio and/or video narrations), read our narration guide here.
How to Regroup objects

Regrouping (covered in detail below) re-establishes an ungrouped group, without having to reselect all of the objects and group them again.
For example, if you ungroup a group of 32 different objects (a complicated graphic) so you can format some of the individual pieces. To reform the original group, you only need to select 1 of the 32 objects, select regroup and the entire group (including all 32 objects) will reform.
To use the regroup command, you can right-click an object with your mouse, and in the grouping menu option select regroup (Keyboard shortcut CTRL + SHIFT + J).
Uncommon PPT objects that can be Ungrouped
Now besides ungrouping normal ‘grouped’ objects, there are a variety of other PowerPoint objects that you can ungroup or break apart.
1. Ungrouping tables and charts
How to do it:
The trick to ungrouping a table or chart is that you first need to copy and paste it in one of the two Windows MetaFile Formats (which doesn’t work on a Mac).
After copying your object, use the paste special keyboard shortcut ALT + SHIFT + V to open the Paste Special dialog. Within the dialog box, select one of the two MetaFile formats (it doesn’t matter which one), hit okay and your table or chart will paste in as a Metafile picture.
With the picture interested, simply select it and ungroup twice (CTRL + SHIFT + G), and the picture will break apart into shapes, lines and text boxes.
When is this useful:
Ungrouping tables and charts is useful in two different scenarios:
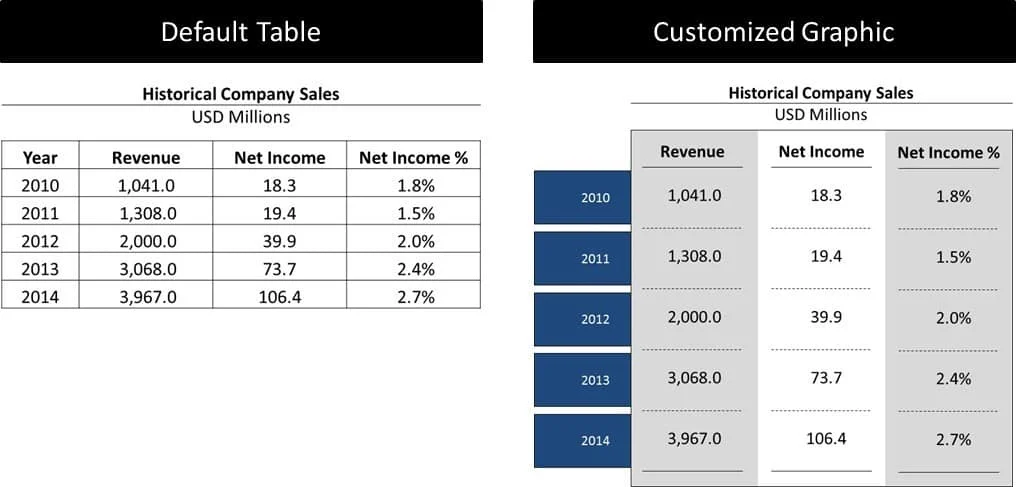
#1: You want to create your own unique graphic out of the contents of the table or chart.
For example, instead of using a table as is, you want to break it apart and build your own unique layout without retyping any of the text.
#2: You want to create a custom animation sequence for the contents of your table or chart.
Tables as a normal PowerPoint object cannot directly be animated, and charts as a normal PowerPoint object has limited animation options. Breaking them apart allows you to customize the animation sequences you apply to your tables and charts.
2. Ungrouping SmartArt graphics
How to do it:
With a SmartArt graphic selected, simply ungroup twice (CTRL + SHIFT + G on your keyboard) and just like a Metafile, the SmartArt graphic will break down into normal shapes, lines and text boxes.
When is this useful:
This is useful when you want to move beyond the limited formatting options of SmartArt.
SmartArt itself is a group of objects in PowerPoint that will automatically resize itself based on the text and shapes you add to it.
Yes, the automatic resizing can be useful when you are first building your graphic, but it can also be annoying when you are trying to finalize your graphic and incorporate it in your layout.
By ungrouping your SmartArt graphic into normal PowerPoint shapes, you have SIGNIFICANTLY more freedom to customize and build your own unique layout.
3. Ungrouping vector graphics
How to do it:
With a vector graphic selected, hit ungrouped the ungroup shortcut (CTRL+SHIFT+G) to begin breaking it down into shapes, lines and text boxes that you can customize and animate it as you see fit.
When is this useful:
This is useful for customizing or animating your vector graphic.
Grouping techniques to inverse your layouts
In this advanced grouping trick, I will show you how you can transpose, or inverse your slide layout using a combination of grouping / ungrouping shortcuts and object rotation shortcuts.
And the trick to pulling this off, is recognizing that your PowerPoint objects rotate differently depending on whether they are part of a group, or just individual objects, as you can see in the below video.
Keys to remember about transposing or inversing your layouts:
#1: Rotating as a single object –when objects are part of a group, the entire group will rotate as one single object.
When regrouping is a lifesaver
Regrouping is the fastest way to recreate a set of ungrouped objects and we’d LOVE IT if Microsoft made a keyboard shortcut for it as well (fingers crossed).
Now the regrouping critics will say:
“WHO CARES about the regroup command when I can easily just select my two or three PowerPoint objects and use the CTRL + G shortcut to group them.”
Well, if you are only regrouping a couple of objects, I agree.
On the other hand, if you are regrouping 5 different groups of objects (at the same time) or regrouping a COMPLICATED vector graphic with over 50 objects (see picture below), THAT’S when the regrouping command is a lifesaver.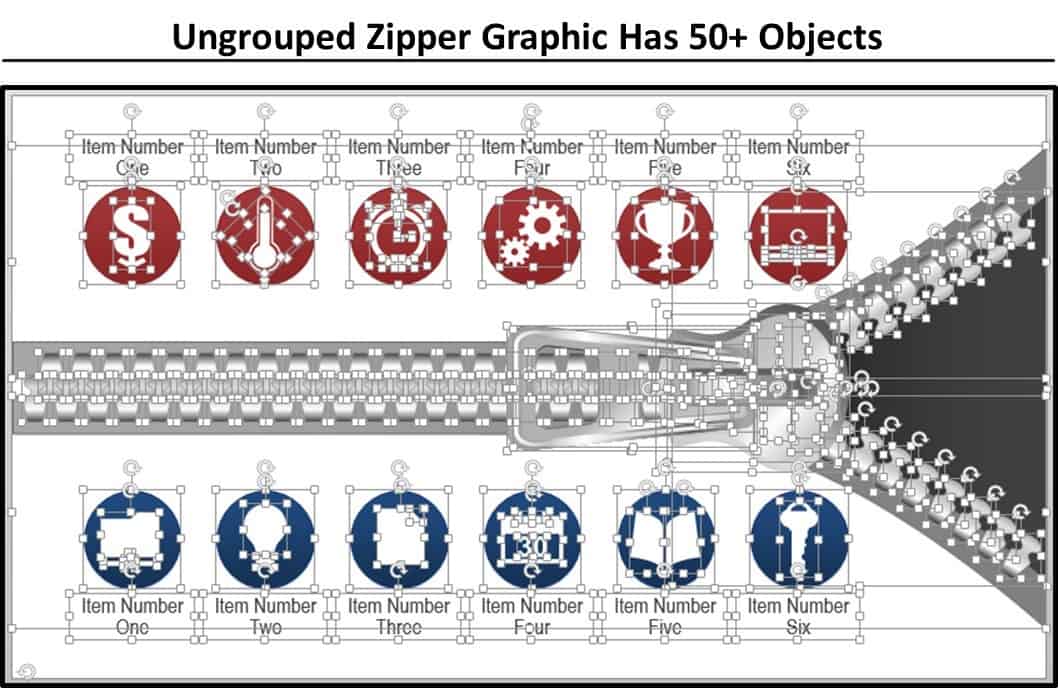
To regroup your objects, simply follow these steps (and I’ll start by first ungrouping some groups).
1. Ungroup a set of objects and make your adjustments
Important: You can only regroup objects which was previously part of a group…hence, why the tool is called regroup.So for this example I will ungroup my SWOT analysis so that I can more easily change the shape fill of the titles to black. I will first select the four groups.
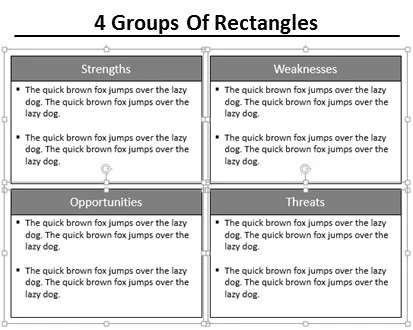
Hit CTRL + SHIFT + G to ungroup my objects into 8 individual rectangles.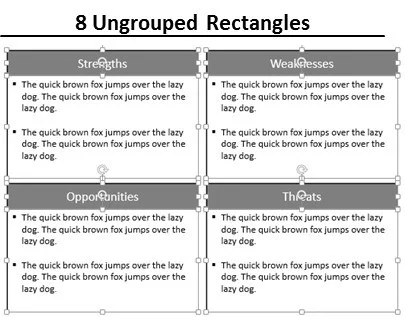
Select the titles, and reformat them to fit my needs.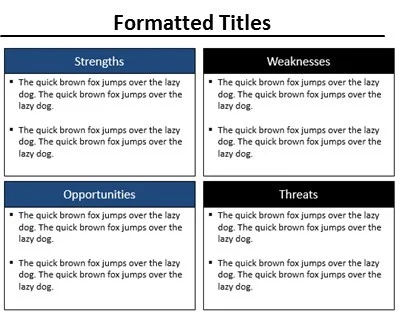
With the new formatting done, now we need to regroup them.
2. Regroup the groups
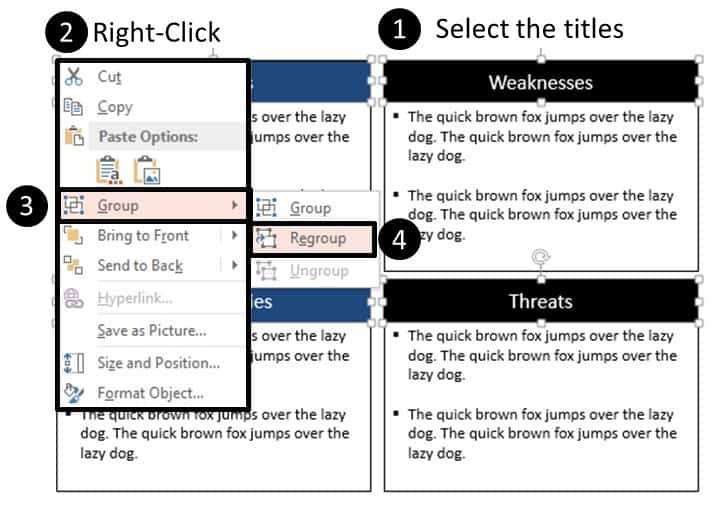
To regroup your objects, you simply need to select ONE object from each of the previous groups. You DO NOT need to select all of the objects themselves (although that works too if they are easier to grab that way).
In this case I will:
- Select the title rectangles
- Right-click with my mouse
- Select the group command in the right-click menu
- Select Regroup
Selecting regroup, all of your PowerPoint groups are reformed.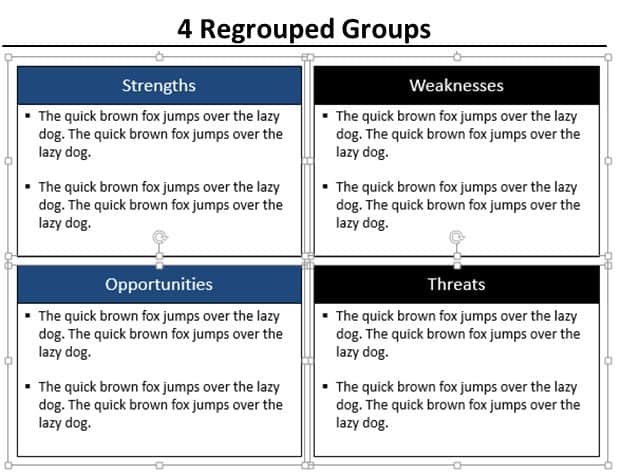
Key ungrouping points to remember
So that’s how to regroup your objects back into their groups, and this works as long as:
#1: Your objects previously belonged to a group (you cannot regroup objects back into groups that never existed in the first place).
#2: Your objects were ungrouped while your presentation was open. i.e. if you ungroup a set of objects, close your presentation and reopen it…those objects will not regroup. Regrouping only works in active sessions of PowerPoint.
How to group slides in PowerPoint
Besides being able to group objects in PowerPoint, you can also group slides together into sections.
Once your slides are grouped into sections, you can rename the sections, move slides in and out of those sections, move the sections around within your presentation (thus moving the entire group of slides) and/or print those individual sections.
This is a great technique when splitting up a deck amongst your colleagues to work on, as each of your colleagues can easily print and work with their own group or section of slides.
1. Right-click and add a section
Another way you can create a section in PowerPoint (or group slides) is to right-click the slide in the thumbnail view on the left that you want your section to start at, and from the right-click menu select Add Section.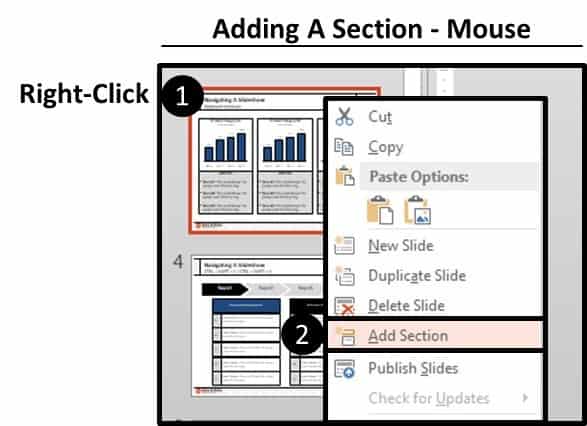
An alternative way to add sections is to navigate to the Home tab, open the Section drop down, and select ‘Add Section.’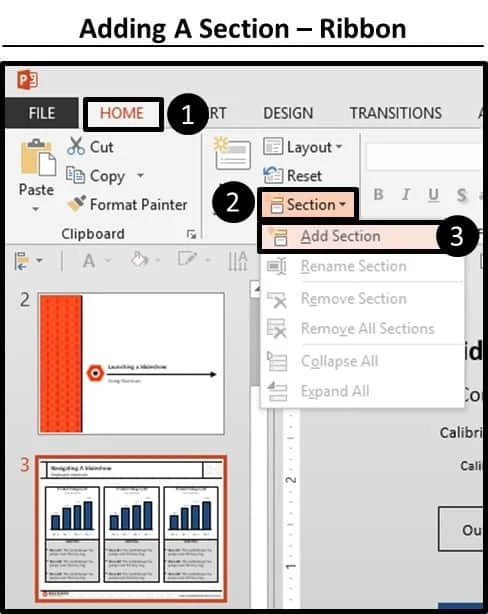
You can repeat adding as many sections as you like to your presentation. In the below picture, you can see that I’ve added two sections to my presentation, both of which have the default section name ‘Untitled Section.’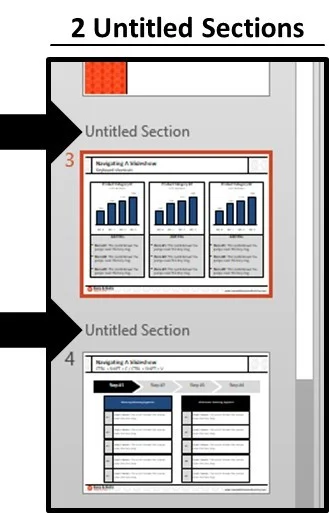
2. Renaming your section
To rename a section, simply right-click the section name, and in the right-click menu, select Rename Section.
You can also rename a section from the Home tab using the Section dropdown if you like.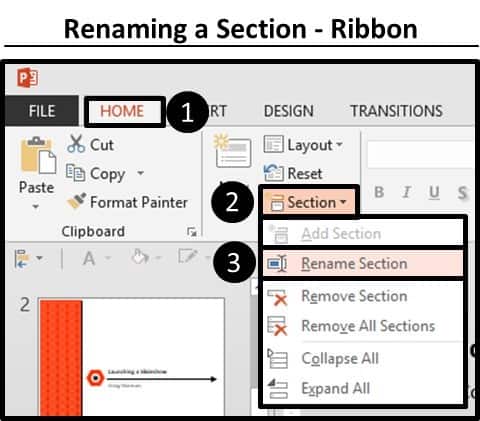
3. Collapsing your sections
After naming your sections, you can then collapse them by right-clicking a section and selecting Collapse.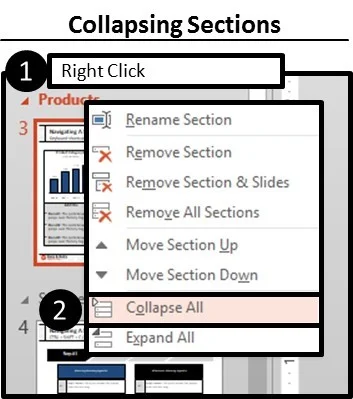
With the sections collapsed you can see all of the sections within your presentation either in the Normal View or the Slide Sorter View.
Note, if you start your slide groupings after the first slide, anything prior to your first group will automatically be categorized as the ‘Default Section’ as you can see in the picture below.
The ‘Default Section’ simply means anything that precedes your first section.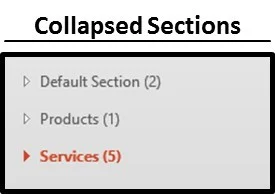
With your groups or sections collapsed like this, you can then click the arrow on the left to open up a specific section, click and drag the group around or move slides in and out of the group as you see fit.
How to print groups of slides in PowerPoint
The advantage of grouping your slides in PowerPoint is that you can then print those individual groups.
This is useful when working on a specific portion of a presentation, and you want to print only a specific portion of the presentations.
With everything broken into sections, instead of trying to identify a specific range of slides (for example slides 10 through 50), if those slides are grouped into a section, you can simply print that individual section.
To print a specific section, follow these steps below.
To learn how to print multiple slides on one page in PowerPoint, read our guide here.
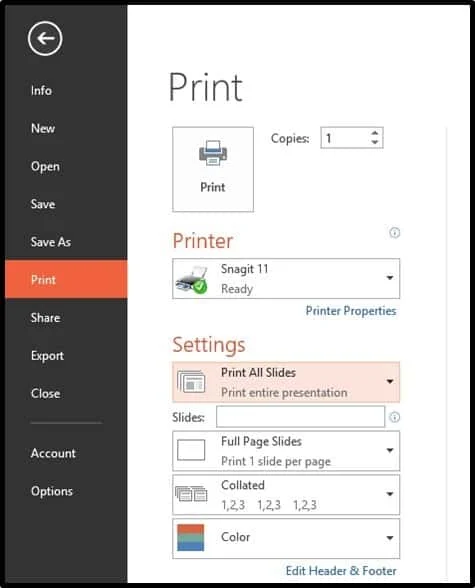
1. Navigate to the print menu
With the slides in your presentation already broken into groups (see above for how to group slides), hit CTRL + P on your keyboard to navigate to the printing options.
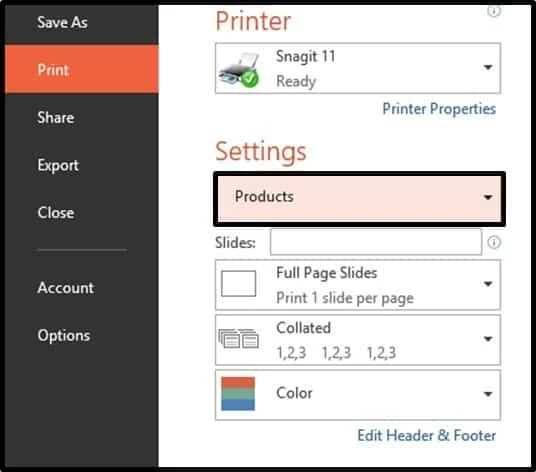
2. Open the print options and select your group
Opening the slide dropdown, you can see a cluster of your grouped sections at the bottom.
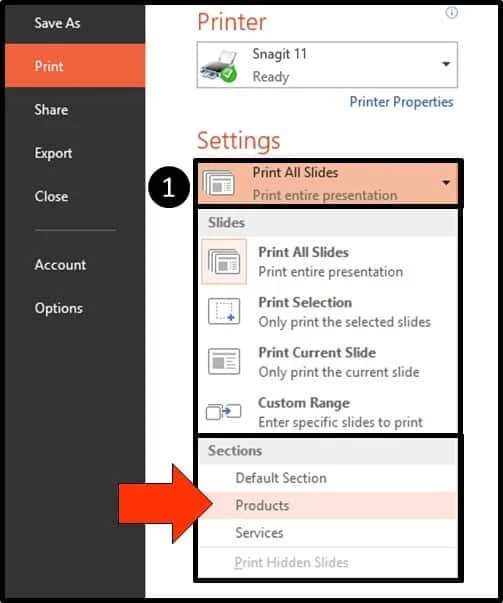
Select the group you want to print (in this case I selected the Products group) and hit Print, and ONLY that specific section (group of slides) will print.
NOTE: When printing sections in this way, keep in mind that:
- You can only print one section at a time in this way
- You can only print entire sections…so you can’t pint half of one section and half of another
If you only want to print half of a section or some other range of slides that spans more than one section, you will have to use the ‘Custom Range’ print option and manually type in the slide numbers.
To learn all about how to print PowerPoint with notes, and all the different options you have, see our guide here.
Conclusion
So that’s EVERYTHING you need to know about grouping in PowerPoint and covers just about every PowerPoint object you can and can’t group.
The Group and Ungroup shortcuts are some of the most useful PowerPoint shortcuts, so if you don’t already have them memorized, I recommend adding them to your list.
If you enjoyed the depth of this tutorial and want to learn other PowerPoint tips and tricks, visit us here.
About the Author

Taylor Croonquist
Co-Founder, Nuts & Bolts Speed Training
Taylor Croonquist is a PowerPoint expert and trainer. Over a career spanning the globe, from consulting in New York and investment banking in China, Taylor has truly seen it all in PowerPoint. Through necessity and a natural tech savvy, Taylor honed his PowerPoint skills to the point of even blowing the minds of the Microsoft PowerPoint programming team. When he's not busy crafting PowerPoint training, you can find him reading a sci-fi series or scuba diving.
Take your PowerPoint skills to the next level
Get access to our complete training library, new tutorials every month, and the same techniques we teach in our corporate workshops. Join the 260,000+ professionals who have trained with us.
See Membership Options