In this tutorial, I’ll show you how to combine two PowerPoint animation tricks together to create moving backgrounds for your images in PowerPoint.
Animation trick #1: A combination of the Fly In and Split animations to create an interesting reveal effect.
Animation Trick #2 (Bonus): How to use a motion path on a background image to create a rolling background effect/
In the example I build out in this tutorial, I’ll show you how to reveal a majestic tower against a bright blue sky and then make the sky move in the background.
See the looping graphic below.
Create Moving Backgrounds Tutorial
To learn more about creating PowerPoint backgrounds, and where you can get free ones, read our guide here.
Part #1: Setting up your picture
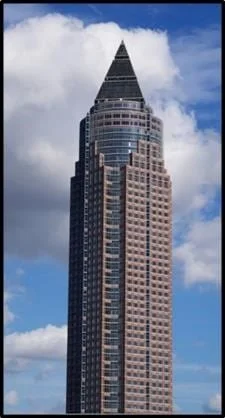
1. Find a picture with good contrast
The first step in this PowerPoint animation tutorial is to find a picture that has a nice clean contrast with the background (you don’t want your center object to be touching anything or blending into the background).
For this example, I’m going to use the picture of the tower below.
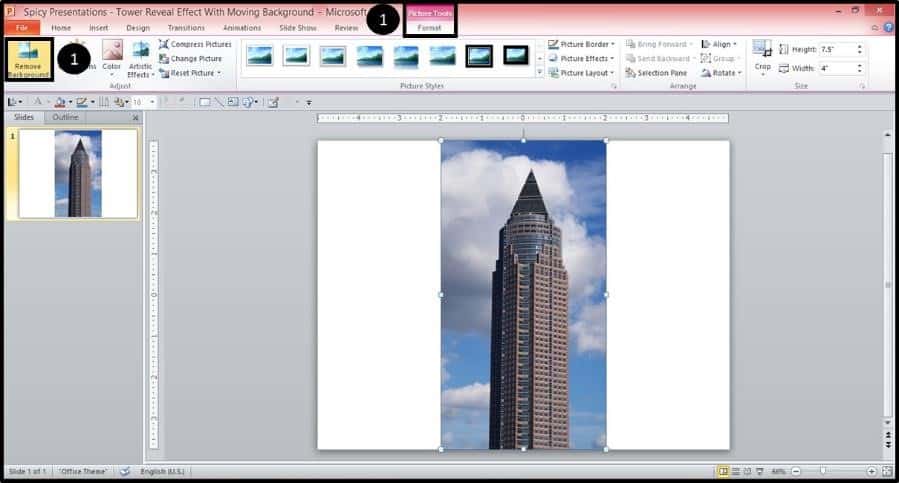
2. Remove the picture’s background
With your tower (or other image) selected, in PowerPoint 2010 or PowerPoint 2013, navigate to the Picture Tools Format Tab, and select Remove Background.
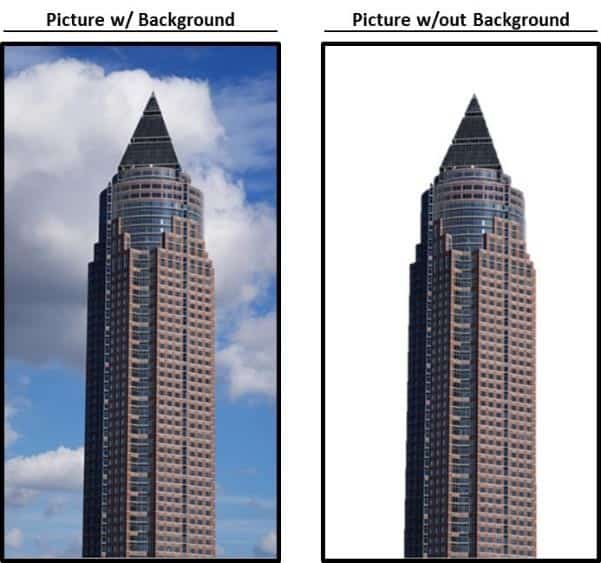
To remove the background, you want to adjust the frame around the center object of your picture, in this case the tower. The purple area is what will be removed from the image; the colored area is what will remain within the image.
Depending on your picture, you might need to use the “Mark Areas to Keep” and “Mark Areas to Remove” commands to correctly remove the background.
Once the background is all purple, select keep changes.

Once you are done removing the background, you should be left with just the center object of your picture.
Part #2: Building your reveal animation framework
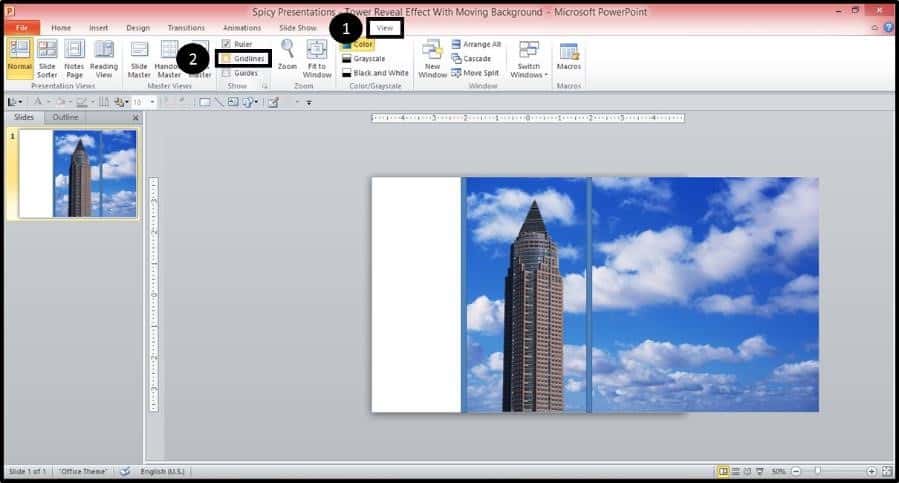
1. Turn on the Gridlines
Before we frame the picture, let’s first turn on the Gridlines within our slide layout. So from the View Tab, make sure there is a check mark next to the Gridlines, which appear as dashed lines crisscrossing the slide.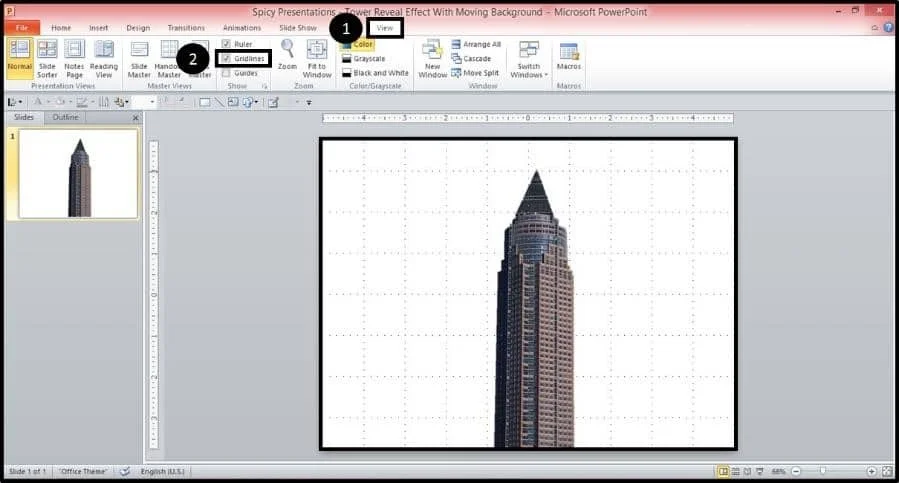
2. Frame your picture
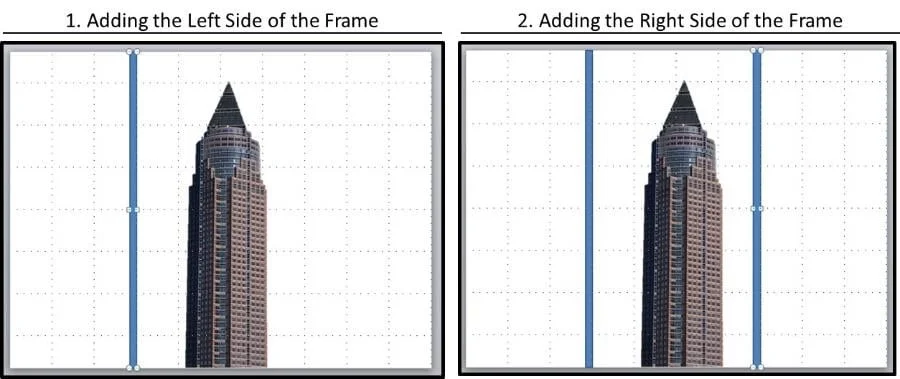
With the Gridlines turned on, let’s build the frame around the picture using two rectangles. From the Insert tab, open the Shapes Gallery and select a rectangle.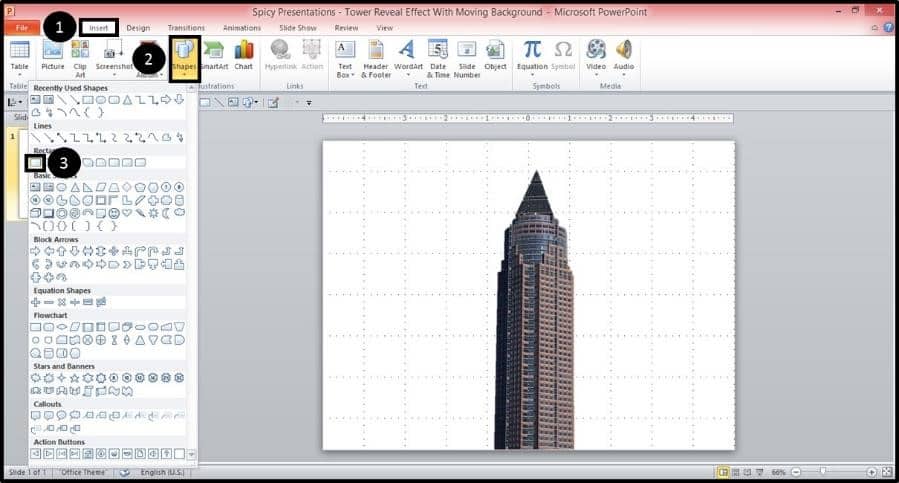 With the rectangle selected, draw a tall and skinny rectangle on the left side of the picture – you can use the Gridlines as guides.
With the left side built, copy and paste or CTRL + SHIFT + DRAG a copy of the rectangle to the right side of the picture, creating the right-side of the frame.
With the rectangle selected, draw a tall and skinny rectangle on the left side of the picture – you can use the Gridlines as guides.
With the left side built, copy and paste or CTRL + SHIFT + DRAG a copy of the rectangle to the right side of the picture, creating the right-side of the frame.
3. Adding your background image
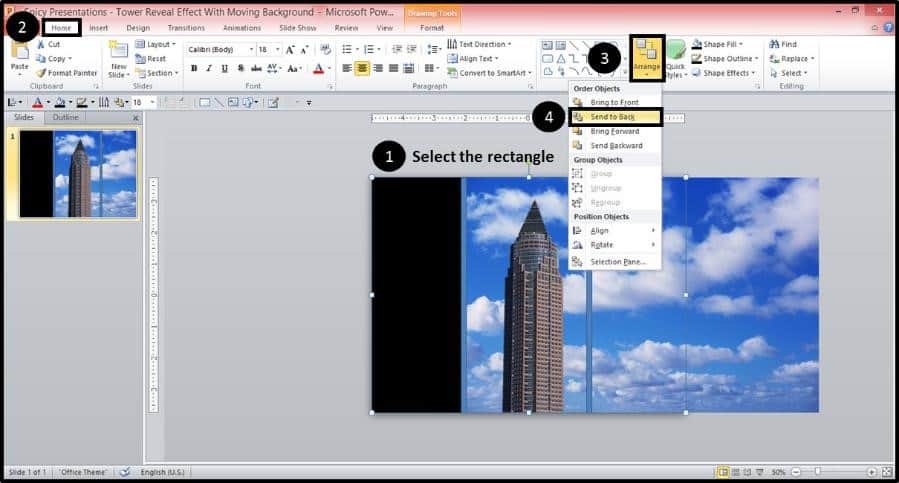
With the frame built, next you need to find your background image. In this tutorial, I’m using a piece of sky that I found using Microsoft Clip Art. You can find something similar using clipart, or download the working files here. Insert or paste the sky into your slide, and now, let’s put it behind the tower. Use the Arrange tool to send it to the back layer. So from the Home tab, open the arrange tool and select Send to Back.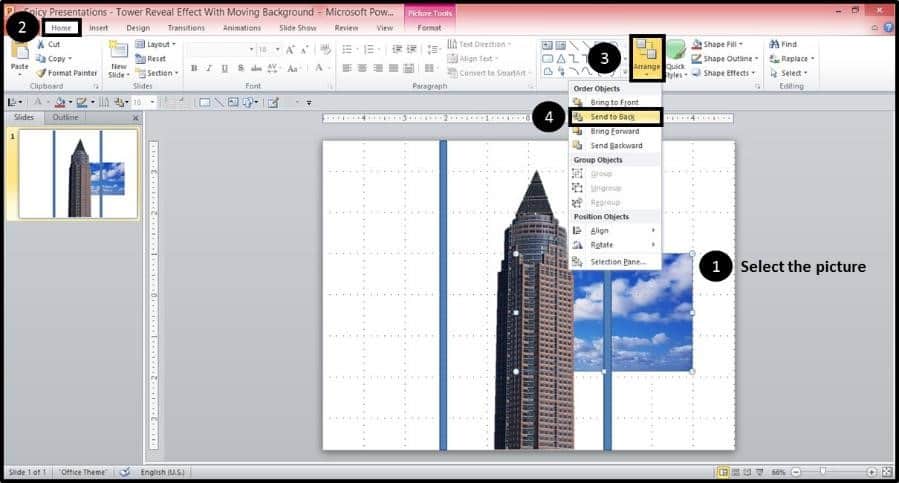
4. Stretch your background image
With the sky in the background, adjust the size of the sky by selecting the picture and then dragging the lower right-hand corner so that the sky fits the entirety of the frame, extending off the right-side of the slide. It’s important that some part of it sticks out because this will allow it to move to the left.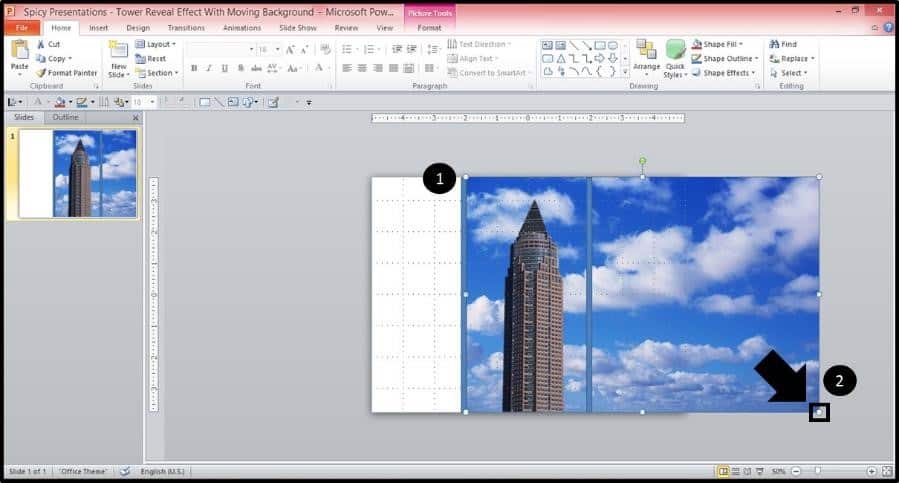 With the background image stretched out, extending off the right-side of the slide, we can turn the gridlines off.
So from the View tab, uncheck the box next to the gridlines.
With the background image stretched out, extending off the right-side of the slide, we can turn the gridlines off.
So from the View tab, uncheck the box next to the gridlines.
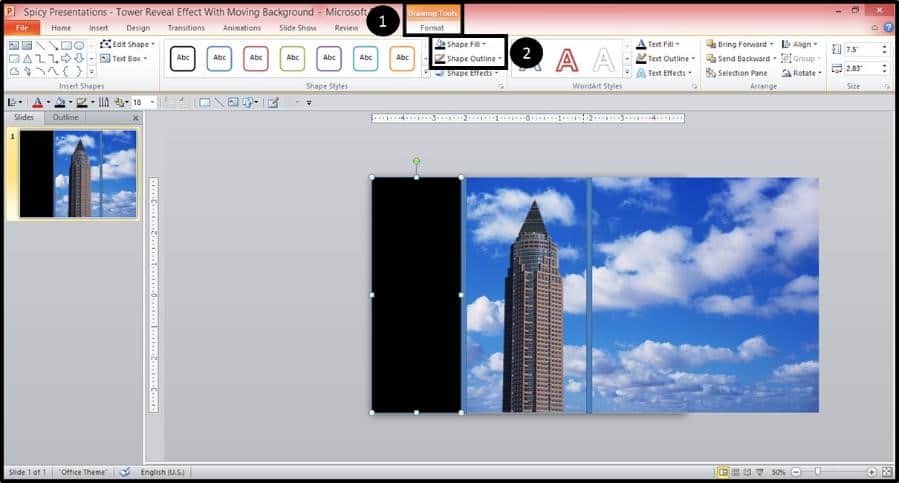
5. Fill in the left side of your slide
Next we’ll fill in the white space on the left-side of the slide with a rectangle. So from the Insert tab, select a rectangle and cover up the white space on the left-side of the slide.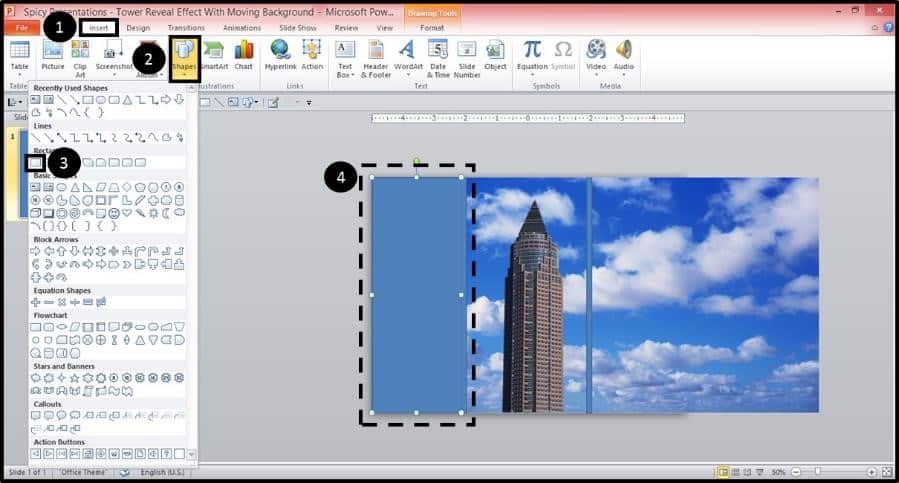 With the rectangle down, let’s fill it with a black shape fill color and a black shape outline. So from the Drawing Tools Format tab, format the rectangle.
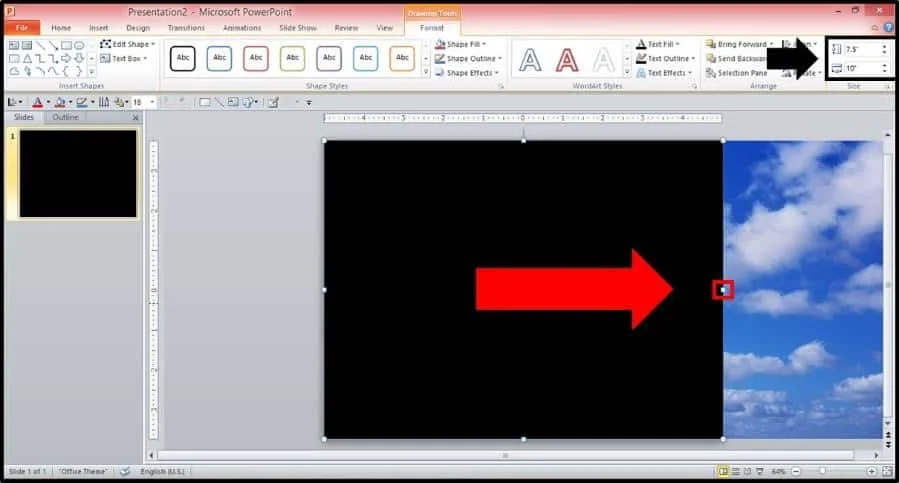
 With the formatting set, stretch the rectangle across the slide, so that it covers the entirety of the slide itself, height 7.5 and width 10, but not covering the entirety of the background image.
 With the black rectangle stretched across the slide, let’s send it to the back. From the Home Tab, open the Arrange tool dropdown and select Send to Back.
6. Group the sky with the background rectangle
Holding Shift, select both the sky and the background rectangle and group the objects together. With both objects selected, either hit CTRL + G for group on your keyboard, or right-click the objects, select Group from the right-click menu and select Group.
7. Duplicate your slide
With the objects grouped together, create a copy of the slide by duplicating it. Right-click the thumbnail slide on the left, and from the right-click menu select Duplicate; leaving you with two identical slides within the presentation.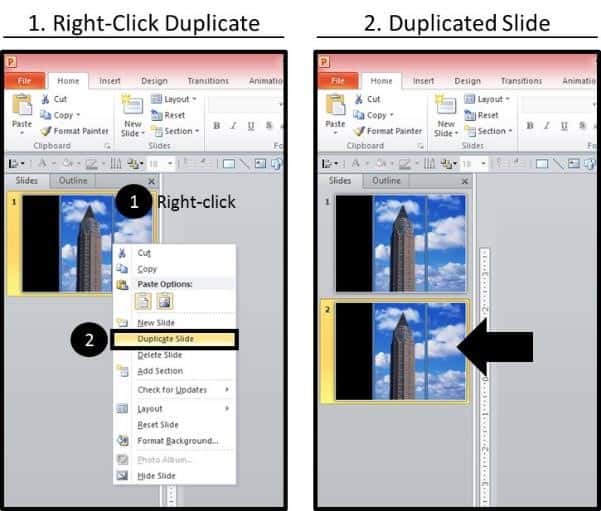
8. Crop your background image
With the slide duplicated, return to the first slide (slide #1) and crop the background image. Select the background image (the sky in this case), from the Picture Tools Format tab select the Crop command, and then used the cropping handle on the right to crop the image to fit the frame we built for the background image with rectangles (it should snap into place with the rectangle on the right). To learn how to crop a picture in PowerPoint and the different options you have, read our guide here .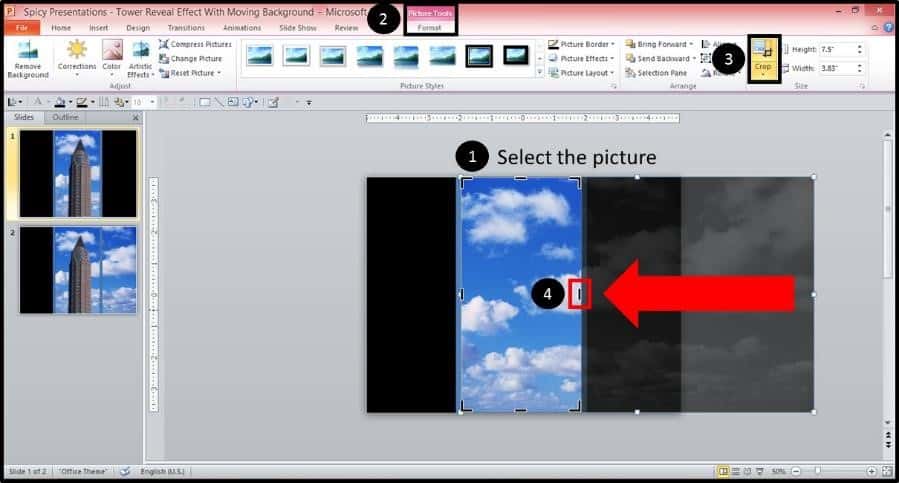
Part 3: Adding the PowerPoint animations
With all the pieces of our slide now set, we can begin adding the PowerPoint animations to our graphic.1. Add the Fly In animation to move your background
On the first slide in the presentation, holding the Shift key, select both of the blue rectangles (the frame) and from the Animations tab, select the Fly In animation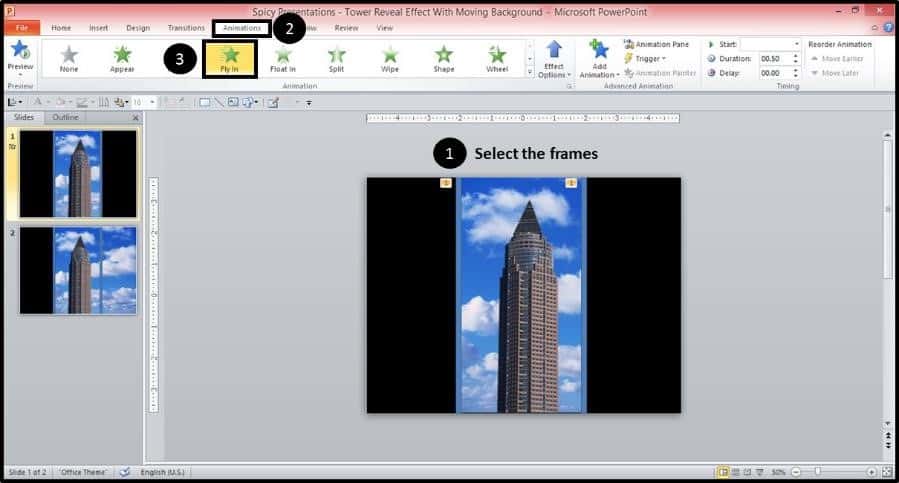
2. Add effect options to the Fly In animation
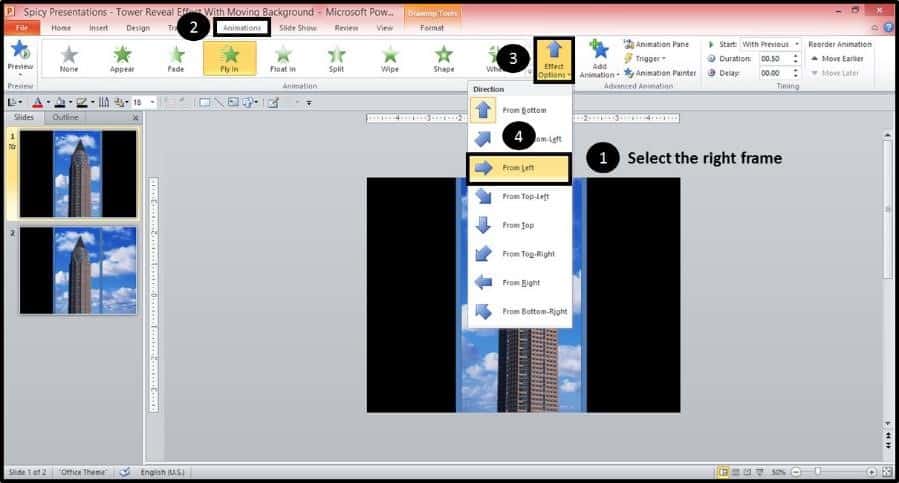
With the Fly In animation added to both bars, first select the left part of the frame only, and then from the Effect Options dropdown in the Animations tab, select From Right.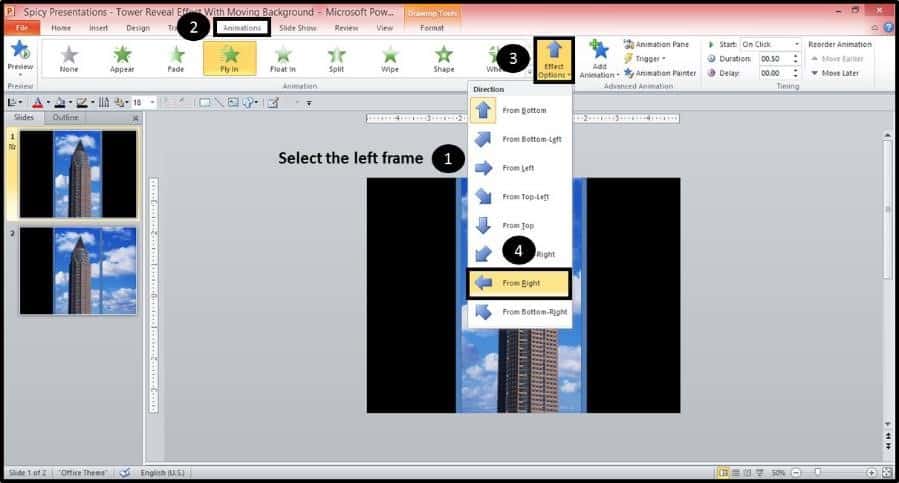 Next select the right part of the frame only, and apply the From Left Effect Option.
3. Open the Animations Pane and adjust the Fly In animations
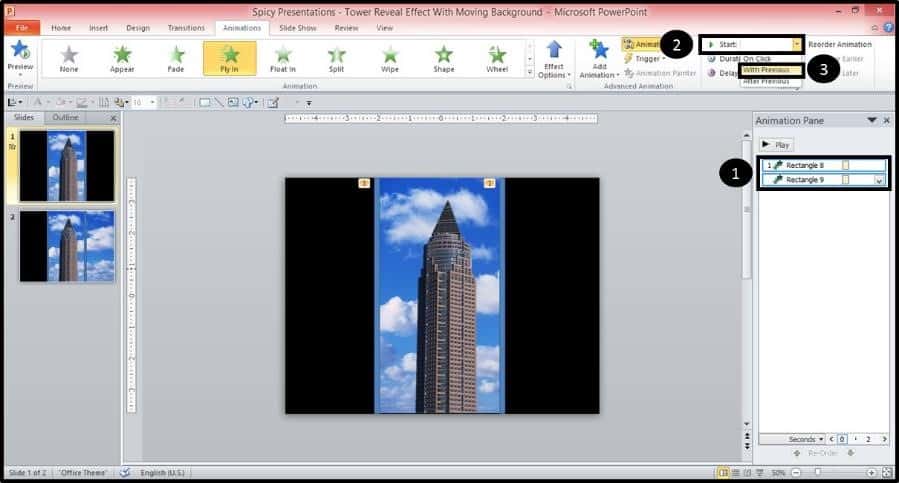
With both Effect Options selected, from the Animations tab, open the Animations pane on the right of the screen.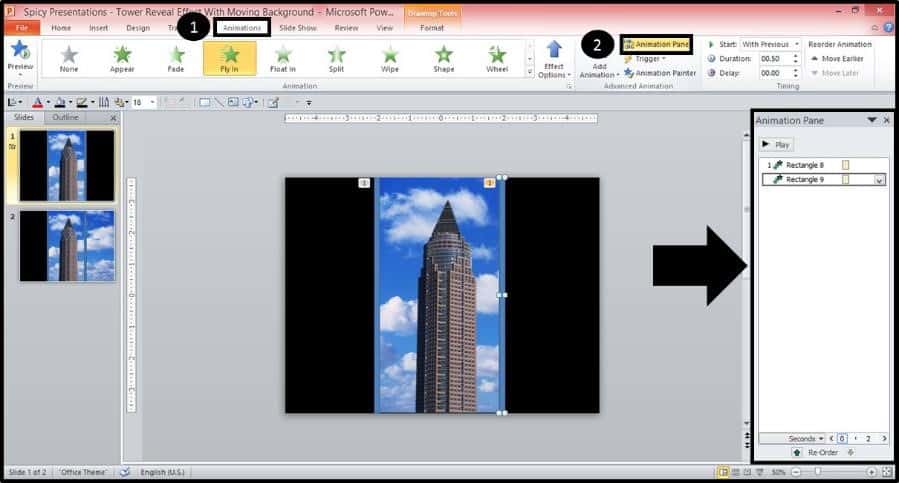 With the Animation Pane, holding the Shift key, select both of the animations and from the Start drop down, select With Previous.
This will ensure that the animations fire off at the same time within our presentation.
With the Animation Pane, holding the Shift key, select both of the animations and from the Start drop down, select With Previous.
This will ensure that the animations fire off at the same time within our presentation.
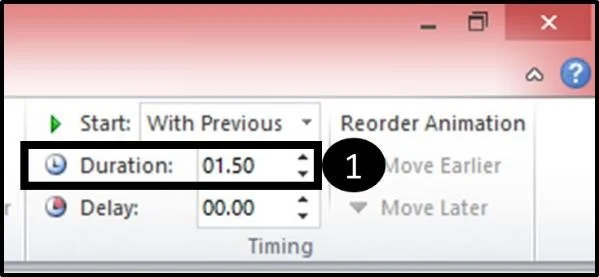
 With both animations still selected, within the timing group, change the duration of the animations to 1.5. This is an arbitrary setting that you can play around with and adjust for your own custom animations.
4. Add a Split animation
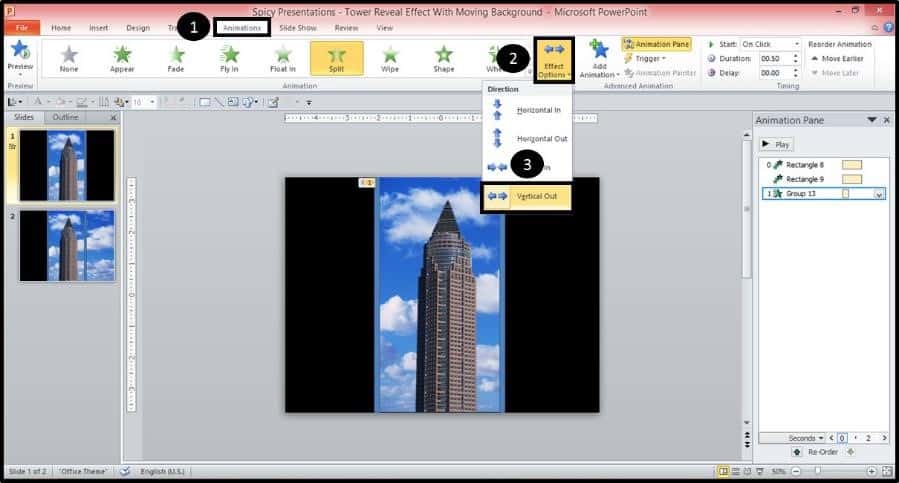
With the frames now set, select the building and background image, which should be grouped together, and from the Animations tab select the building and the sky (which should be grouped together) and apply the Split animation.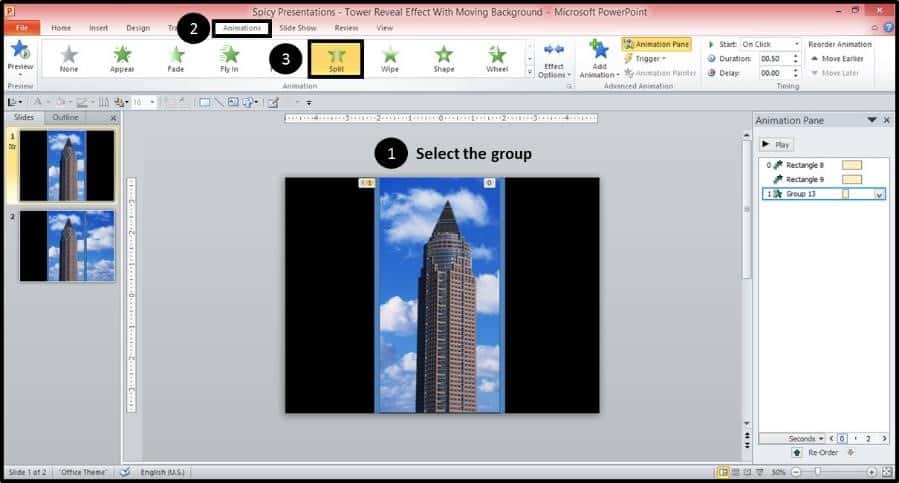 With the Split animation set and the group still selected, from the Effect Options drop down, select Vertical Out.
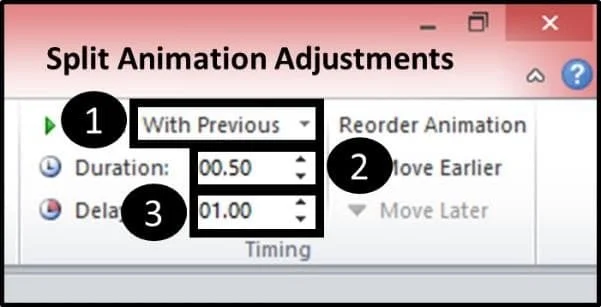
 With the split set and still selected, make the following adjustments to the animation:
- Set the animation to Start With Previous so that it lines up with the frame animations we previously set
- Set the Duration to .5 seconds
- Set the Delay to 1.0 seconds
5. Add a black background to the right side of the second slide
On the second slide within the presentation (the duplicate slide), copy and paste the black background, and adjust it to fit on the right-side of the slide, hiding the sky.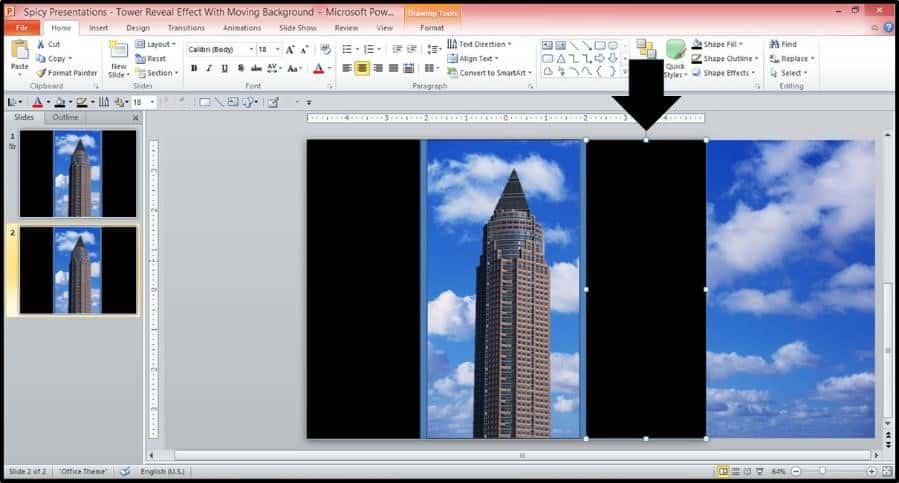
6. Adding a Motion Path to the background image
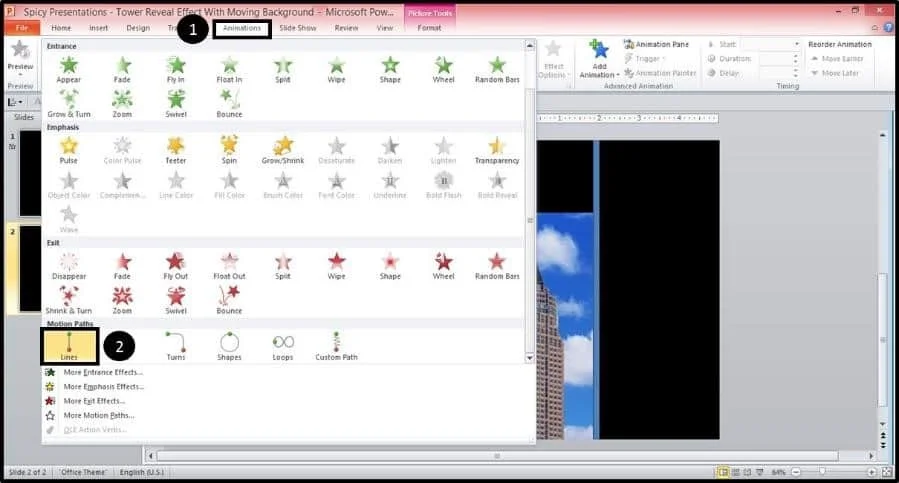
Next, select the background image (the sky) and ungroup it. Either hit CTRL + SHIFT + G on your keyboard, or right-click the image, and from the group menu select ungroup. See learn everything these is to know about the grouping shortcut, see our guide here .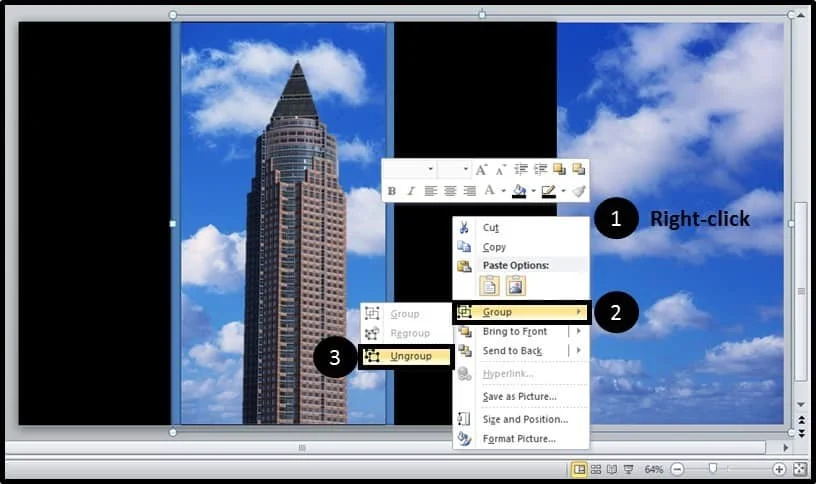 With the sky ungrouped, select the background sky image only and from the Animations tab, add the Lines motion path animation.
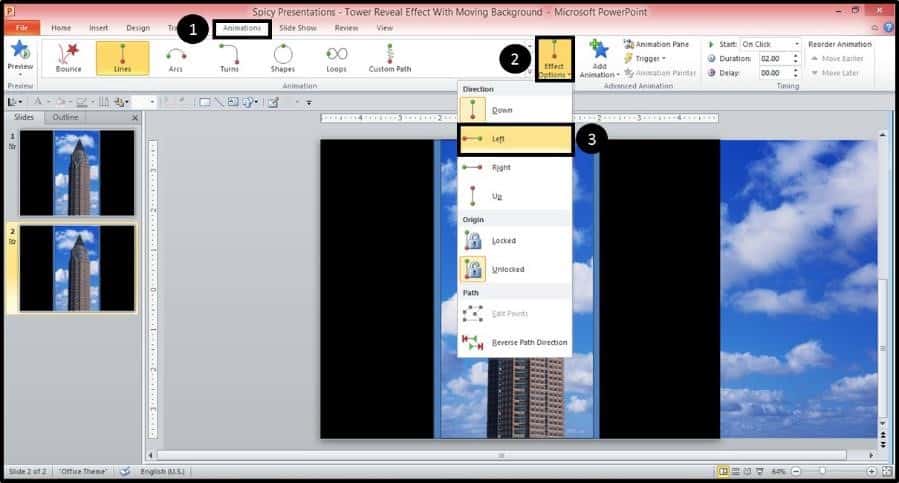
 With the Lines animation still selected, from the Effect Options drop down, select Left. This creates a right to left motion for the background image.
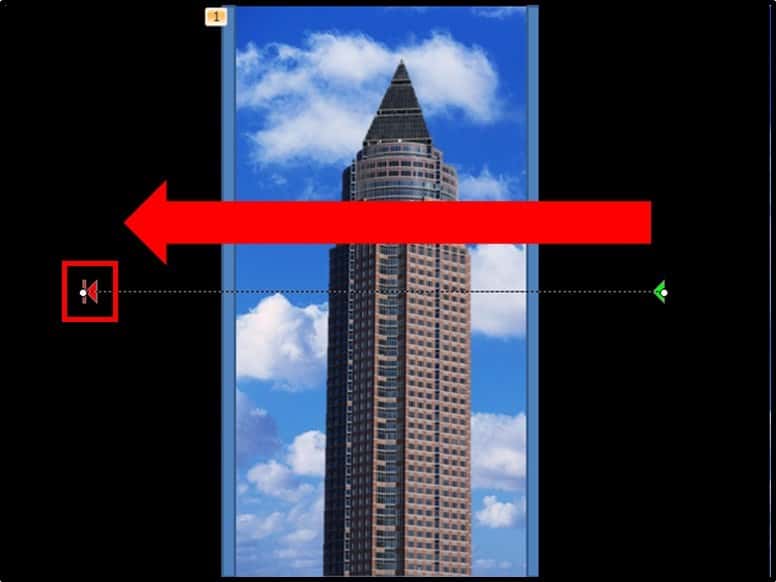
 Next grab the end of the motion path animation, and holding the Shift key (to keep the motion path straight) extend it left along the picture.
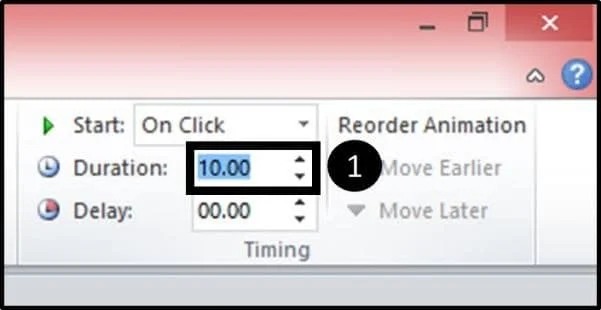
 With the motion path extended and still selected, from the timing group in the Animations tab, increase the duration of the animation to 10 seconds.
This can be changed depending on how fast you’d like the background to move – decreasing the time speeds it up while increasing the time slows it down.
With the motion path extended and still selected, from the timing group in the Animations tab, increase the duration of the animation to 10 seconds.
This can be changed depending on how fast you’d like the background to move – decreasing the time speeds it up while increasing the time slows it down.
7. Add a screen on the left side of the slide
As a last step, we need to create a screen to hide the background as it moves toward the left side of the slide. So copy and paste one of the black rectangles, and fit the rectangle onto the left side of the screen as demonstrated below.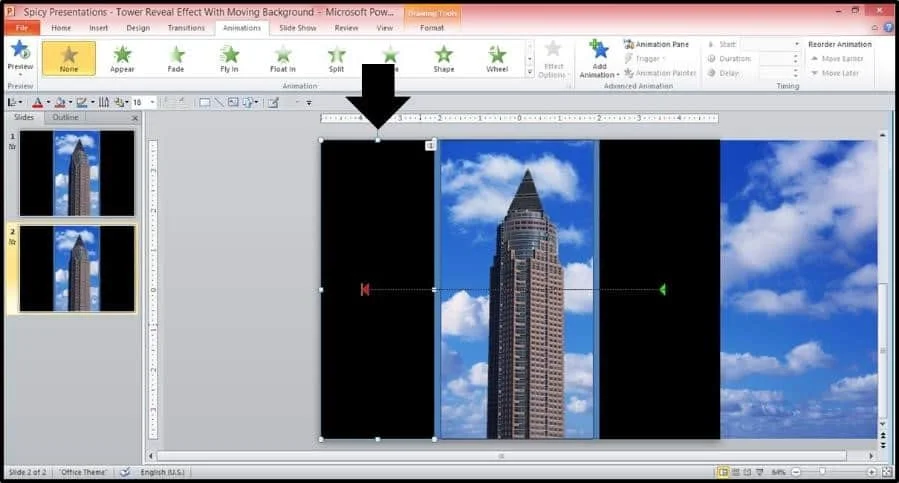
Bonus moving background tricks
With the animated sky now all set up, you can quickly reuse it to additionally create a moving sky background outside of a window.1. Copy and paste the Sky animation
Copy and paste the sky animation from the previous slide onto a new slide.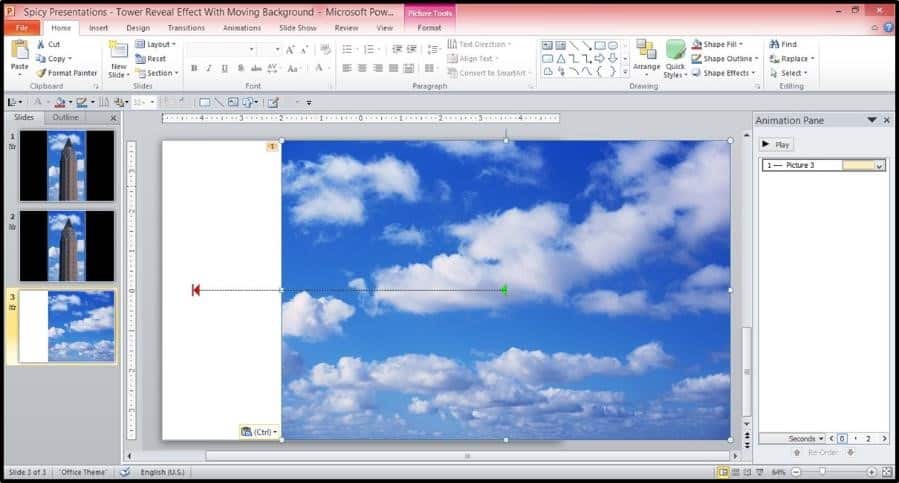
2. Copy and paste the Sky animation
Find a picture of a window, I’ve again found a picture of a window from Microsoft ClipArt, which is also included with the working files for this tutorial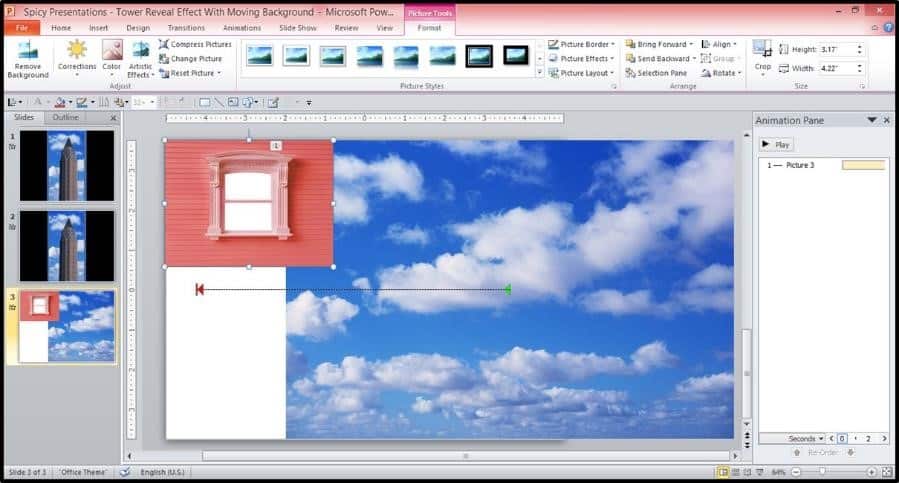
3. Extend the window frame across the slide
With the window frame added, grab the lower right-hand corner of the window frame, and extend it across the slide.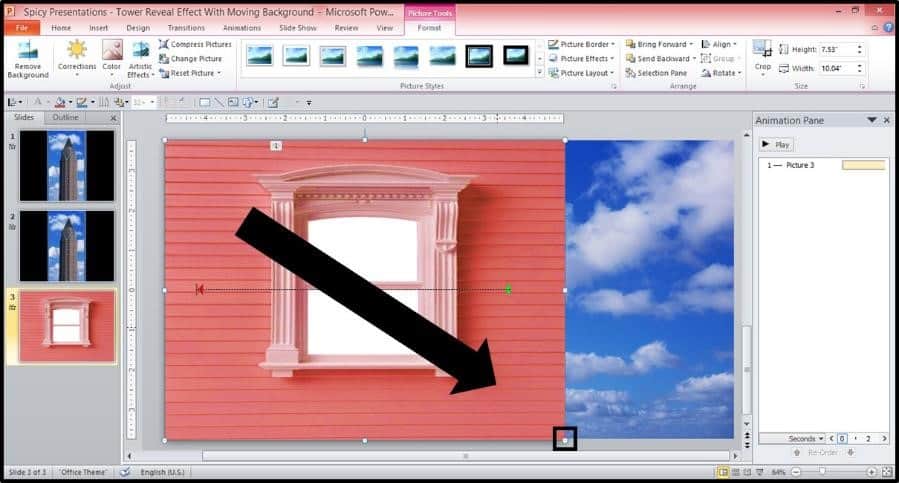
4. Remove the window
To remove the window background, you can either use the remove background technique, discussed above, or if your window frame is a solid color, you can change the color of the window to be transparent. To do that, with your picture selected, navigate to the Picture Tools Format tab, open up the Color dropdown and select Set Transparent Color.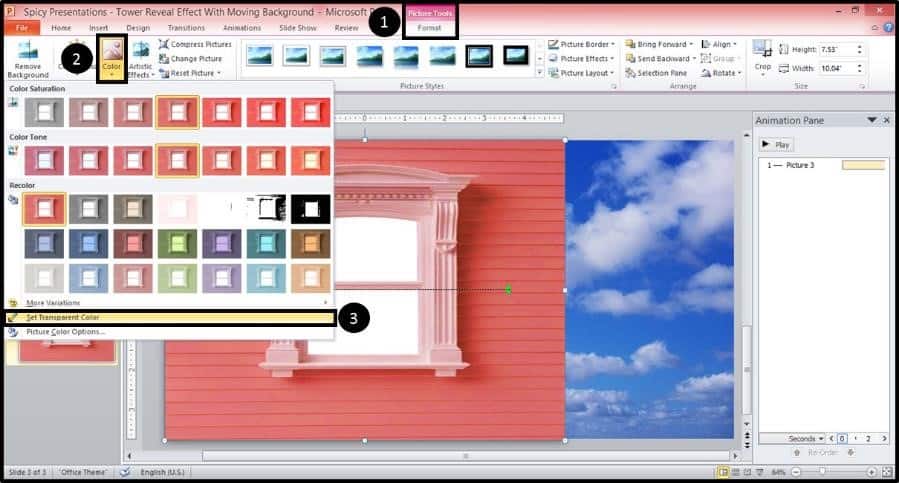 With Set Transparent Color selected, simply click the solid color of your window color to remove it.
Note: If your window has more than one color within it, or more than one shade of color within it, you will have to use the remove background feature.
With Set Transparent Color selected, simply click the solid color of your window color to remove it.
Note: If your window has more than one color within it, or more than one shade of color within it, you will have to use the remove background feature.

5. Change the color tone of the sky
If you like, you can also change the color tone of the sky to better match your window. Simply select the picture of the sky, then from the Picture Tools Format tab, select the Color dropdown and select a color. I’ve selected the blue accent color 5 light in this example.Conclusion
As you can see, what’s great about these techniques is that you can reuse these pieces or swap the out for others once you make them.
You can add a different sky (or a different background entirely) behind the window or the tower, for instance, once you have the background removed.
Or, you can use the sky with another window, such as a plane window, for example. You can also change the picture you’re revealing – so you can replace the tower picture for anything else that’s the same size if you add the same Split animation with the same timings.
Play around with these yourselves and see what other combinations you can come up with! If you enjoyed this tutorial, you can learn more ways to boost your PowerPoint skillshere.
What’s next?
About the Author

Spicy Presentations
Yulia Barnakova is passionate about helping people develop the skills and learning mindset to thrive in the digital age. She is always experimenting with emerging technologies and has been recognized by Microsoft as a Most Valuable Professional for her creative presentation technology tutorials, which have more than 8 million views on YouTube. Her recent TEDx Talk, Think You're Not Tech Savvy? Here's Why You Are, shows how everyone can (and must) develop the mindset and skill set to embrace technology.