If you’ve ever seen a presenter in PowerPoint click to reveal an object on screen (and then clicked to make that object disappear) and wondered how they pulled it off…
The answer is combining the Appear and Disappear animations with trigger animations in PowerPoint and setting them to ‘on click’.
This is an easy animation trick to pull off and works in all versions of PowerPoint 2007 and later.
It’s also the same trick we used in mouseover pop up text effect trick that you can read about here Everyone asked how we did it, so here it is.
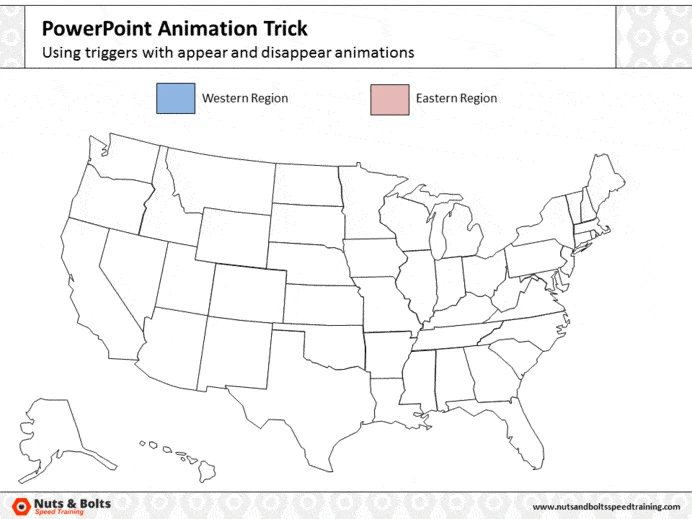

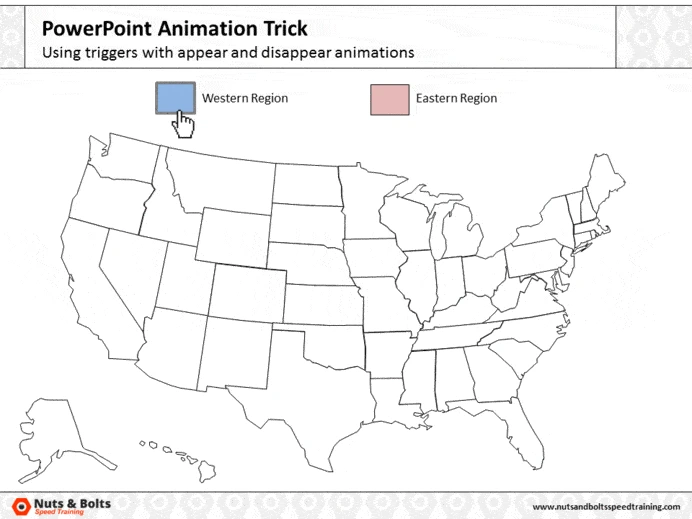
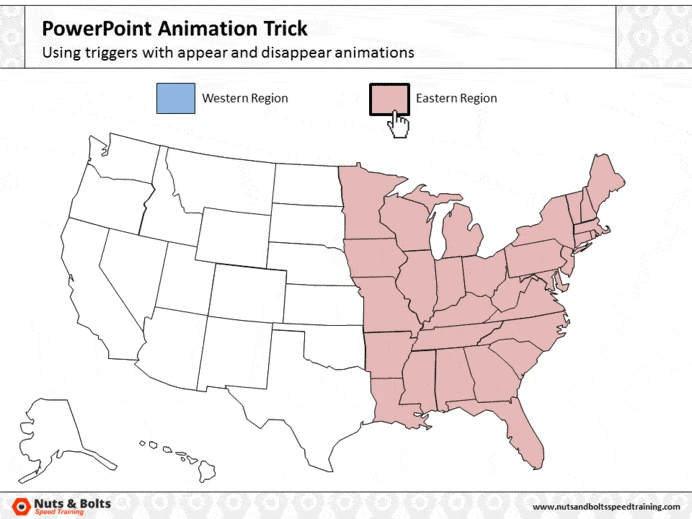
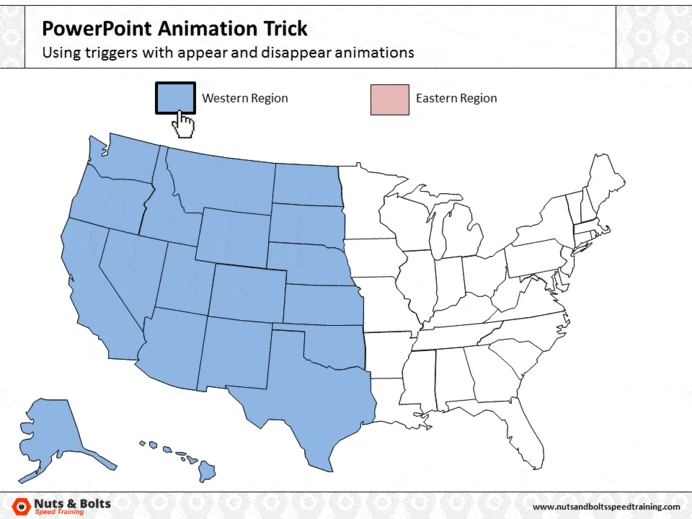
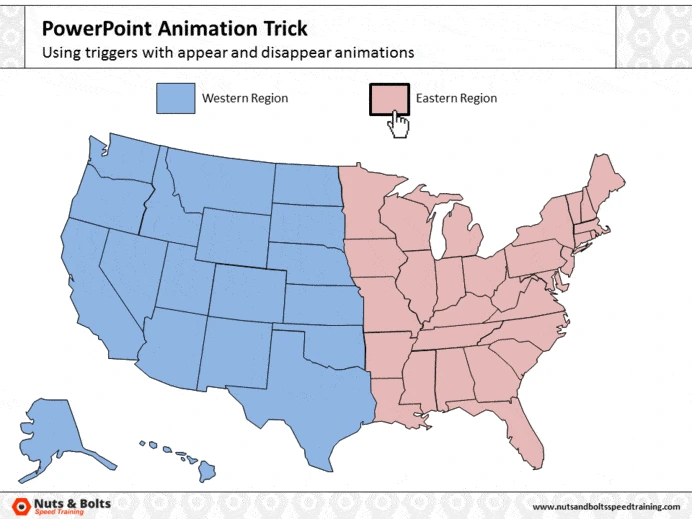
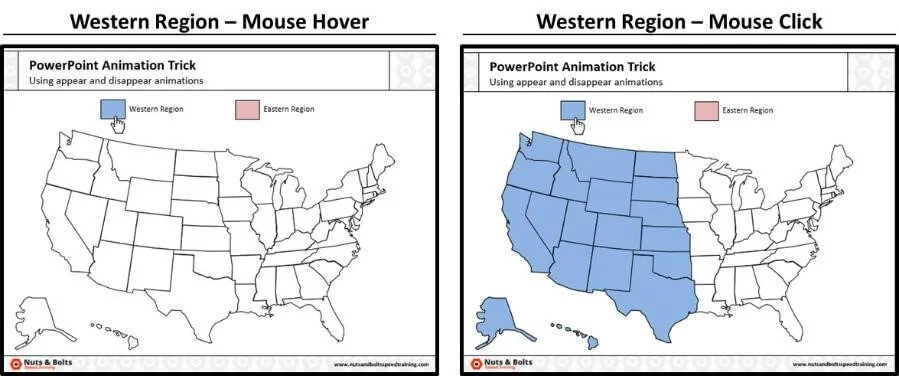
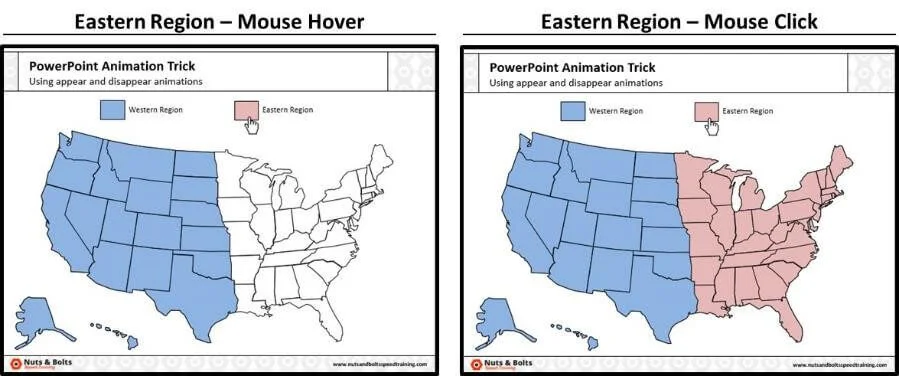
In the graphic above, you can see that when the Western Region button is clicked, the western region turns blue. When you click the Easter Region, the eastern region turns red.
Note: EPS files and graphics are no longer supported in PowerPoint. So if you have an old EPS graphic, see how to import it into PowerPoint here.
Setting up appear and disappear triggers
When is this animation trick useful?
This is a great trick (combining PowerPoint animations and triggers) that you can use when you a map, a picture, text or some other object in PowerPoint that you want to have appear on screen during your presentation you click an object (to help you prove a point)…WITHOUT moving on to a next slide!
That means that you can use this animation trick to make objects appear and then disappear (to help you prove a point) without advancing to a new slide…which is why it is such a clever PowerPoint trick.
Part #1: Set up your objects
In the below tutorial I will set up the vector map of the United States (as demoed in the video above).
That said, you can use these steps to set up any appear and disappear trigger animations to make anything appear or disappear on screen (pictures, objects, text, anything)
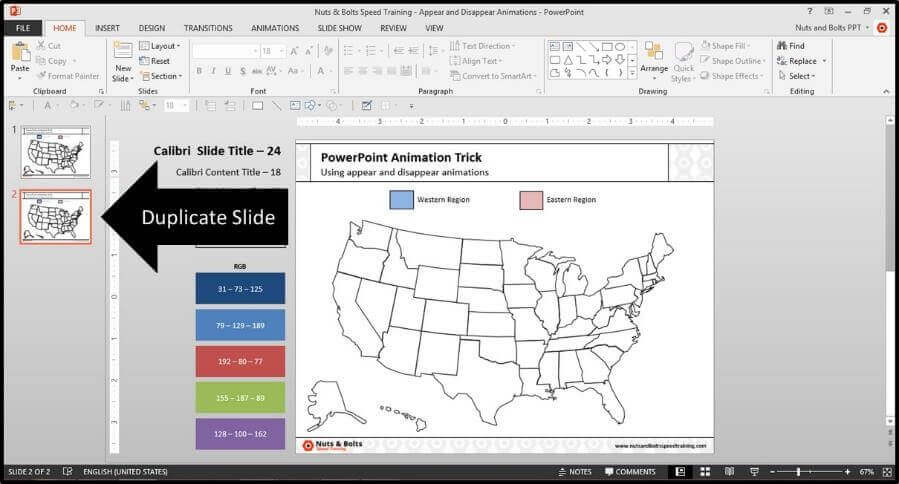
1. Set up the vector map
Starting with your vector map, on your keyboard, hit CTRL + SHIFT + D to duplicate your slide, so that you have two versions of the exact same slide.
To learn more about the Duplicate Slide shortcut,
The reason you want to duplicate your slide is because you want to overlay a filled version of your graphic over the original one.
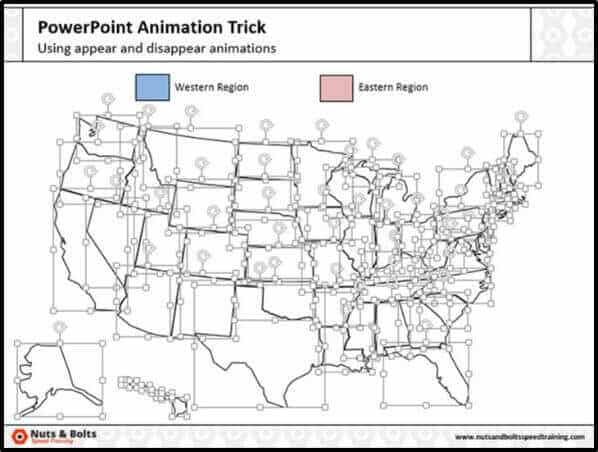
2. Un-group the vector graphic
On your duplicated slide, select your vector map (or graphic) and hit CTRL+SHIFT+G on your keyboard to ungroup the vector graphic.
This then allows you to work with and manipulate all of the individual pieces (that’s the beauty of using vector graphics in PowerPoint).
Ungrouping Shortcuts Explained
Besides CTRL + SHIFT + G ungrouping objects, you can also ungroup SmartArt graphics, as well as tables and charts if you first paste them as metafiles.
To paste a table or chart as a metafile, follow these steps:
- CTRL + C to copy your table or Chart
- ALT + SHIFT + V to paste special, and select one of the metafile formats
- CTRL + SHIFT + G the Metafile twice
To learn more about what you CAN and CANNOT group and ungroup in PowerPoint, check out our blog post here.
3. Group the pieces together
With the vector map now un-grouped, you want to group together the specific regions that you want to animate.
In this case, based on the data for my example, I’ll group the Western regions through Texas, and all the other states as the Eastern region.
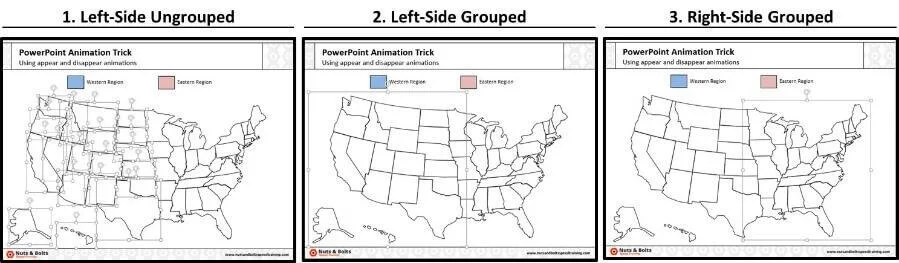
Why are we grouping the objects together?
Besides making it easier to pull off our PowerPoint animation, this is the trick to overlaying our vector map over our original vector map without having to re-align anything (no need to waste our time).
4. Fill the grouped regions with their respective colors
Select your different grouped objects and fill them with their respective colors.
In this example, I will fill the Western regions blue, and the Eastern regions salmon pink as denoted on the rectangles at the top of the slide.

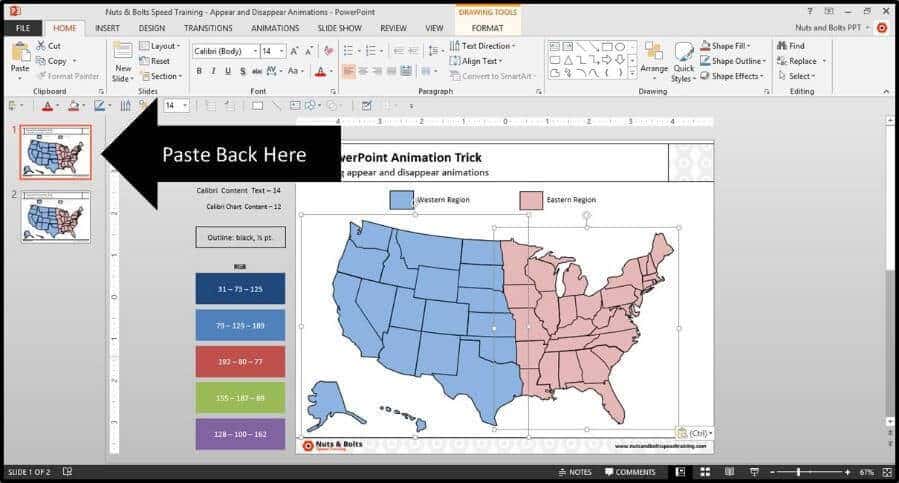
5. Copy and paste your regions back on top of the original vector graphic
With your regions grouped and colored, select them all, copy them, and then paste them back on top of the original (non-colored) vector map on the first slide.
Note: Because we grouped the objects together, they overlay exactly onto of the original vector map. Had we not grouped the objects together, they would not fit exactly over the top of the original map.
Don’t believe me? Try it…this is a killer bonus PowerPoint trick!
6. Open the Selections Pane
Back on your original PowerPoint slide, open the selections pane one of two ways:
Option 1: Using your mouse – navigate to the home tab, navigate to the Arrange tool and at the bottom of the dropdown select the selection pane.
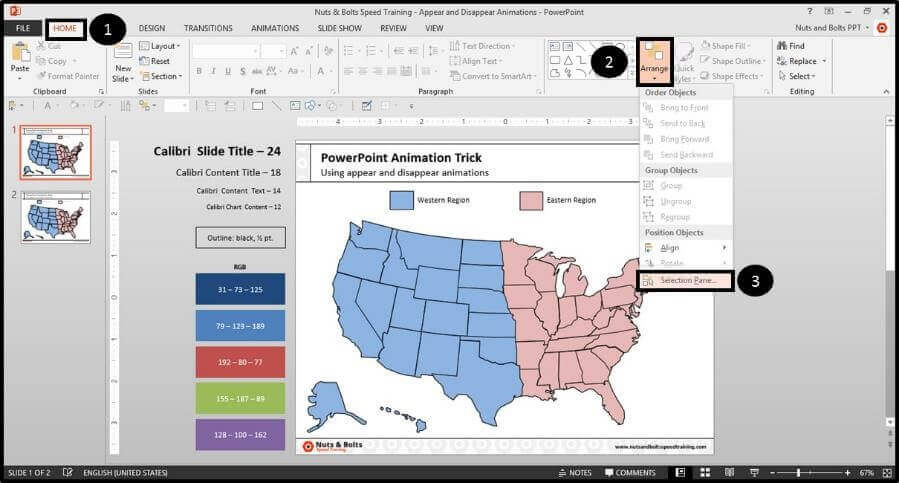
Option 2: Using your keyboard – hit the ALT + F10 keyboard shortcut and the selection pane pops open on the right-side of your screen.
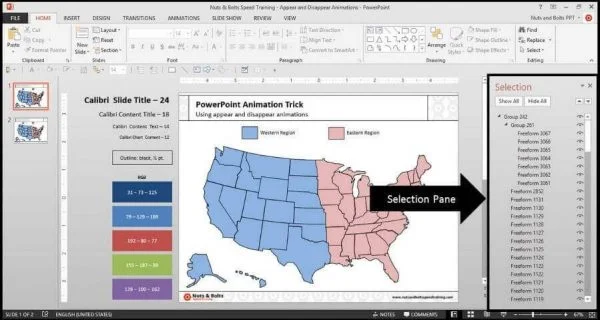
7. Name the trigger objects
Within the Selection Pane, scroll through your objects and find the shapes you want to use as triggers for the PowerPoint animation. In this case, I want to use the two rectangles at the top, so I need to scroll way down.
As the blue rectangle is Rectangle 1, so I will double-click the rectangle in the Selection Pane and label it as something that’s easier to remember like ‘Western Region’.
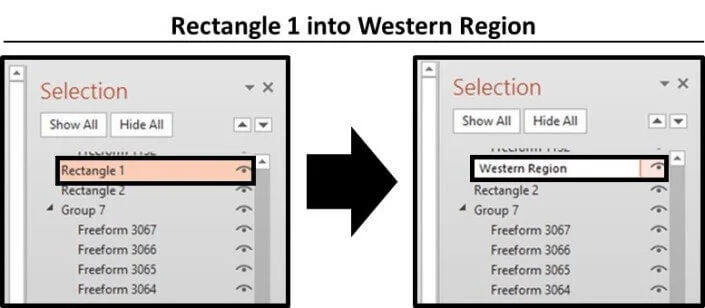
Next, we’ll do the same for the second trigger object. In this case the salmon pink rectangle is Rectangle 2, so I will double-click the rectangle and rename it ‘Eastern Region’.

Note: Renaming the PowerPoint objects like this is not necessary to pull off the appear and disappear animation trick, but it makes it A LOT easier, so I highly recommend this extra step.
With the trigger objects now named correctly, you can close the Selection Pane, either by clicking the X in the upper right-hand corner or by hitting ALT + F10 on your keyboard.
Part #2: Set up your animations
Now we need to hook up the appear and disappear animations and set them to trigger ‘on click’.
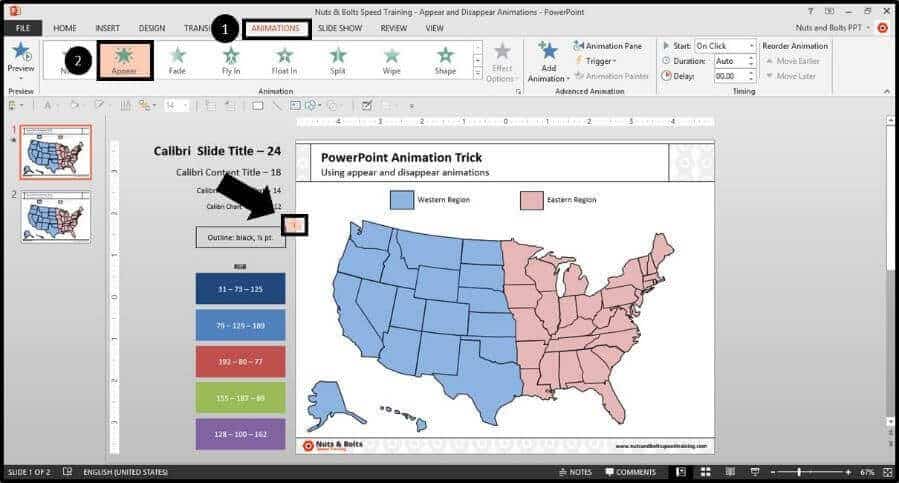
1. Hooking up your PowerPoint animations
Select the first group of states (I’ll start with the Western region in blue) and from the Animations Tab select the Appear animation. You should see a 1 appear next to the group.
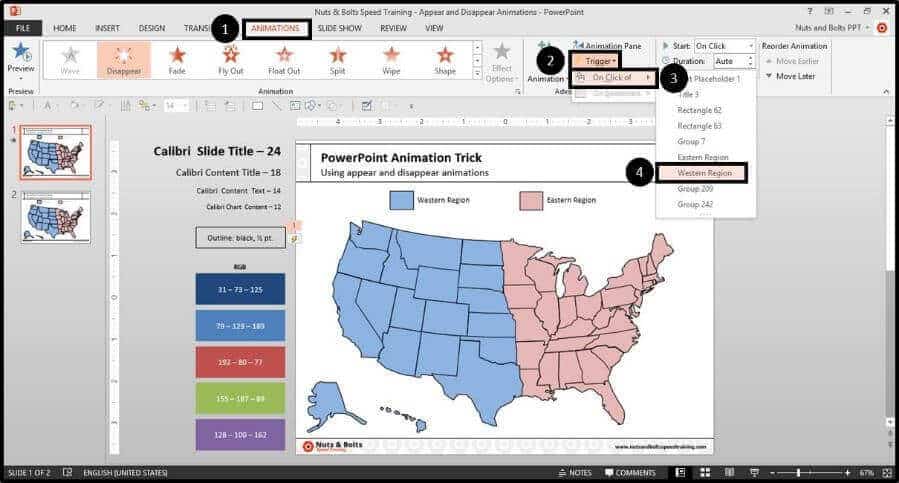
2. Starting the animation on click (click to reveal)
With the animation applied and the group still selected, from the Animations Tab, select Trigger, On Click of and select your named shape (Western region in this case).

3. Setting the second animation
With the Appear animation set, you now want to add a second animation – Disappear – to that same group.
So with the group selected, from the Add Animation drop down, scroll down and find the Disappear animation.

4. Setting the disappear animation’s trigger (click to disappear)
With the second animation added, you again want to navigate to the Trigger drop down and select On Click Of and select your trigger shape, again the Western Region in this case.
So your first group should have both an Appear and Disappear animation set to it, based on the trigger event of clicking the blue rectangle.
5. Repeat the same sequence for your other grouped shapes
- Add the Appear animation
- Set the Appear animation to On Click of your other shape, the Easter region in this case
- Use the Add Animation drop down to add the Disappear animation
- Set the Disappear animation to On Click of your other shape, again the Easter region in this case
The result is that each of the rectangles on your PowerPoint slide should now have two animations both set to trigger with a click: an Appear animation and a Disappear animation.
This is how you get that click to reveal and click to disappear effect using trigger animations.
Part #3: Test your trigger animations
Now that you everything setup, it’s important to test it before you call call your presentation final.
Follow these steps to test your animated sequence.
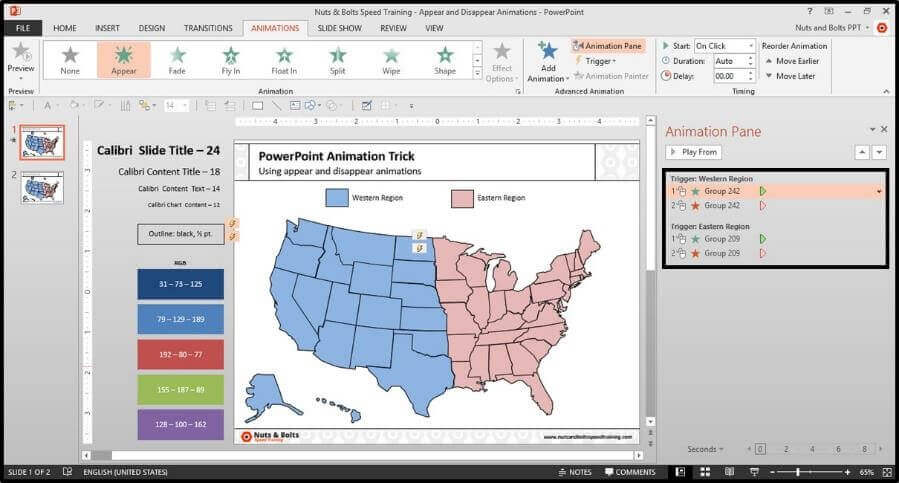
1. Open the Animations Pane to double check your work
If you open the PowerPoint Animations Task Pane, it should look like the below image. The green star is the Appear animation and the red star is the Disappear animation.
Make sure that the object appears (the green star) before it disappears (the red star), otherwise this Animation trick will not work.
2. Test your trigger animations to make sure they work
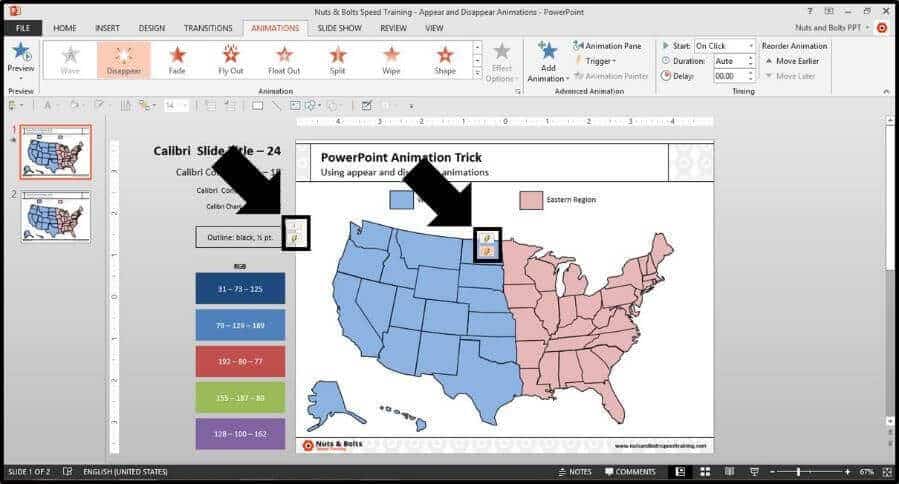
With the animations set, hit SHIFT + F5 on your keyboard to launch Slideshow View (see shortcut demo below for help with this), and the slide starts out as the non-filled vector map (just like we wanted).
If I click the blue trigger rectangle (the Western Region), the western side of the map fills blue (perfect!).
If I click the red trigger rectangle (the Eastern Region), the eastern side of the map fills red.
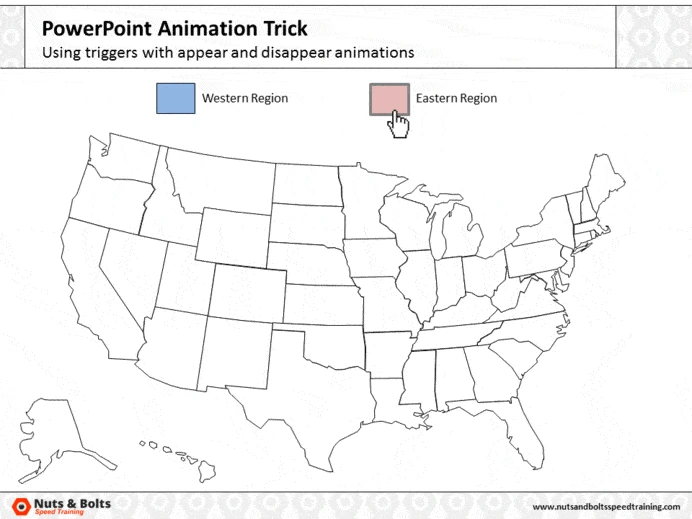
So you can see that clicking the rectangles, makes the PowerPoint animation appear then disappear, revealing our objects…which is exactly what we want!
Conclusion
So that’s how you can use the appear and disappear animations (with trigger objects) to create an interactive graphic in PowerPoint.
The great thing about this trick is you can quickly and easily create a sophisticated graphic to impress your audience. Trust me, they will be impressed!
To learn more about our training courses and other PowerPoint tutorials, visit us here.
About the Author

Nuts & Bolts
With our famous PowerPoint tips, training and self-paced courses, we help presenters save hours and gain peace of mind. Discover the career-changing wow moments that will transform not just the way you approach your presentations, but also how you tackle your work tasks in general.