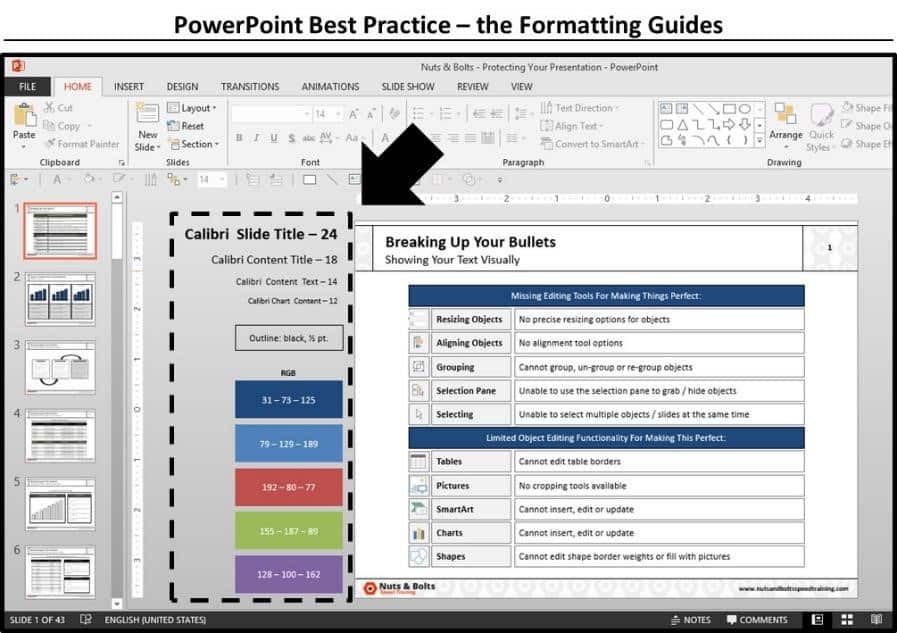
When people see our slides, they often ask us: “What is all that stuff there on the left side of your slides and how do I get them on mine?”
“All that stuff” is what we have dubbed the “Formatting Guides” and in our opinion, is one of the cleverest PowerPoint best practices you can implement today, to save time…which is why you’ll see them across our website in our slide examples, screenshots and videos.
You might say: “But, isn’t that what creating your own custom PowerPoint theme is for in the first place?”
The answer is yes…but the formatting guides will take your formatting selections to the next level, by creating a visual guide of all the formatting that needs to be used, and give someone the bread crumbs they need to recreate your theme if they need to.
That’s why we consider it as one of the cleverest, and low tech, PowerPoint best practices that you can immediately implement today.
These breadcrumbs will also never show up when you present your presentation or convert your presentation to the PDF file format.
To learn how to convert your PowerPoint presentation into a PDF, read my guide here.
Setting up your formatting guides
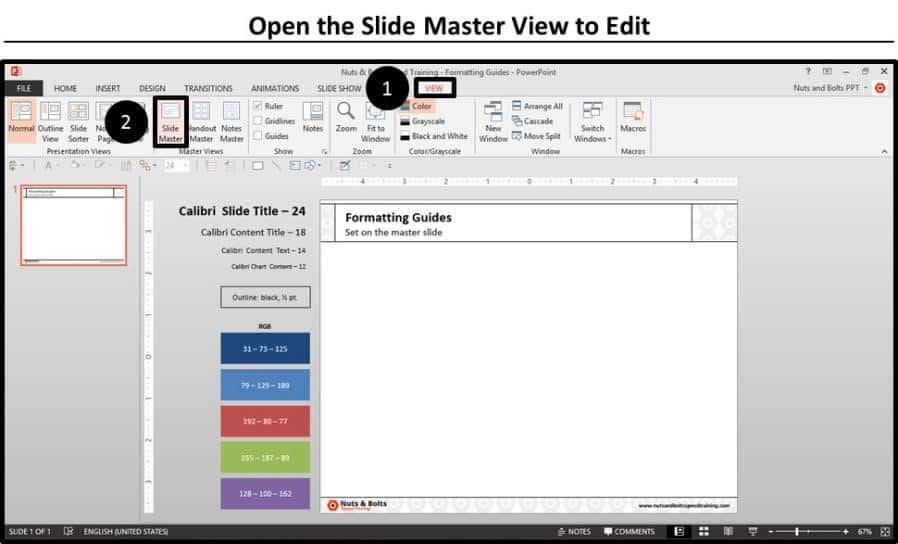
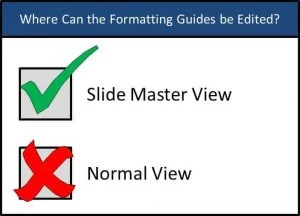
1. Open the Slide Master View
First off, you want to add the formatting guides in the Slide Master View of your presentation, next to the parent slide. And there are number of placement advantages for doing so (as discussed below).
But first off, if you’ve never navigated to the Slide Master View before, from the View tab in your Ribbon, select Slide Master.
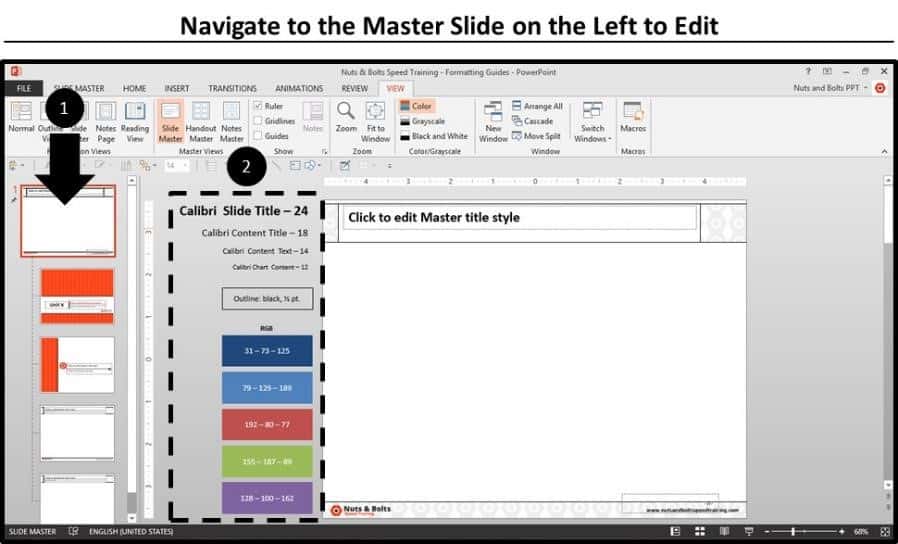
2. Navigate up to the Parent Master Slide
Once in the Slide Master View, on the left hand side of your screen, select the Parent Slide, or largest slide, on the left. This is where you want to add the Formatting Guides to take advantage of the three placement advantages discussed below.
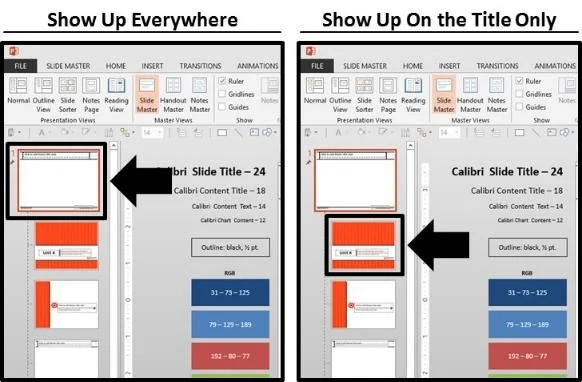
Advantage #1: They show up everywhere
Once on your Slide Master, the formatting guides will show up everywhere within your presentation, or at least in enough places (you can toggle them off for specific layouts) that there is no way to “accidentally” not see them.
Additionally, if you ever need to update the formatting guides, you can update them all at once (on your Slide Master) and have those changes carried through to all of your slides!
Now, if you feel it’s too distracting to have them show up everywhere within your presentation, you can alternatively add them to the left side of your Title Slide (or other) layout and only have them show up on that specific layout.
Advantage #2: You can’t accidentally delete them
p>Once the formatting guides are set within the Slide Master view of your presentation, they are “un-selectable” and “un-editable” in the Normal View of your deck.As such, they won’t get in your way and if someone does want to change them (if they dare), they’ll have to purposefully navigate to the Slide Master view to do so.
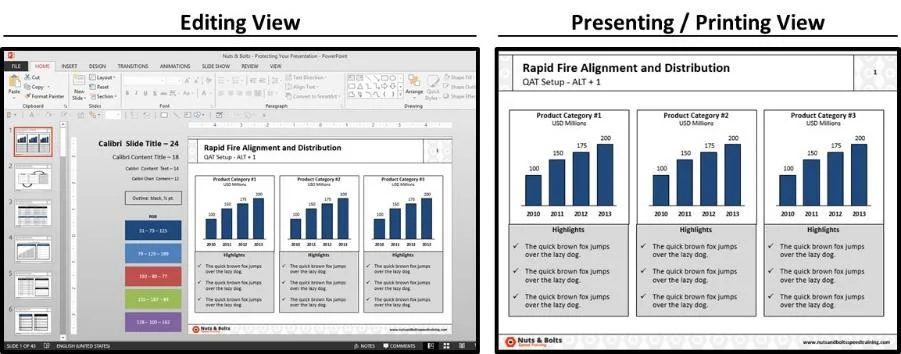
Advantage #3: They don’t print on show onscreen
Placing the formatting guides on the outside of the slide space ensures that they will NEVER show up when presenting or printing your presentation.
So they are there when you need them, building out your presentation; but they aren’t there when you don’t need them, presenting or printing your presentation.
3. Add your Formatting Guides off the slide space
What to include in your Formatting Guides
You can include as much or as little formatting guidance as you want, but our recommendation is that you should include the font styles (spelled out), font sizes, outline weights, hard code the fill colors to match the theme colors that should be used within your presentation, and include the RGB or HSL codes for your colors (see explanation below).
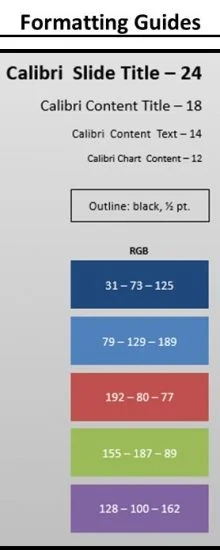
If you use additional formatting elements in your presentations like drop shadows, bevels, etc., you can add those to your Formatting Guides.
Tips for adding colors to the Formatting Guides
Another thing we recommend doing is typing in the formatting guide color codes in two different places:- Within the color dialog box (hard coding the color in)
- Within the Formatting Guide rectangles themselves
Hard coding the colors in
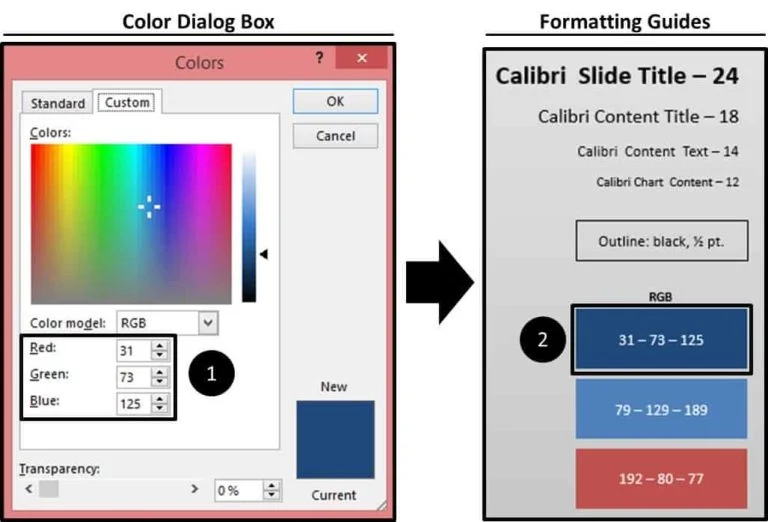
The first place to type the color codes in, is in the color dialog box. This ensures that regardless of the PowerPoint theme someone is using (or changes your presentation to), the formatting guides retain the correct coloring.Notice in the picture below that even though I’ve selected a new theme color, the formatting guides remain the same.
 If you’ve never hard coded RGB or HSL codes before, simply open up the shape fill dialog box, and select More Fill Colors to open up the Color dialog box.
On the Custom tab, all you need to do is re-type the codes that are currently in each menu item there. So for Red, you would simply place your cursor where “31” is and type “31” on your keyboard, etc. And now it’s hard coded in.

Typing in the colors codes into the Formatting Guides
The second place you want to add your color codes, is in the Formatting Guide rectangles themselves, to act as the Hansel and Gretel bread crumbs that someone can use to rebuild your theme colors if they need to.
As you can see on the right, I simply type them in with dashes separating the numbers.
Conclusion
Yes, in an ideal world full of unicorns and cotton candy clouds, you would create your own customized theme, distribute it to everyone properly and everyone would actually use it.
But until we see unicorns crossing the street and edible clouds floating in the skies, the formatting guides is your best insurance policy (that we know of) to police formatting consistency across your presentations.
To learn more about PowerPoint best practices for building templates, read our guide here.
If you enjoyed the depth of this article, you can learn more about our PowerPoint training courses and other free resources here.
What’s Next?
About the Author

Taylor Croonquist
Co-Founder, Nuts & Bolts Speed Training
Taylor Croonquist is a PowerPoint expert and trainer. Over a career spanning the globe, from consulting in New York and investment banking in China, Taylor has truly seen it all in PowerPoint. Through necessity and a natural tech savvy, Taylor honed his PowerPoint skills to the point of even blowing the minds of the Microsoft PowerPoint programming team. When he's not busy crafting PowerPoint training, you can find him reading a sci-fi series or scuba diving.