In this guide, you will learn how to make an image transparent in PowerPoint, regardless of which version of PowerPoint you have.
If you have the latest version of Microsoft Office (Microsoft 365), there is a BRAND-NEW transparency tool built right into the Picture Tools Format tab making this easier than ever.
If you have an earlier version of PowerPoint, jump to the next section to see how to create the transparent picture effect below.
Make an image transparent in Microsoft 365
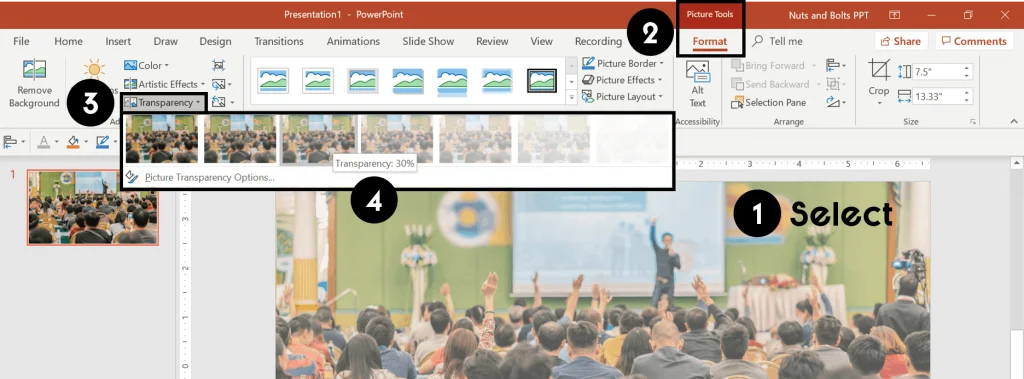
To make an image background transparent using the Transparency Tool in the Microsoft 365 subscription, simply:
- Select the image you want to make transparent
- Navigate to the Picture Format tab
- Open the Transparency Tool options
- Choose from one of the preset transparency options or click on Picture Transparency Options to choose a custom setting
 The higher percentage of transparency you apply to your picture, the more you will see design elements and objects behind your picture. Currently, this NEW transparency tool is only available inside the Microsoft 365 subscription. Hopefully, it will be added to the standalone version of PowerPoint 2019 soon (but I’m not holding my breath).
Instead of making your image background transparent, you can also remove your image background. To see how to do this, read our guide here.
To expand your knowledge and learn how to compress images in PowerPoint to make your presentations easier to share, read our guide here.
If you don’t have an Office 365 subscription, you are still in luck! While creating transparent images is one of those zany things that is technically impossible in PowerPoint, you can use the below work around to accomplish the same thing as pictured below.
How to make an Image Transparent (Pre-Microsoft 365)
To get access to all our best PowerPoint speed training courses and resources for one affordable monthly price, check out our PowerPoint Pro Membership here.
1. Insert a rectangle onto your slide
From the Insert tab, find the Shapes gallery, select a rectangle, and draw it onto your slide so that it’s the same height and width as your picture.
Once that’s done, move the rectangle a bit to the side. We will use the rectangle in the next step, but we do not want to bury our picture as we need it as well.
PRO TIP: If your rectangle isn’t the same height and width as your picture, your picture will become distorted. To avoid any distortion, triple-check that your shape is the same height and width as your image before you continue.

2. Copy your picture
Select your picture and hit CTRL+C to copy it.
For other cool things you can do with the Copy, Clipboard Copy and Paste special shortcuts, check out the video below.
To expand your knowledge and learn all about the Copy shortcut, including how to copy formatting in Word and PowerPoint, read our guide here.
3. Open the Format Shape dialog box
Right-click your shape, select the ‘Format Shape’ dialog box and navigate to the Shape Fill section.
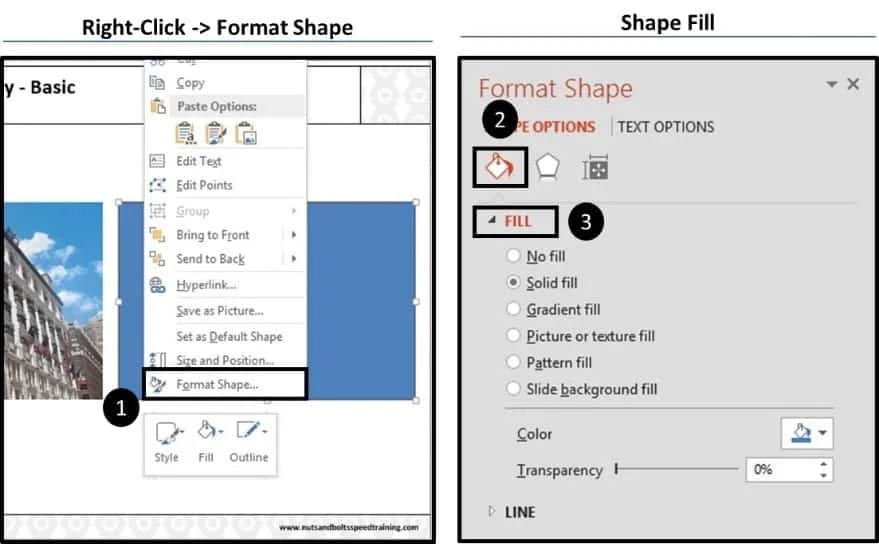
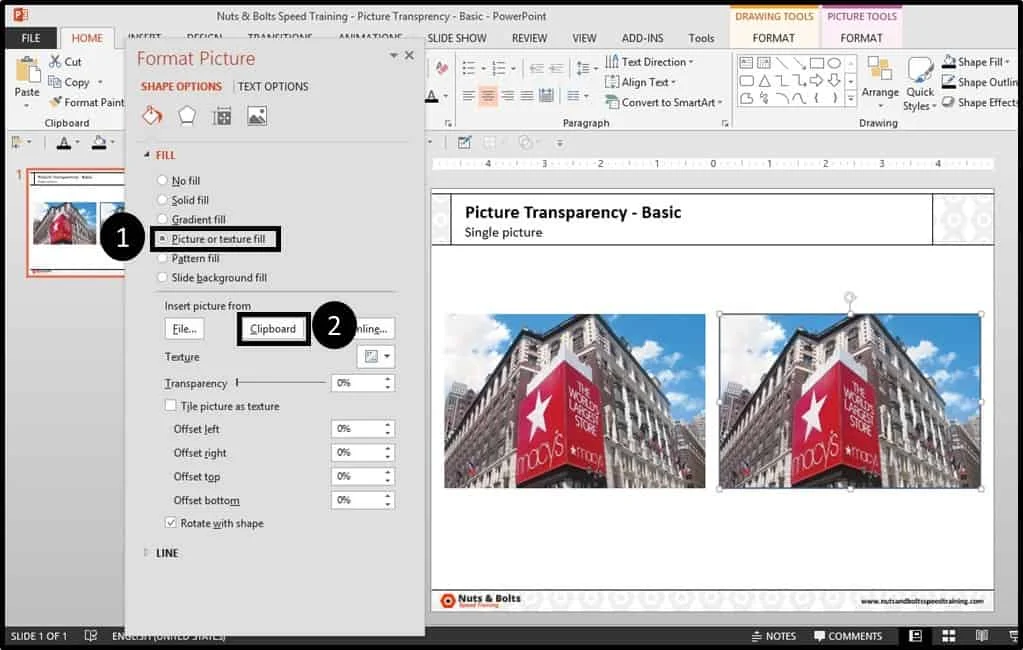
4. Select ‘Picture or texture fill’
Here you have quite a few options to work with. Since your picture is already on your slide and you have already copied it, just click the ‘Clipboard’ button. Doing so, your rectangle will fill itself with the picture.
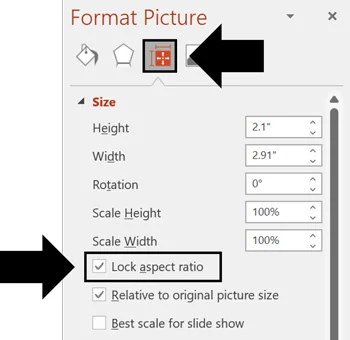
PRO TIP: Lock Your Aspect Ratio
Whether you are making a transparent image or not, I highly recommend locking the aspect ratio of your rectangle.
That way your image won’t accidentally get stretched and warped when you (or someone else) resize the shape.
To lock the aspect ratio of your rectangle.
- Right-click your rectangle and select Size and Position
- Tick the box next to Lock aspect ratio
Option: Fill from File
Another option – the slower method – is to fill the shape with a picture from a file on your computer by choosing ‘File,’ and then selecting a picture.
This method can be used when the picture is not already on your slide, but you risk warping it if the dimensions aren’t right (see warning in step #1).
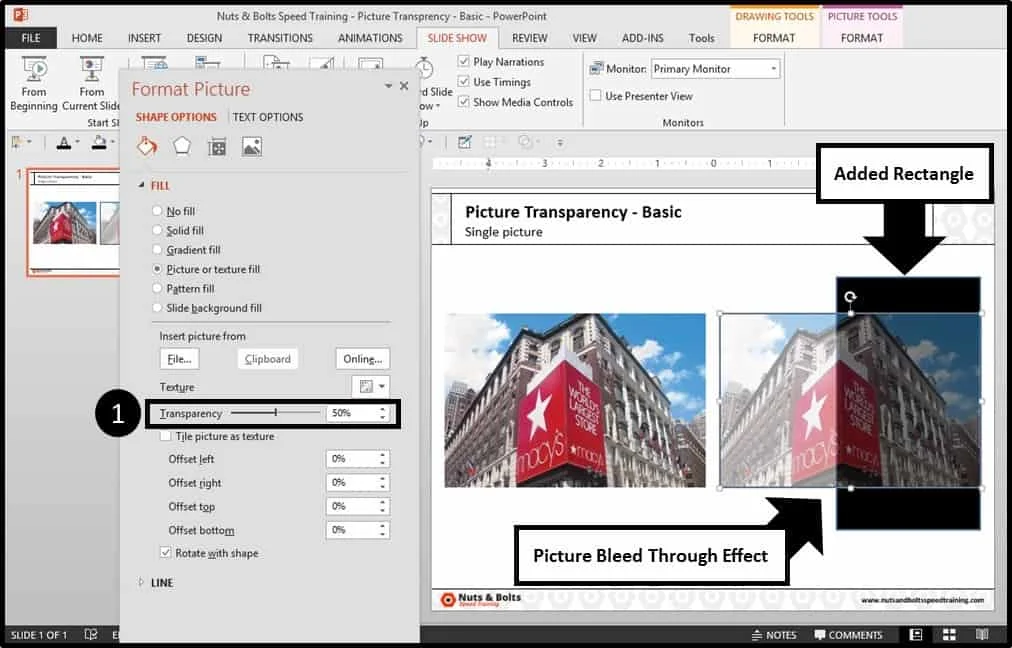
5. Adjust your image transparency settings
Now to make your picture transparent, simply use the transparency slider or input the % of transparency you would like. In this case I’m using 50%.
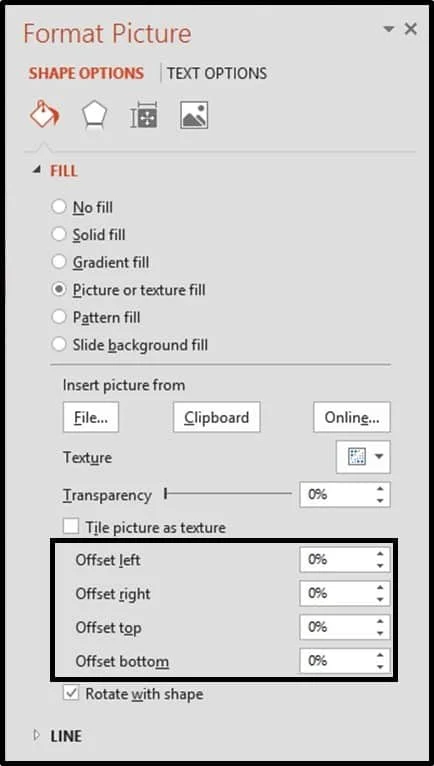
Troubleshooting warped pictures
If your picture appears warped or stretched, here are two things to double-check:
- Check that your rectangle has the same height and width dimensions as your picture. If your rectangle is larger or smaller, your photo will be stretched.
- Check that your offset values at the bottom of the dialog box are all set to 0%.
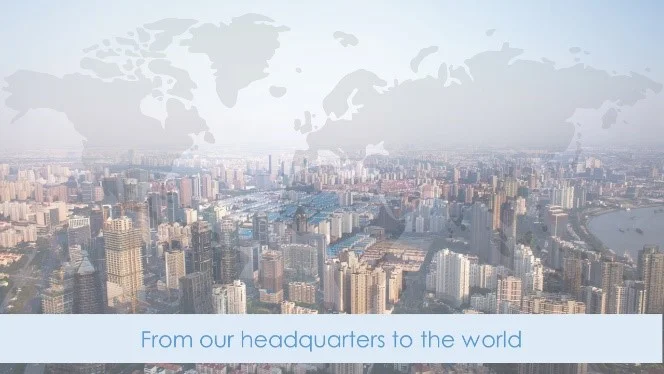
Transparent Background Examples
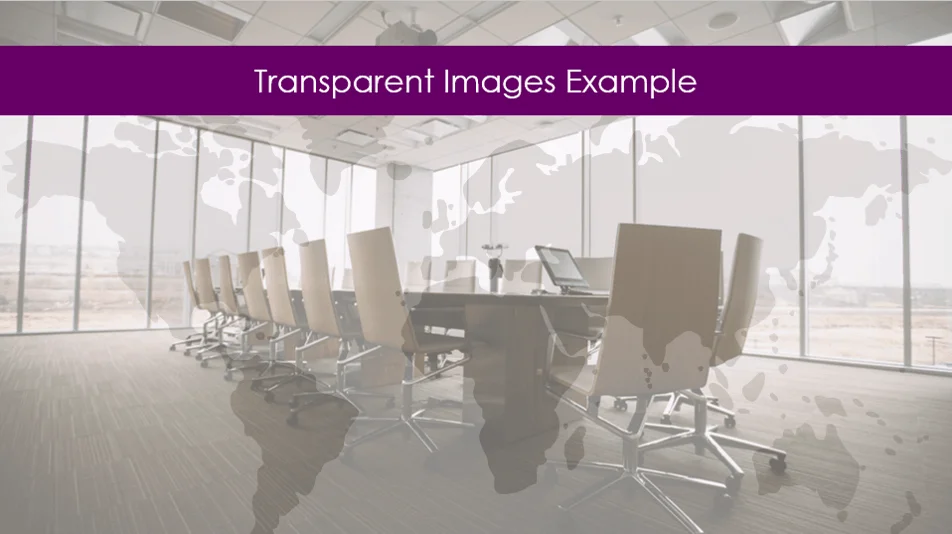
You might be wondering when you’d ever want to make an image or picture transparent?
The primary reason is that it opens cool image overlays, allowing you to combine two different images together in one.
Below are some examples of transparent images that I’ve stacked on top of each other to create cool effects. And as you can see, the sky is the limit!

Conclusion
As you can see, regardless of which version of PowerPoint you are using, you can create transparent pictures without having to use Photoshop.
The easiest way is with the new transparency slide in the Microsoft Office 365 subscription. This allows you to quickly make your image backgrounds transparent.
If you enjoyed this tutorial and want to take your PowerPoint skills to the next level, you can check out our PowerPoint training courses and resources here.
About the Author

Taylor Croonquist
Co-Founder, Nuts & Bolts Speed Training
Taylor Croonquist is a PowerPoint expert and trainer. Over a career spanning the globe, from consulting in New York and investment banking in China, Taylor has truly seen it all in PowerPoint. Through necessity and a natural tech savvy, Taylor honed his PowerPoint skills to the point of even blowing the minds of the Microsoft PowerPoint programming team. When he's not busy crafting PowerPoint training, you can find him reading a sci-fi series or scuba diving.