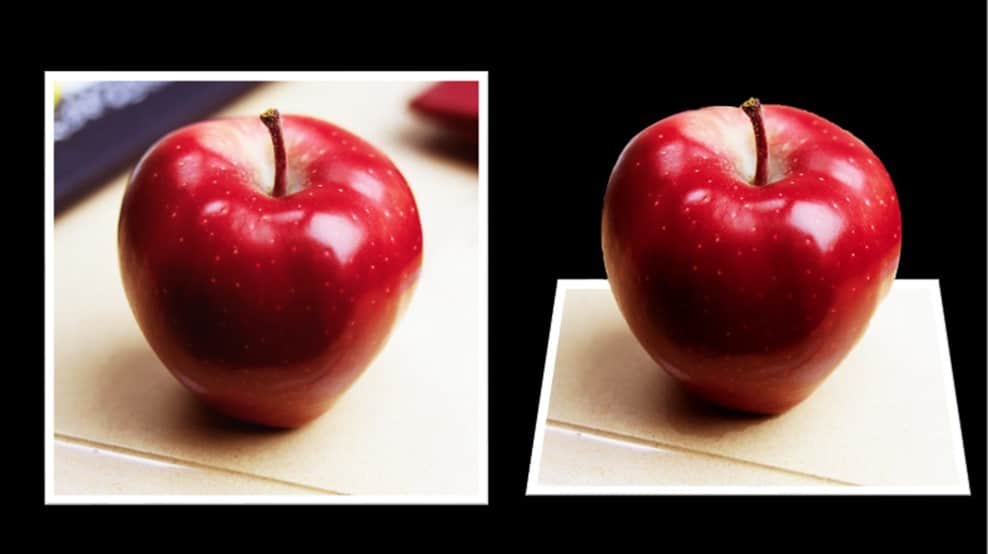
In this tutorial you’ll learn how to spice up your presentations by creating 3D pictures (also known as out of bounds pictures).
And the cool thing about this technique is you can quickly and easily pull it off in PowerPoint (no Photoshop required).
These background removal and picture cropping techniques work in all versions of PowerPoint 2010 and later.

The overall process for creating 3D pictures in PowerPoint can be broken down into three straightforward steps (all detailed below):
- Find a good picture to create the 3D effect with
- Frame your picture in PowerPoint
- Create the 3D effect
[Watch] Creating a 3D picture in PowerPoint
You are currently viewing a placeholder content from Youtube. To access the actual content, click the button below. Please note that doing so will share data with third-party providers.
More InformationPart #1: Find a good picture
When creating 3D pictures in PowerPoint, you want to start with good pictures and make sure that the parts that you want to pop-out (the 3D effect) meets two specific criteria.
Picture Criteria #1. High contrast
You want to make sure that your object stands out starkly from its background, as opposed to blending in with its background.
For example, the top of the below apple has good contrast (and is great for the 3D effect), whereas the bottom of the apple with the shadow does not, as it blends in with the desk.

Picture Criteria #2. Completeness
You want to make sure that your object is complete and not cut off.
For example, in the below picture of the couple, the right-side of the photo is good for creating the 3D picture pop-out effect (as everything on that side of the photo is whole and complete) whereas the left-side of the photo is not good for this effect, as the photo is cut off.

Note: Your picture doesn’t have to be perfect. Keep in mind that only the object within your photo that you want to create the 3D pop-out effect for needs to meet the above criteria. The picture itself doesn’t need to be perfect.
Part #2: Frame your picture
Step #1. Duplicate Your Picture
With your picture selected in PowerPoint, Copy and Paste the image to make a copy (or hit CTRL + D on your keyboard for PC users) and move it off to the right-side of the screen. We will use this copy in part 3 of this tutorial.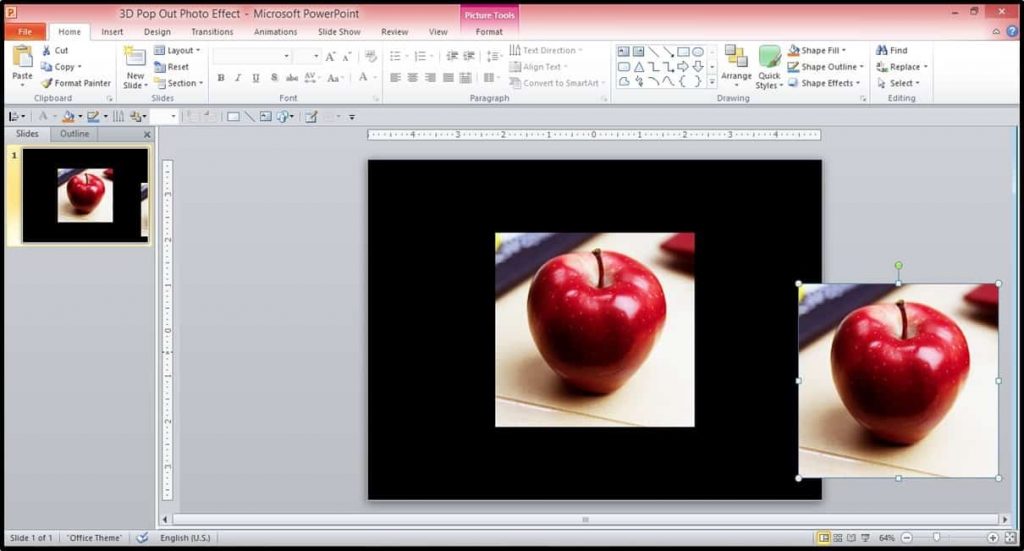
Step #2. Add a Border to Your Picture
Select the original picture in the center of your slide and from the Picture Tools Format tab select the Simple White Frame on the far left of the picture styles to make the image look more like a photo.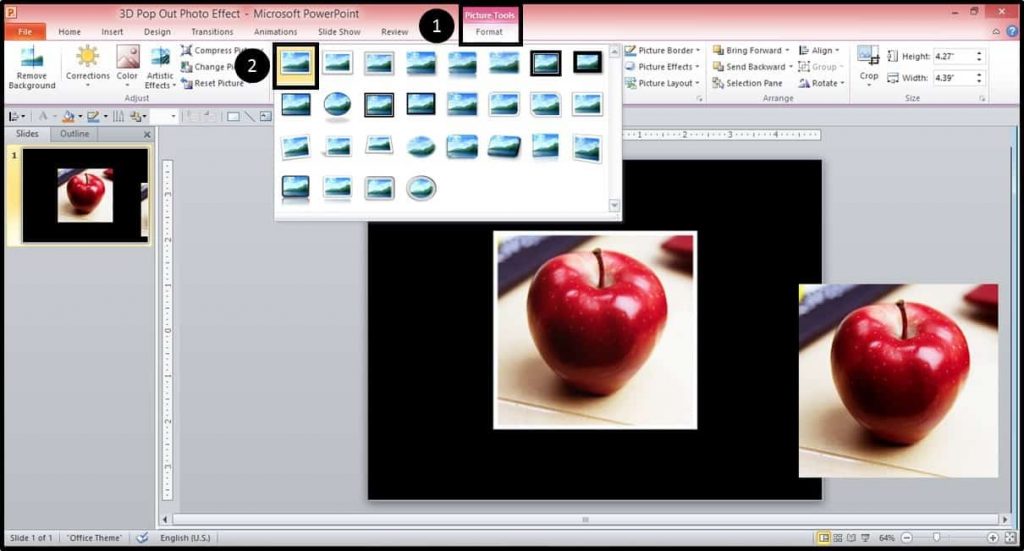
Step #3. Crop Your Picture into the Shape of a Trapezoid
With the picture frame applied (and the image still selected) open up the bottom portion of the Crop menu, select Crop to Shape and within the Shapes Gallery, select the trapezoid shape.
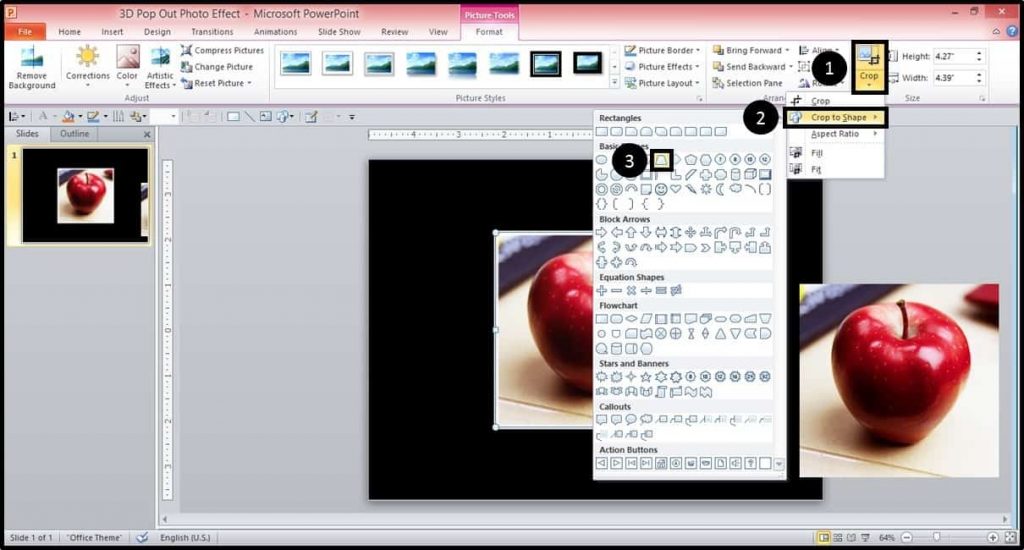
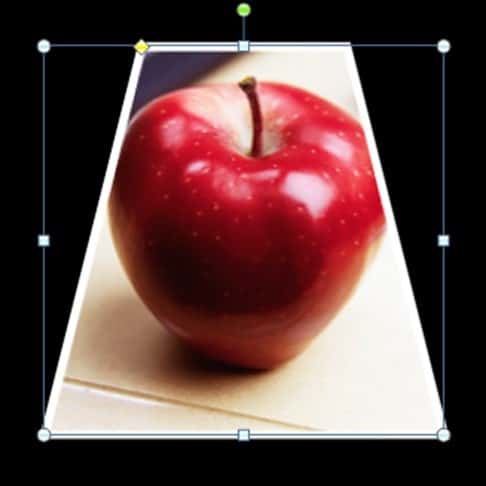
Step #4. Adjust The Trapezoid Angle
With the picture cut into a trapezoid, adjust the angle of the trapezoid so that you can see the entirety of the shape that you want to have pop-out of your picture (creating the 3D effect).
To adjust the angle of the trapezoid, select the yellow diamond at the top of the shape with your mouse and adjust it manually to fit your picture.
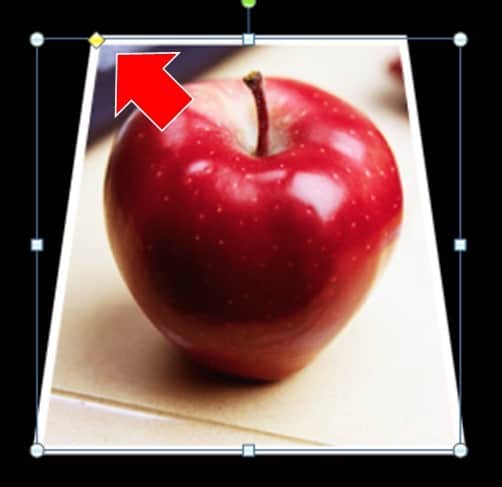
Step #5. Crop Your Picture Down
With the trapezoid angle set, hit the top portion of the Crop command (adds black dashed lines around your picture) and pull down the black lines (the center black line in this case) that frame your photo so that most of your image is cropped out (this will make sense in a moment).
For this image of an apple, I’ve cropped it just below where it will be popping out (in the next step).
For more help cropping your images in PowerPoint, see how to crop a picture in PowerPoint.
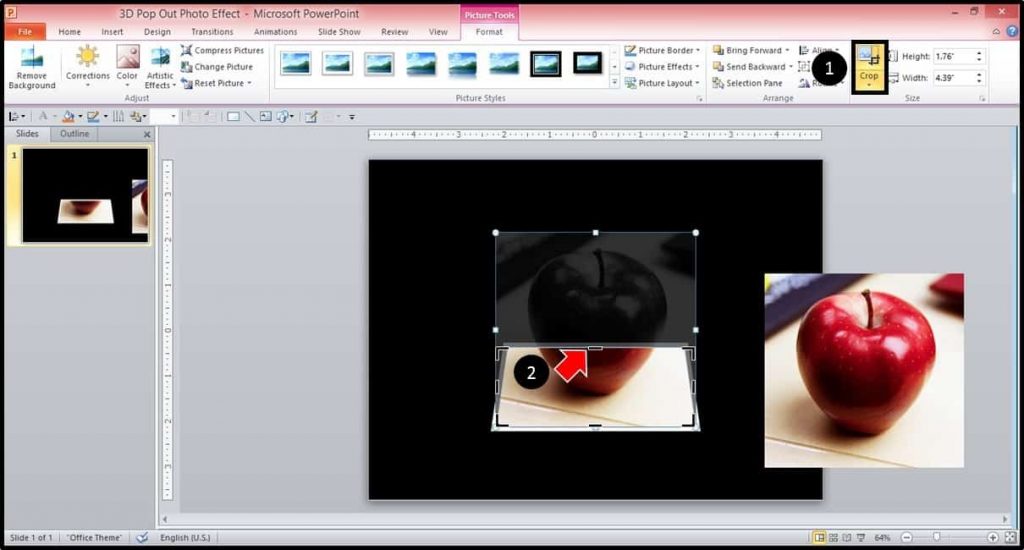
Part #3: Create your 3D effect
With the first picture all set up and cropped, now we’ll use the duplicate image we created in Part 2 Step #1 to create the 3D picture effect.
Step #1. Remove the Background from Your Second Picture
Select the second, duplicated picture (I’ve moved it back into the center of my slide) and from the Picture Tools Format tab, on the far left, select Remove Background.
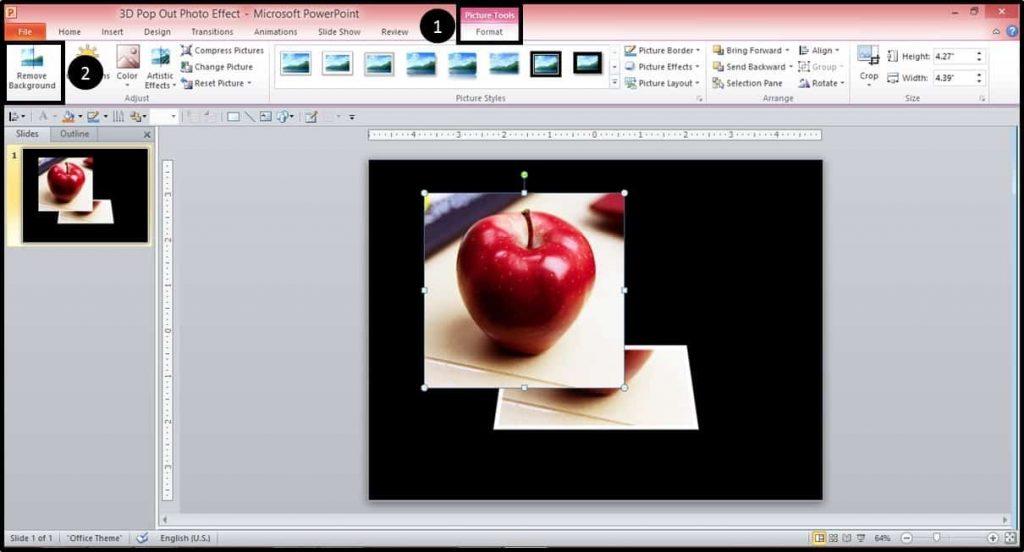
Next, make adjustments to your photo using Mark Areas to Keep and Mark Areas to Remove commands in your Ribbon, until you have the entirety of your picture framed and the background that you want to remove in pink (see below image).
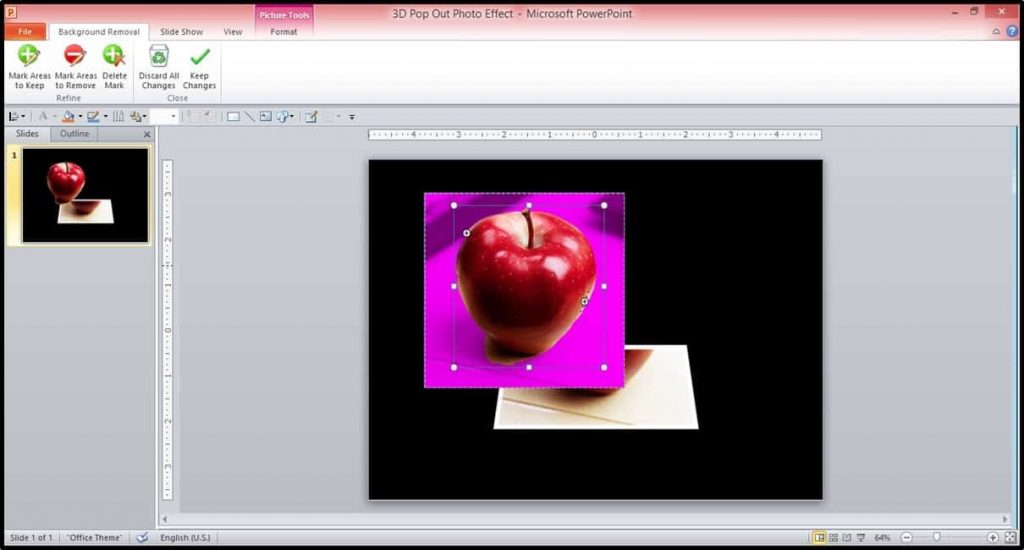
Removing the background from an image can take some time, depending on your photo and how precise you’d like to be. When you are finished, hit Keep Changes in the Ribbon.
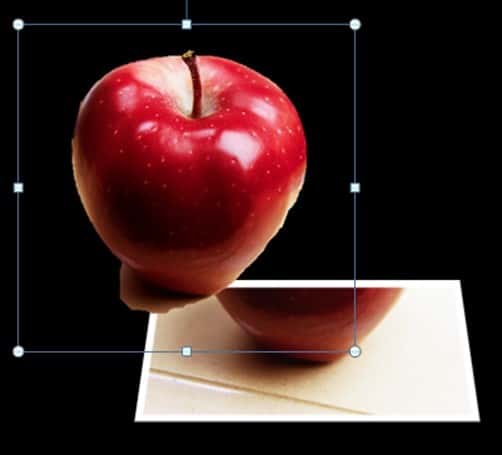
Step #2. Set the Image on Top of Your Cropped Photo
With the background removed from your picture, simply place it over your other cropped picture, aligning the two exactly, and you have created the 3D Pop-Out Effect here in PowerPoint!
If you find that your image is too big at the end, you can reduce your file size by compressing your images.
For help compressing your images in PowerPoint to reduce your file size, read our guide here.
Note: You can play around with the background trapezoid image (that we created in Part 2 Step #6) to adjust the 3D Pop-Out Effect

(Optional Step) Moving from the static photo to the 3D pop-out photo in Slideshow Mode:
From here, if you want to create the same 3D pop-out effect that I did in the video tutorial above (transitioning from the 2D image to the 3D image), you can either:
- Set the 2D image on top of your 3D image and use a PowerPoint animation like the Disappear animation, to transition from the 2D picture to the 3D picture.
- Set the images up on two separate slides (in exactly the same position) and use one of the PowerPoint transitions (such as Fade or Wipe) to transition from the 2D picture to the 3D picture.
