Here’s a cool PowerPoint photo trick that most people think can only be done in Photoshop. It’s actually super easy to do in PowerPoint too – especially if you have version 2010 or higher (though it can be done in earlier versions too).
The trick is basically having one part of the picture in color while the rest is black and white, such as in the examples below.

Want the slides to see what I did? You can download these picture examples to see what I did by clicking here.
Creating the Color Pop Picture Trick
1. Duplicate your picture
First off, you need 2 separate copies of your image to pull this picture trick off. So in PowerPoint with your photo selected, hit CTRL+D to duplicate it.
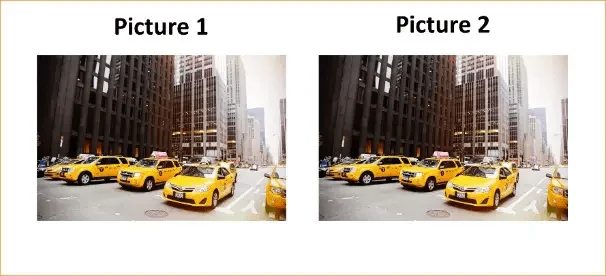
2. Recolor one of the images as greyscale
Now select one of the photos (we need to make it black and white) and navigate to Format, Color, Recolor and choose Greyscale.

Instead of making your image greyscale, you can also use one of the artistic effects. To see how to use the artistic effects to turn your image into a black and white drawing, read our guide here.
3. Remove the background from the second picture
Next, take the second photo, choose the subject that you want to pop out (make sure it’s very distinctly separated from what’s around it), and then go to Format, Remove Background, and remove everything outside of the subject.
Make sure to add extra marks to indicate which areas to keep and which to remove to make it cleaner, as I did below.
To learn all about how to remove backgrounds from images in PowerPoint, read our guide here.

4. Layer the two pictures
Now just lay the second photo over the first… and there you have it! Super easy, right?

5. Save your new creation as a picture (optional)
If you want, you can now select both layered pictures, paste as a picture, and apply picture formatting.

Note: If you have an earlier version of PowerPoint, then you’ll need to remove the background in a separate program. You can do that either using something online like Clippingmagic or Background Remover or draw on the background in a drawing program like MS Paint (included in PCs) and then use the Set Transparent Color feature in PowerPoint.
For a demo of this latter way, check out my previous article on how to create a reveal effect with moving backgrounds here.
Maybe one day I’ll make a video of this too, but given how LONG it takes me to make videos, I figured I’d share on this blog first – so thanks for checking it out!
Don’t forget you can download 6 examples of this technique so you can see what I did here.
Conclusion
So that’s how to create the color pop trick with images in PowerPoint using a simple layering and background cropping technique.
This again proves how creative you can get with your photos in PowerPoint, without having to go to Photoshop.
To learn more about our PowerPoint training courses and resources, visit us here.
About the Author

Spicy Presentations
Yulia Barnakova is passionate about helping people develop the skills and learning mindset to thrive in the digital age. She is always experimenting with emerging technologies and has been recognized by Microsoft as a Most Valuable Professional for her creative presentation technology tutorials, which have more than 8 million views on YouTube. Her recent TEDx Talk, Think You're Not Tech Savvy? Here's Why You Are, shows how everyone can (and must) develop the mindset and skill set to embrace technology.