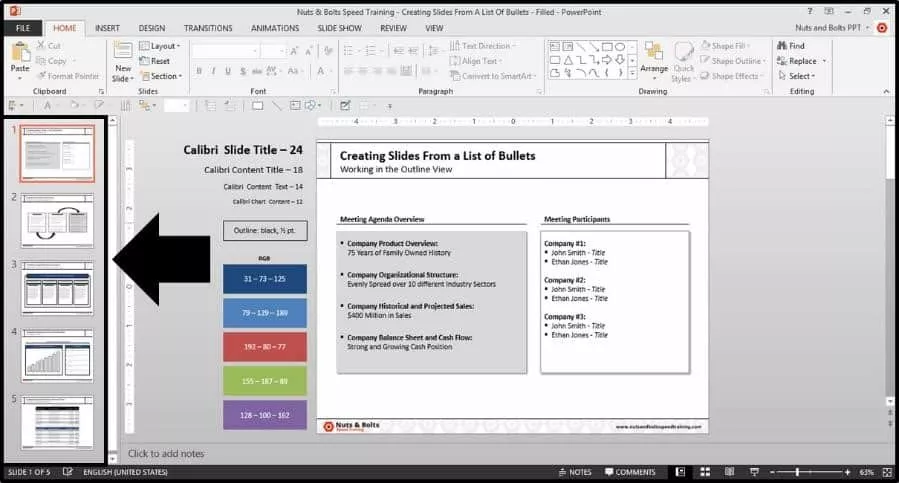
If you find that one of the most time-consuming parts of creating a PowerPoint presentation is knocking out the framework, or taking your pages of notes and turning them into slides, then I have good news for you!
PowerPoint has an ‘Outline View’ that allows you to view your presentation – as the name suggests – as an outline.
What does that mean? Well firstly, it means that you can not only follow your train of thought and make sure that your presentation has a clear progression – and that’s pretty cool!
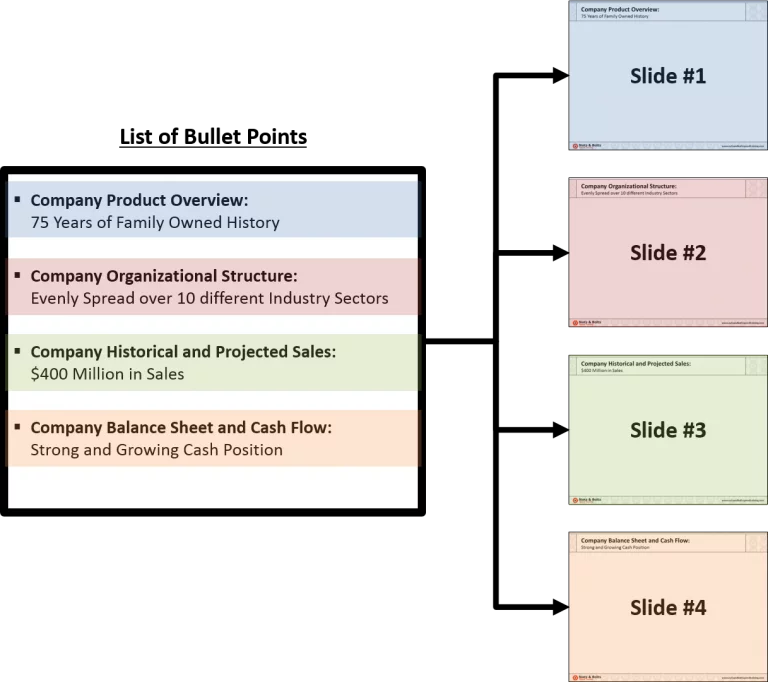
But what fewer people know is that you can use this Outline View for more than just viewing; you can use it to actually generate slides based on a list of bullet points. And this means that you can create a bunch of slides in a few short seconds without having to do so manually.
And it doesn’t matter where your bullets points came from: a website, an email, a report, or something you quickly knocked out on your smartphone while riding the elevator to work!
Sound like a super time-saving trick? Absolutely.
Turning bullet points into slides in a nutshell
To turn your bulleted list of text into slides in PowerPoint, simply follow these steps:
- Go to the Outline View
- Copy / paste your bullet points as plain text in the Outline View
- Adjust the levels of your text by hitting TAB and/or SHIFT + TAB
[Watch] Bullet Points into Slides
You are currently viewing a placeholder content from Youtube. To access the actual content, click the button below. Please note that doing so will share data with third-party providers.
More InformationRegardless of where your list of bullet points comes from, you can use the Outline View in PowerPoint to quickly turn your list of bullets into PowerPoint slides.
Step #1: Navigate to the Outline View
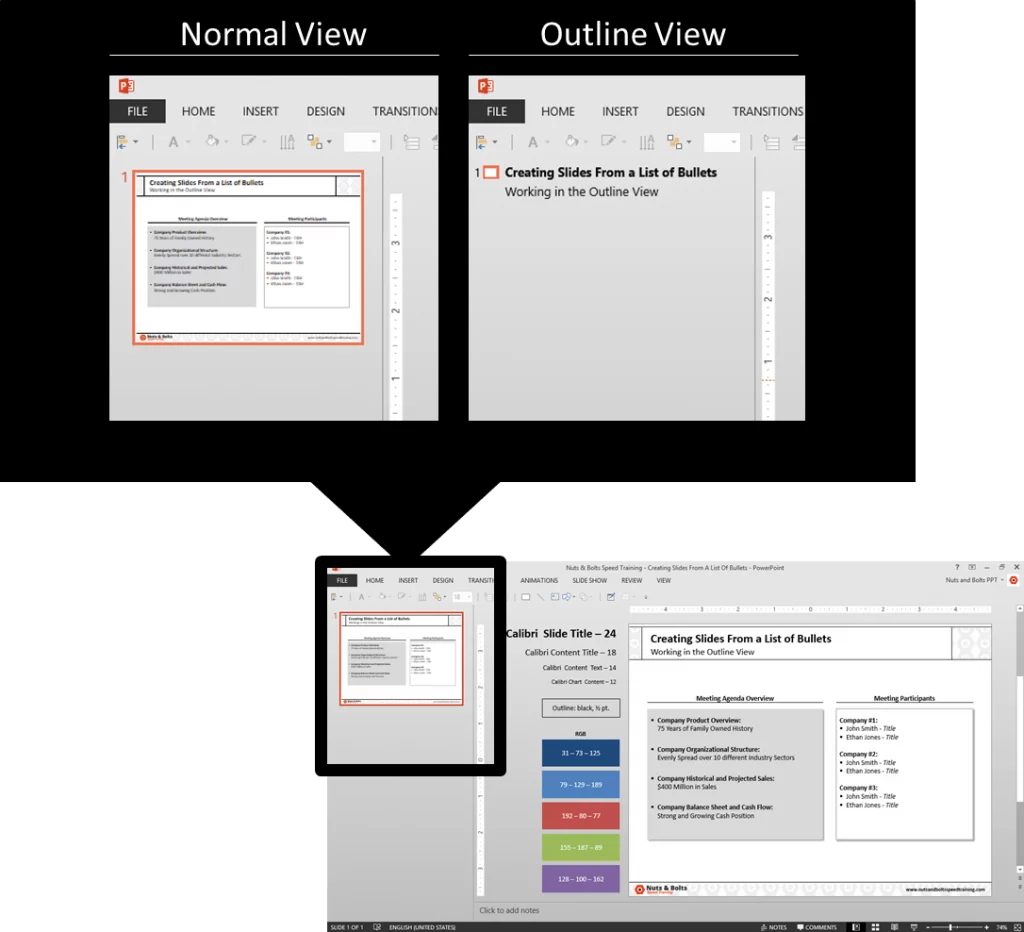
Within your PowerPoint presentation, navigate to the Outline View of your deck by hitting CTRL + SHIFT + TAB on your keyboard. The left side of your screen should change from a visual graphic of the slides themselves, to a text version of the slides.
Step #2: Copy and paste your bullet points in the Outline View
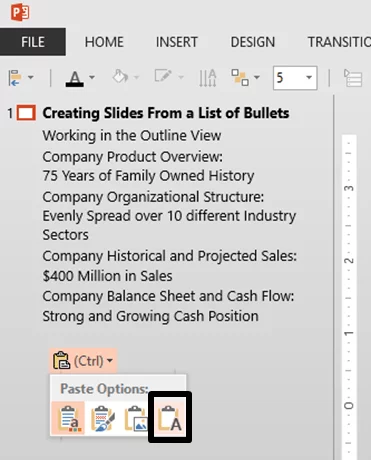
Step #3: Choose ‘plain text’
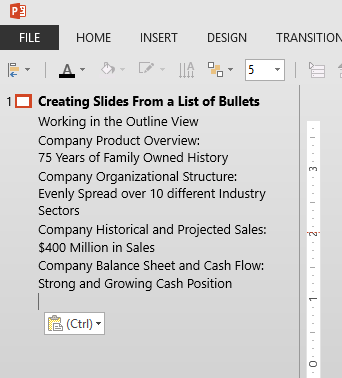
Immediately after pasting the bullets, hit the CTRL key on your keyboard to open up the Paste Special options, and either hit T for Text or select Text in the dialog box that opens with your mouse. This ensures that your text defaults to the set formatting for your slides and saves you from having to reformat the text later.
Step #4: Adjust the levels of your text
Now you’ll need to re-arrange your bullet points based on how you want your slides laid out.
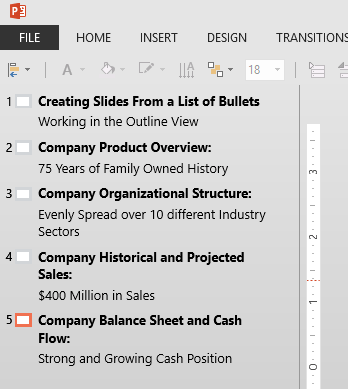
Within the Outline View, hitting ENTER will create a new slide, with the next bullet point becoming the title of the new slide (the bold text); if you hit the TAB key, you’ll demote a bullet point (i.e. take it from the title position to the subtitle position); and if you SHIFT + TAB, you’ll promote a bullet point (i.e. take it from the subtitle position to the title position).
Pro Tip: One quick tip, as mentioned in the video tutorial, to avoid unnecessary formatting adjustments within your presentation, it is always wise to paste your list of bullets as Text Only. That way your bullet points will take on the default formatting that is already set within your PowerPoint presentation, saving you the trouble of having to reset the slide layout or reformat the objects.
Step #5: Return to the Normal View
Once you have made your adjustments here in the Outline View of your presentation, you can return to the Normal View of your presentation by hitting CTRL + SHIFT + TAB on your keyboard, and you can see all of the brand new slides created there on the left.
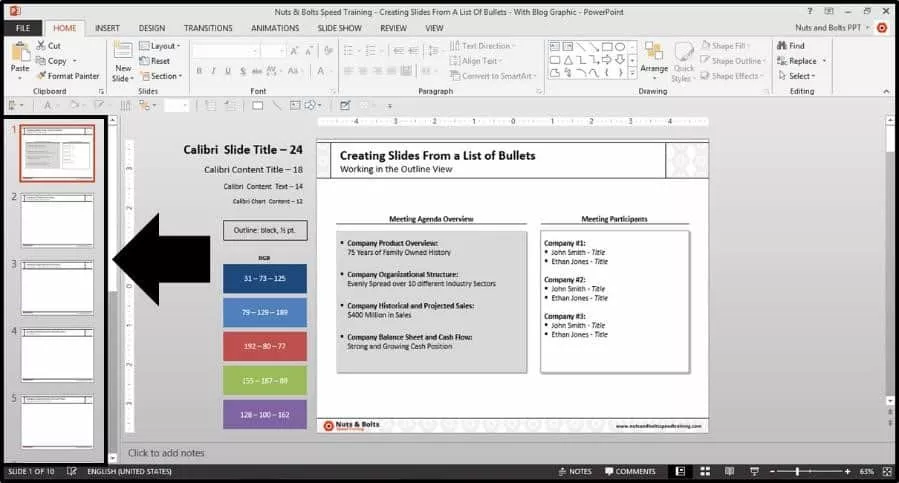
From here, you can invest your time building out the actual slides for your presentation.
