In this tutorial you’ll learn how to create 3D spinning objects in PowerPoint.
And the cool thing about this trick is that it’s one of those “you can’t believe it was done in PowerPoint” tricks (as you can see below).
If instead of creating a 3D shape, you want to create a 3D picture effect, see my guide here.
Creating a 3D Shape in PowerPoint
Part #1: Create a 3D object
For this animation tutorial I’ll make a rotating cube, so on a blank slide (I’m using a slide with a blue gradient background color), insert a rectangle (or other shape / object of your choice) and format it anyway that you like.
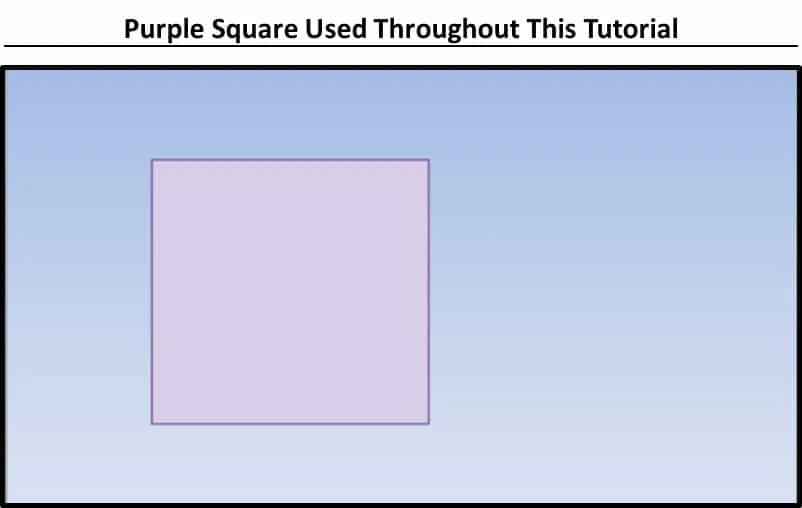
For this tutorial, I’ll use this purple square.
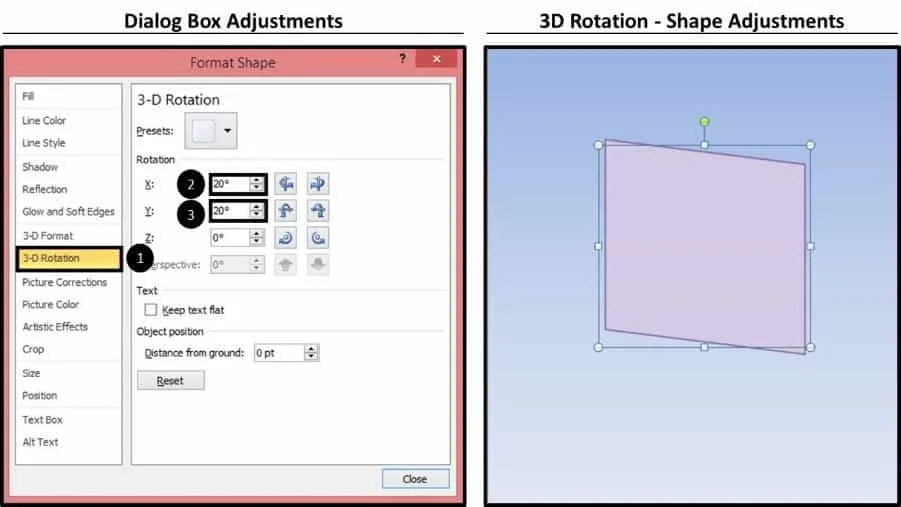
To make your object 3D, right-click the object and from the right-click menu select Format Shape.

Within the format shape dialog box open, select 3D rotation, and add 20 degrees for the X and 20 degrees for the right so that you can see the depth of the shape.
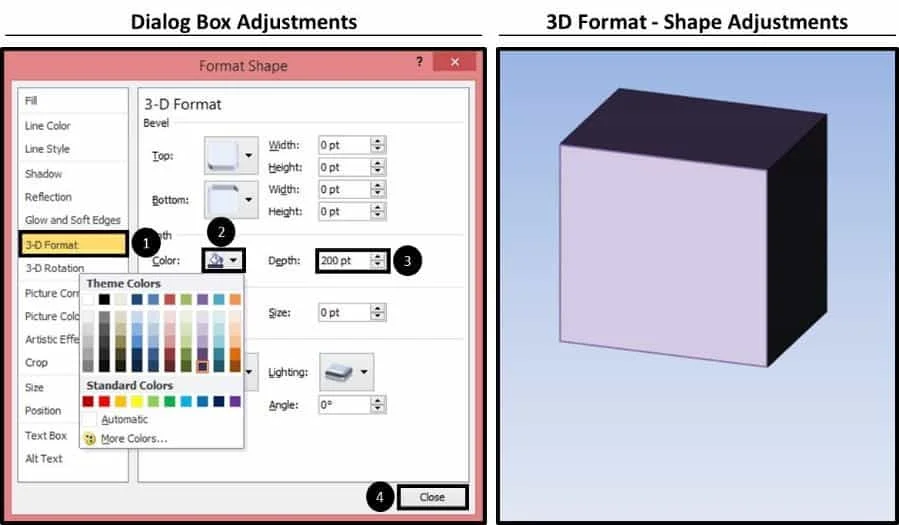
With the dialog box still open, navigate to the 3D Format section on the left side of the dialog box, change the color of the depth to something darker (I’ve chosen a dark purple), make the shape Depth on the right 200 points and then close the dialog box.
The resulting shape for this animation tutorial is not a perfect cube, but it is good enough to demonstrate how to create a 3D rotation animation.
Part #2: Animate your shape
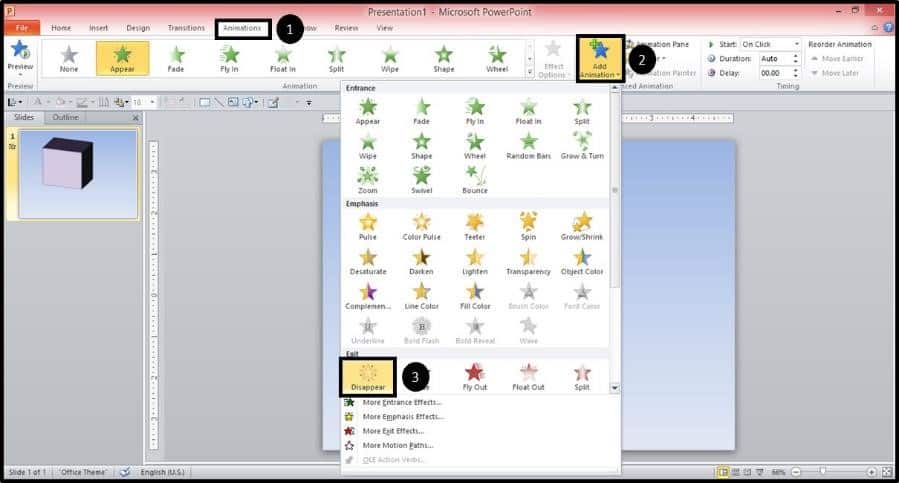
The basic principle of the animation here is a flipbook, or stop motion effect. To create this in PowerPoint 2010 and later, we must use both an Appear and Disappear animation on each object so that each one flashes in and out quickly, creating the illusion of motion (ironically, in versions 2007 and earlier, it’s actually easier to do by just adding a Flash Once animation to each object). Let’s first begin by adding the Appear animation, so with your shape selected, from the Animations tab, select the Appear animation.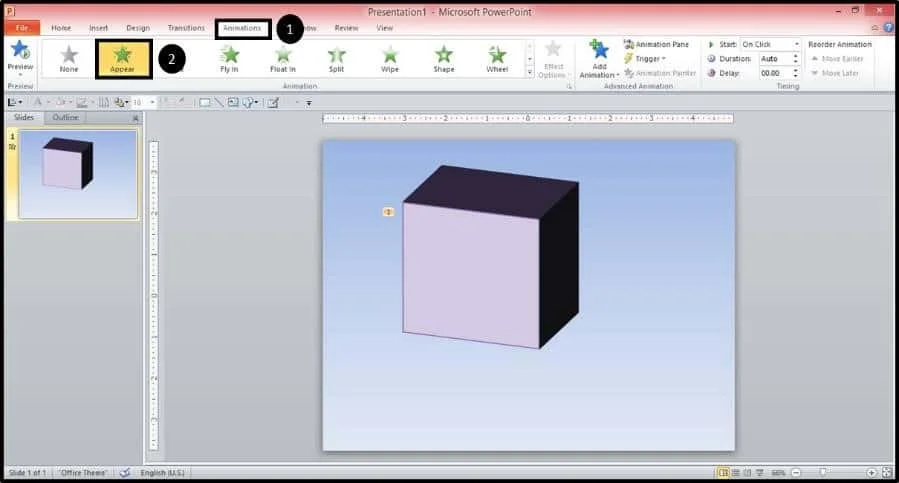 With the Appear animation added, next open up the Add Animation dropdown and scroll down to the Disappear animation (so now the object is animated with both an Appear and Disappear animation).
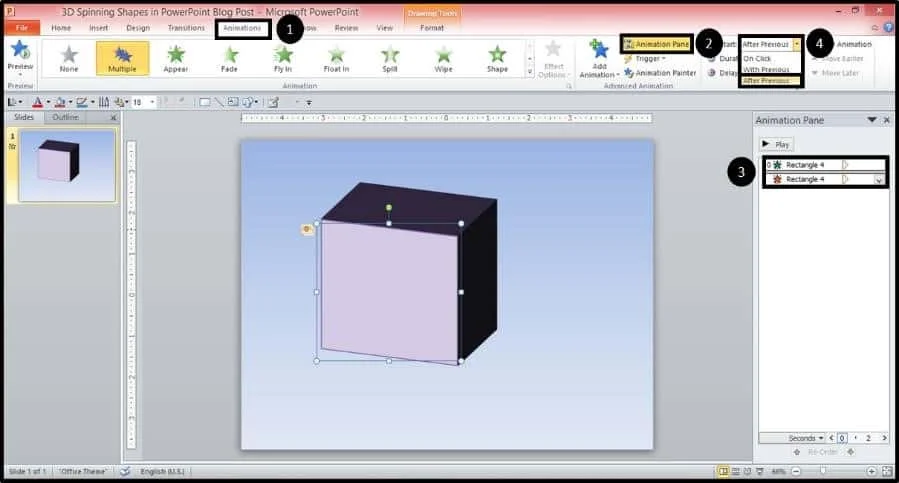
 With both animations added, open up the Animation Pane, select both the Appear and Disappear animations that we’ve just added, and change the timing to start ‘After Previous’.
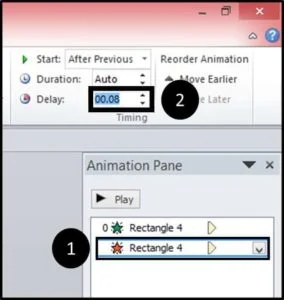
 Next select the disappear animation (the second animation in the Animation pane) and add a delay of 00.08 seconds in the Timing group.
Part #3: Layering the objects to create the animation effect
With the animations set and customized, next we need to start layering our object to create the visual effect of motion. The actual sequence itself will be multiple layers of our object that when played, will create a flipbook-like effect in PowerPoint, with each new rectangle (or object) moving and rotating slightly, creating the visual effect of a 3D rotating object. As the starting point, we want to begin with a simple 2D version of our object.Step #1. Rotate Object Back Into A 2D Object
Right-click your object and from the right-click menu Format Shape and in 3-D Rotation, make both the X and Y rotation zero, hiding the depth of the object. So the depth is still there – it’s just hidden.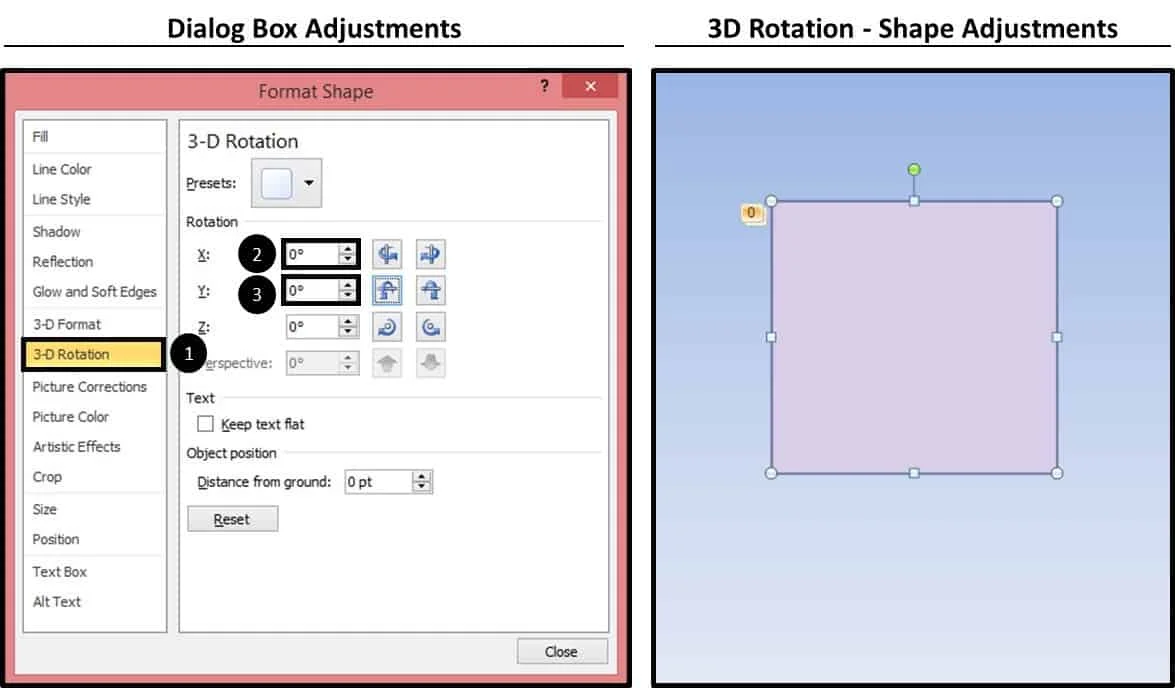
Step #2. Duplicate the Object
With the rotation set at zero, copy (Ctrl + C) and paste (Ctrl + V) or duplicate (Ctrl + D) your object so that you have two identical objects on your slide.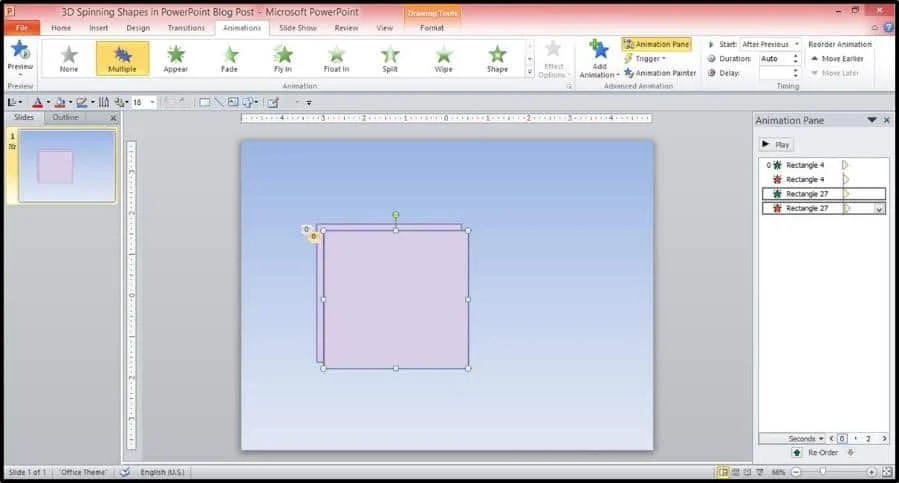 Note:
Before you continue to create all of the layers for the 3D rotation animation, double check that your animations are set to ‘After Previous’ and that the Disappear animation has a 00.08 second delay.
Note:
Before you continue to create all of the layers for the 3D rotation animation, double check that your animations are set to ‘After Previous’ and that the Disappear animation has a 00.08 second delay.
Step #3. Rotate the New Object 10°
Now we will begin rotating our layers to create the flipbook-like effect here in PowerPoint. To do that, right-click the new, duplicated object, select Format Shape from the right-click menu to open up the Format shape dialog box. For this tutorial, we are going to rotate our object 180 degrees on both the X and Y axis. You can choose any increment you want to rotate the objects. For this tutorial, we’ll rotate them in 10 degree increments (that is, you’ll increase the rotation by 10 degrees each time). Note: The smaller the increments, the smoother your rotation will be, but it will take longer to make. So 5 degree increments will look smoother than 10 degree increments but will take twice as long to make. So in the 3D Rotation menu, change the X and Y axis to 10 degrees.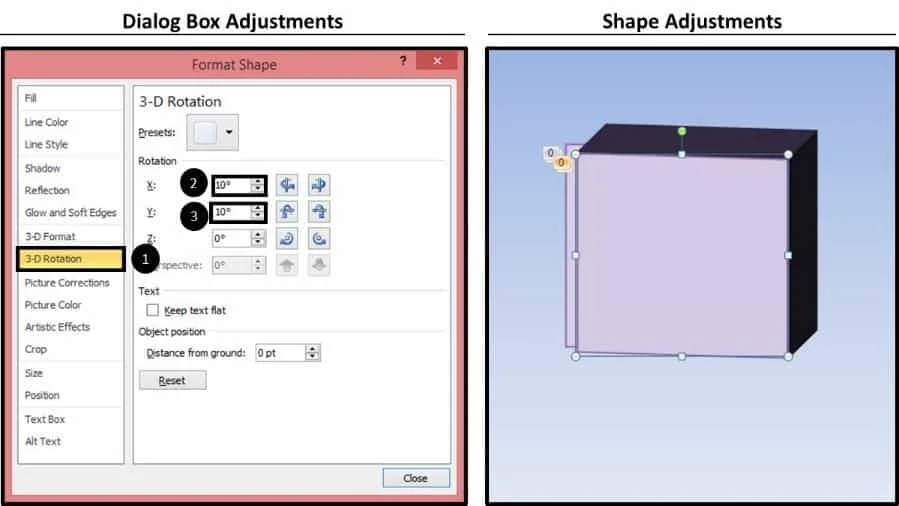
Step #4. Place the New Object
With the 10 degree rotation set, select the object and place it directly on top of the previous object. You can use the Smart Guides in PowerPoint 2010 and 2013 (the dashed cross which I’ve highlighted in the picture below) to make sure the placement is perfect. Perfect placement will ensure that you have a smooth animation effect.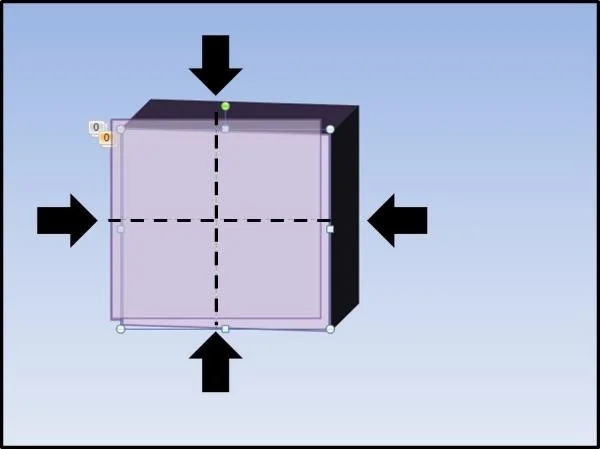
Step #5. Repeat Steps #3 and #4 Until the Rotation is Complete
Repeat the copy / paste / rotation / placement sequence, for the remainder of your shapes, increasing the rotation angle each time. For a 180 degree rotation in increments of 10 degrees, you will need 19 rectangles or shapes in total. If you are rotating by 5 degrees, you will need 37 shapes, etc. In the below image, I’ve added 19 rectangles.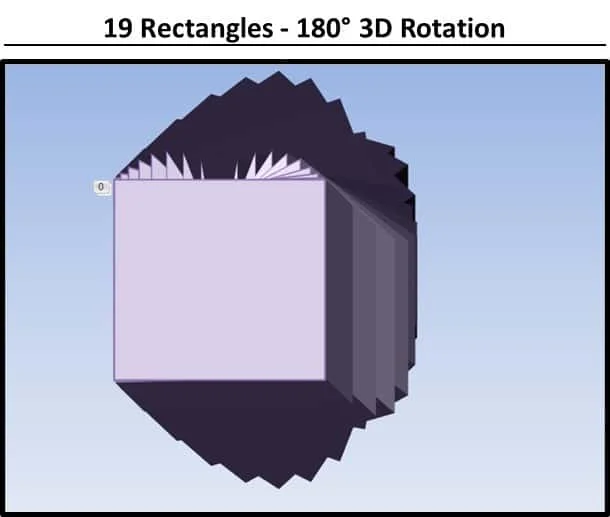 Note:
If you aren’t sure if everything lines up, you can do a quick check by selecting all the objects (CTRL + A on a PC), going to the Arrange menu on the Ribbon, selecting Align, then Align Center, then going to the same menu and choosing Align Middle. This quick check ensures that objects are in perfect alignment, as demonstrated on the right.
Note:
If you aren’t sure if everything lines up, you can do a quick check by selecting all the objects (CTRL + A on a PC), going to the Arrange menu on the Ribbon, selecting Align, then Align Center, then going to the same menu and choosing Align Middle. This quick check ensures that objects are in perfect alignment, as demonstrated on the right.

Step #6. Remove the Last Disappear Animation
Once you have all of your objects complete, remove the last disappear animation, so that your last object remains on the screen. Within the Animation Pane, simply select the last animation and hit Delete on your keyboard.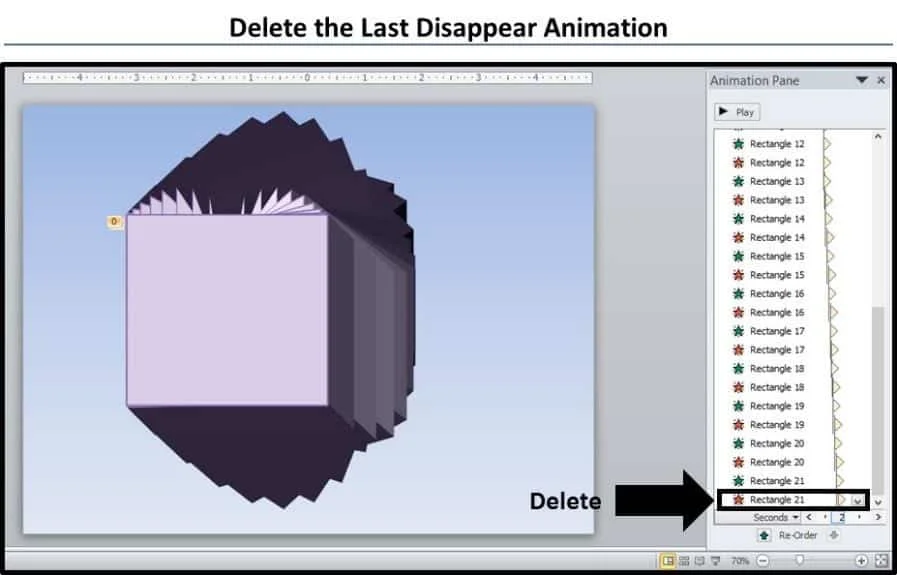
Animation formatting tips
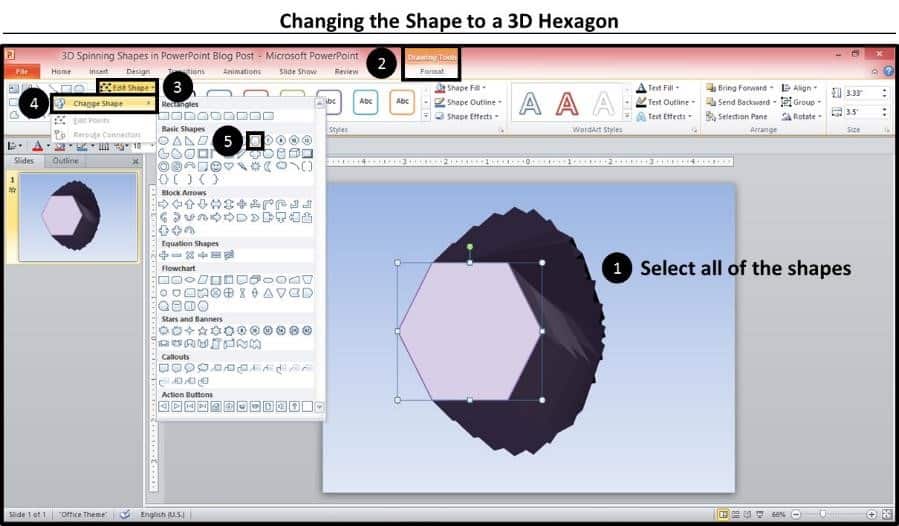
Once you have everything completed, you can change the colors of the cube or change the shape altogether. To play with different formatting options, first select all the objects again (CTRL + A on a PC). Then, to change the cube format, you can just go to the Format menu and change the settings there. Here I’ve changed the depth from 200 points to 100 points.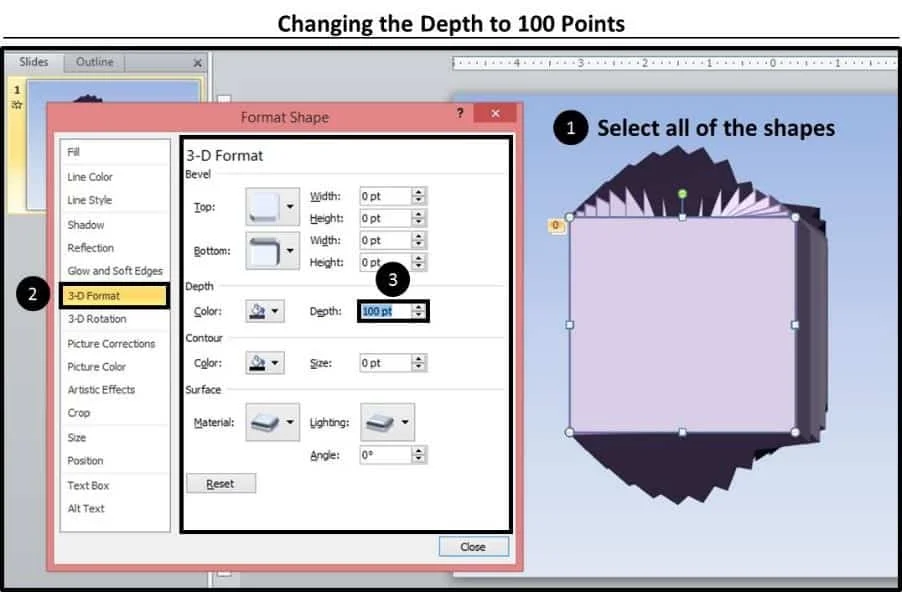 To change the shape altogether, with all of the rectangles selected, from the Drawing Tools Format tab, open the Edit Shapes dropdown, select Change Shape and choose any shape you like. Here I’ve changed the shape into a hexagon.
Conclusion
While this animation trick can take a bit of time to perfect, the process becomes much faster and easier with practice. Plus, once you do it the first time, you can reuse the same effect with a variety of shapes, so your efforts will be well worth it. Try it out and see what combo of shapes and rotations you can come up with! You can also download the working files for this tutorial here to follow along with me.What’s Next?
About the Author

Spicy Presentations
Yulia Barnakova is passionate about helping people develop the skills and learning mindset to thrive in the digital age. She is always experimenting with emerging technologies and has been recognized by Microsoft as a Most Valuable Professional for her creative presentation technology tutorials, which have more than 8 million views on YouTube. Her recent TEDx Talk, Think You're Not Tech Savvy? Here's Why You Are, shows how everyone can (and must) develop the mindset and skill set to embrace technology.