Adding this hinge animation effect to your presentation (to open a door or other object) will delight your audience, as no one expects to see something opening and closing in PowerPoint.
In this tutorial you’ll learn how to use this hinge effect to open a door, but the same technique applies to boxes (and you can see other hinge effect examples in the video tutorial below).
You are currently viewing a placeholder content from Vimeo. To access the actual content, click the button below. Please note that doing so will share data with third-party providers.
More InformationNote: You can use this PowerPoint animation effect in PowerPoint 2007 and later (it should also work on the Mac versions of Office too).
This open door animation hinge effect can be broken down into three straightforward animation steps:
- Make the object on which you want to put the hinge
- Make (and animate) the hinge
- Layer the object to make the hinge come to life.
[Watch] Animated Hinge Effect
You are currently viewing a placeholder content from Youtube. To access the actual content, click the button below. Please note that doing so will share data with third-party providers.
More InformationPart 1: Create Your Door (or Hinge Object)
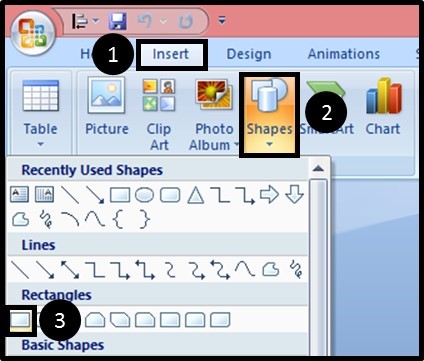
Step #1: Insert a Rectangle to Create a Door
First step to creating this animation effect is to make the door itself. So from the insert shape dialog, select a rectangle and draw it on your slide.
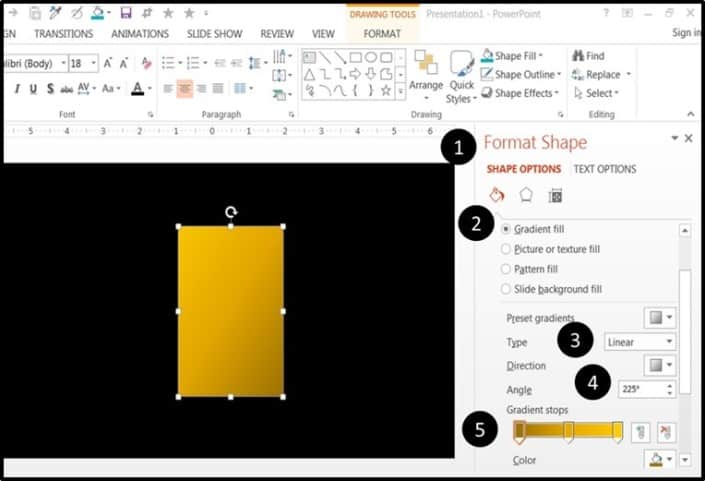
Step #2: Format the Door with a Gradient
Color the door orange (or whatever color you like) with a gradient. Do this by going to Format Shape, Shape Options, Fill on the left side, selecting Gradient Fill, Linear type, and 225 degree angle.
Make 3 gradient stops, evenly spaced, with the left one being a dark orange, the middle being a medium orange, and the right one being a light orange, as you can see in the graphic below.
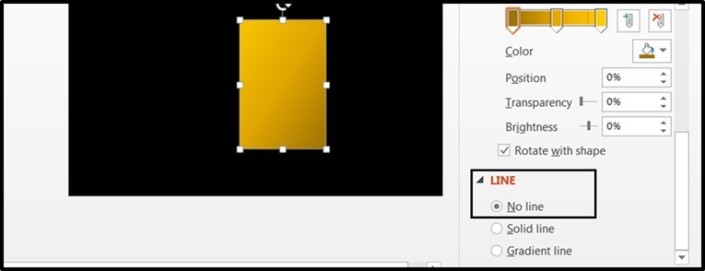
Step #3: Remove the Outline
Remove the shape outline by scrolling down in the menu box and selecting the No Line option.
Let’s add a simple doorknob to make the door more realistic, so just draw a black circle on the side of the door – on the opposite side of where you’ll want your hinge to be.
Now we have our basic door – and let’s make it 3D by giving it some depth. To do this right-click on the door, then go to Format Shape, 3D format and let’s add the depth, maybe 20 points.
We are now ready to make the hinge for the door.
Part 2: Make the Door Hinge
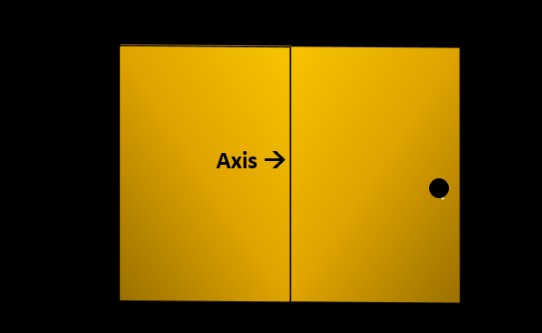
When an object rotates, the axis of rotation (where the hinge is) will always be in the middle of the object. So, if we were going to try to rotate the door as is, it would turn in the center (like a revolving door) which is not what we want.
Instead, we want it to turn on the left edge – so this edge needs to be in the middle of the object.
In order to make this happen, there needs to be an object on the left of the door that’s the same exact width. An easy way to do this is to duplicate the door (CTRL + D for PC users) and line it up right next to the other door.
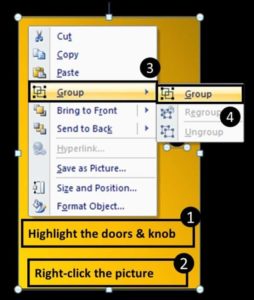
Then, group the two doors and the doorknob (CTRL + G for PC users), or with both objects selected, right-click and select Group from the right-click menu.
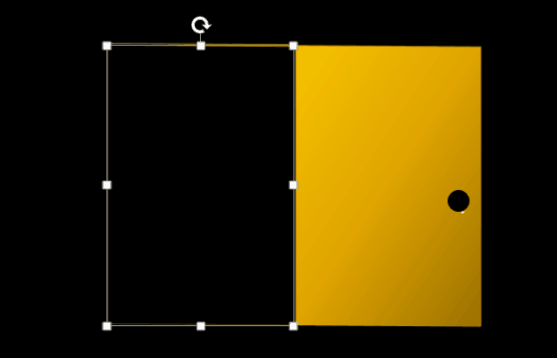
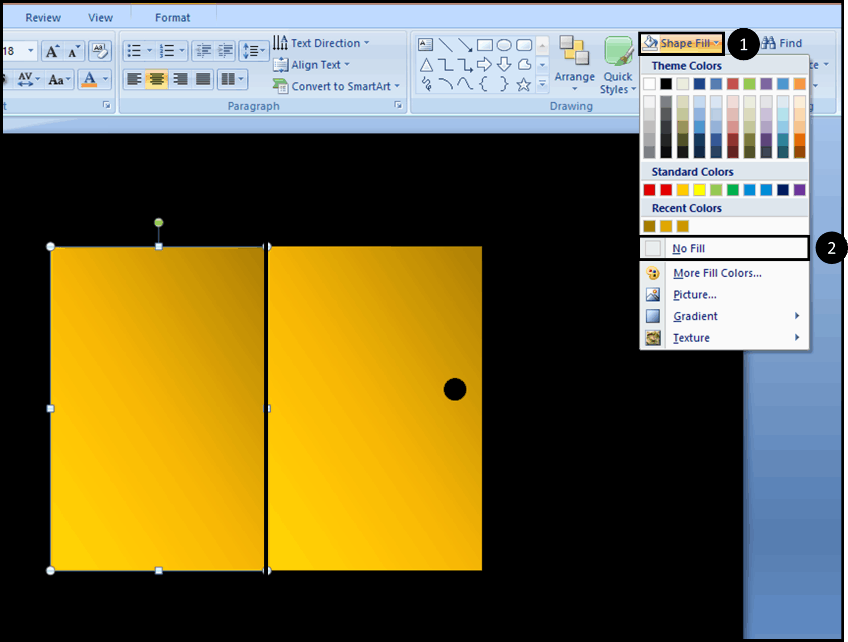
However, since we obviously don’t want to see the duplicate door on the left, we need to make it invisible (don’t worry, we’ll still get the benefit of the new axis).
So select that door, go to Format Shape, Shape Fill and change it to No Fill.
Afterwards, you should get something like this:
Finally, let’s take away the depth from the invisible object, which we previously created. We do this by again going to Shape Effects, 3D format, and changing the depth to ‘0’.
As you’ve probably guessed, another way to do this is to just make any invisible object the same width as the original – and that can indeed work and can be even easier in some cases.
Part 3: Layer and Animate the Door
Finally, let’s take away the depth from the invisible object, which we previously created. We do this by again going to Shape Effects, 3D format, and changing the depth to ‘0’.
As you’ve probably guessed, another way to do this is to just make any invisible object the same width as the original – and that can indeed work and can be even easier in some cases.
Step #1: Add a 3D Effect
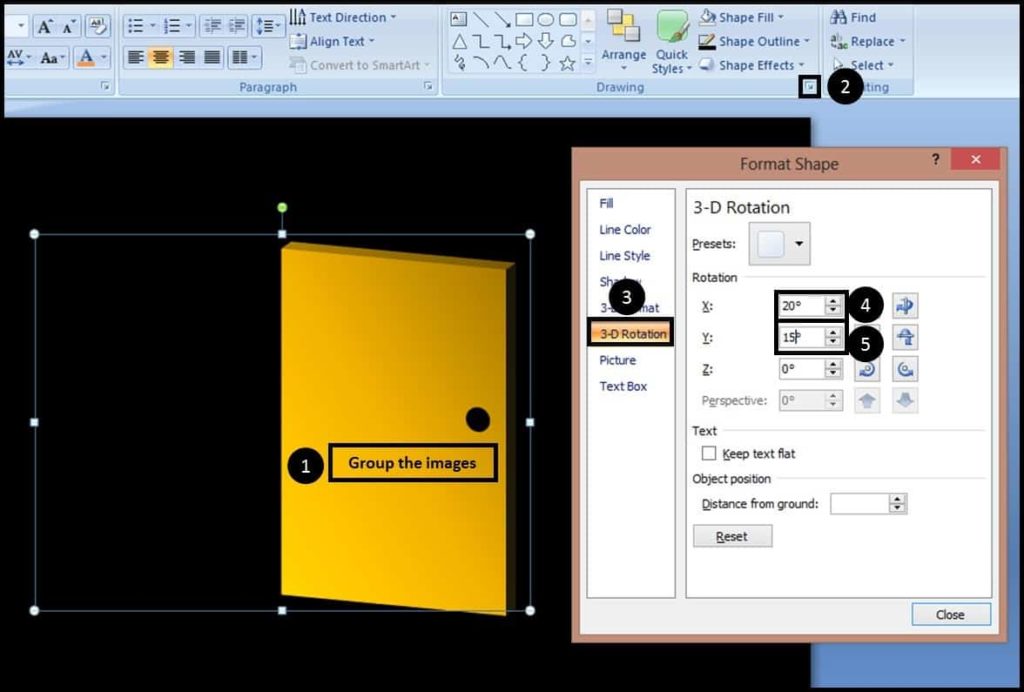
We’ll start off by changing the rotation and angles to make it look more 3D.
So select the grouped object, then right-click and go to Format Shape again. Under 3D rotation, change the X axis to 20 degrees, and the Y axis to 15 degrees. Now you can see the depth behind the door.
At this point, if you haven’t seen my article on 3D Rotating Objects Video, I highly recommend that you do so first as it covers what I am about to do in more detail.
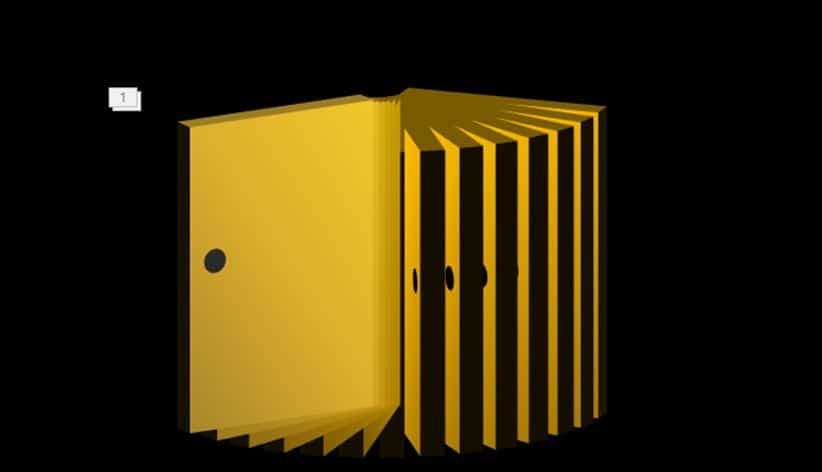
Again, the idea here is make something like a hinge where each door is slightly more open than the one before it and when you flash them one after the other, it looks like a smooth animation.
For the animations I’m about to show you, I will use PowerPoint 2013 – for earlier versions, such as 2007 shown below, you’ll need to open up the Custom Animations Tab.
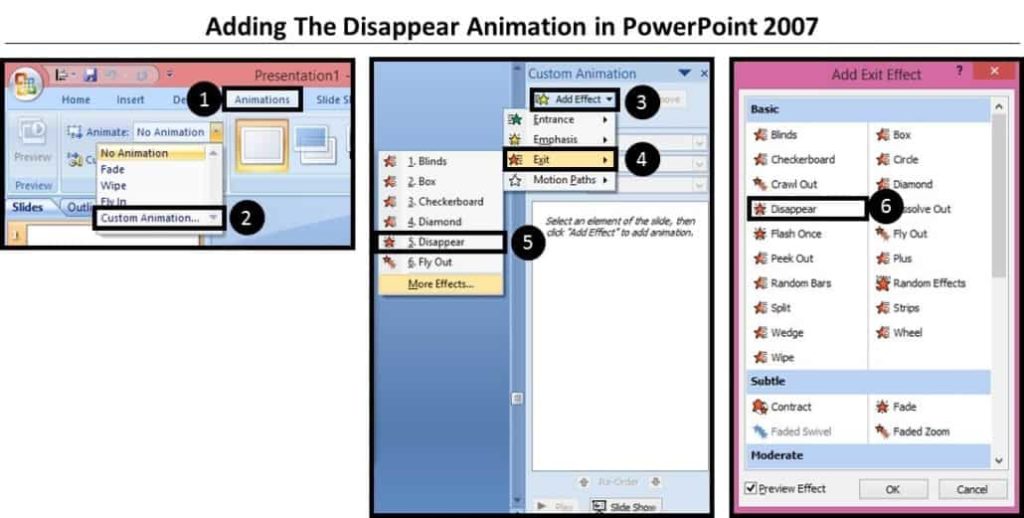
There are two ways to create this hinge effect – the standard way is to make each door appear, then disappear right away.
If you have PowerPoint 2007 or 2003, however, it’s actually easier because you can just use the Flash Once effect (which is not available in later versions).
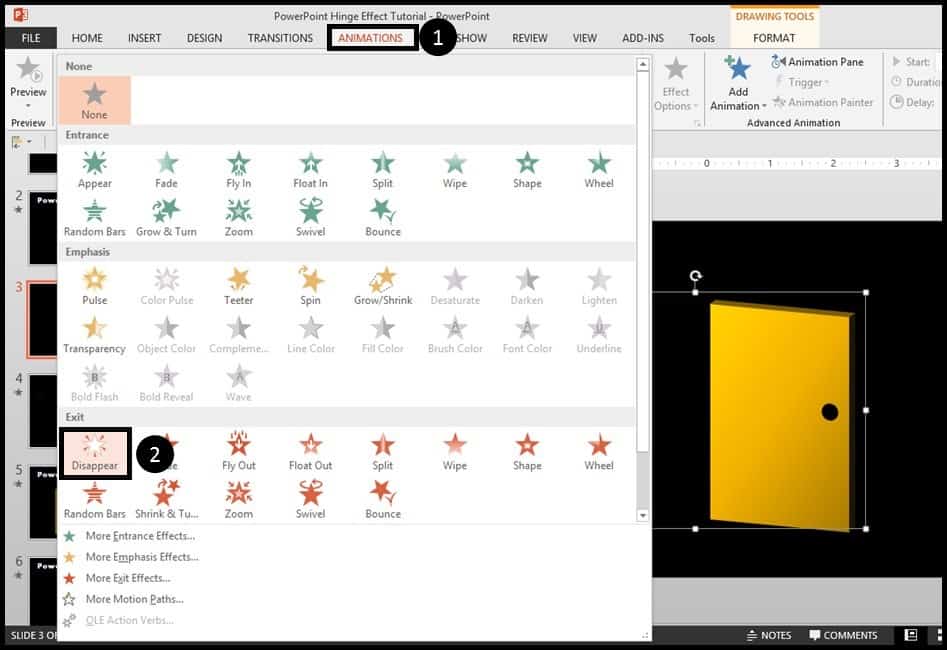
Step #2: Adding the Animations
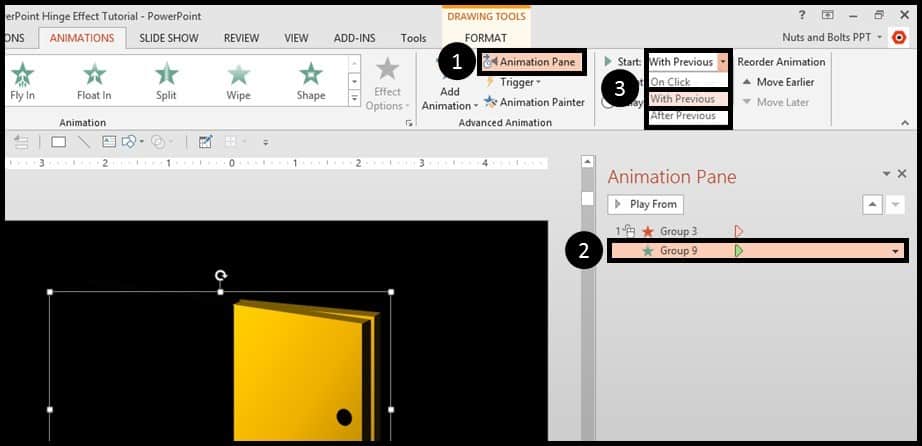
Since the first door starts off on the screen, it doesn’t need an Appear animation, so we just put a Disappear animation on it. To do this, we go to our Animations tab and select Disappear from the choices.
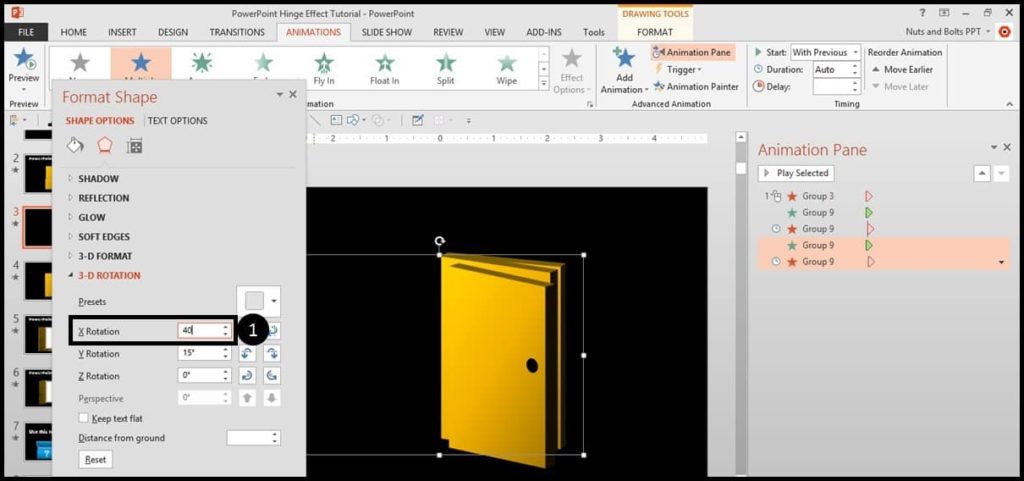
This door will then disappear just as the next door appears, so we duplicate the first door, then take the duplicate door and rotate 10 degrees more along the X-axis by right clicking, going to Format Shape and then increasing the X Rotation from 20 to 30 degrees.
Warning: Be sure to make this adjustment manually by typing into the box rather than using the arrow keys. For some reason if you use the arrow keys to adjust the angle, you will also change the Y and Z angles automatically – not sure why it does that!
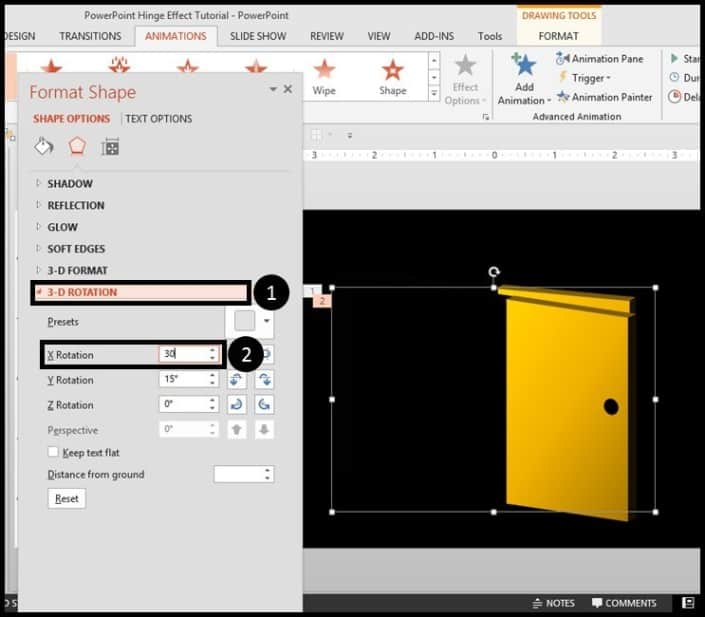
After adjusting the rotation, place the door directly on top of the other door, so it lines up like in the picture below.
Use the PowerPoint guides to help you (the red dotted lines) if your version has this feature.

The new door we’ve made retains the animations of the original door, in this case the Disappear animation, which we want to replace with an Appear animation to get that hinge effect we’re trying to make.
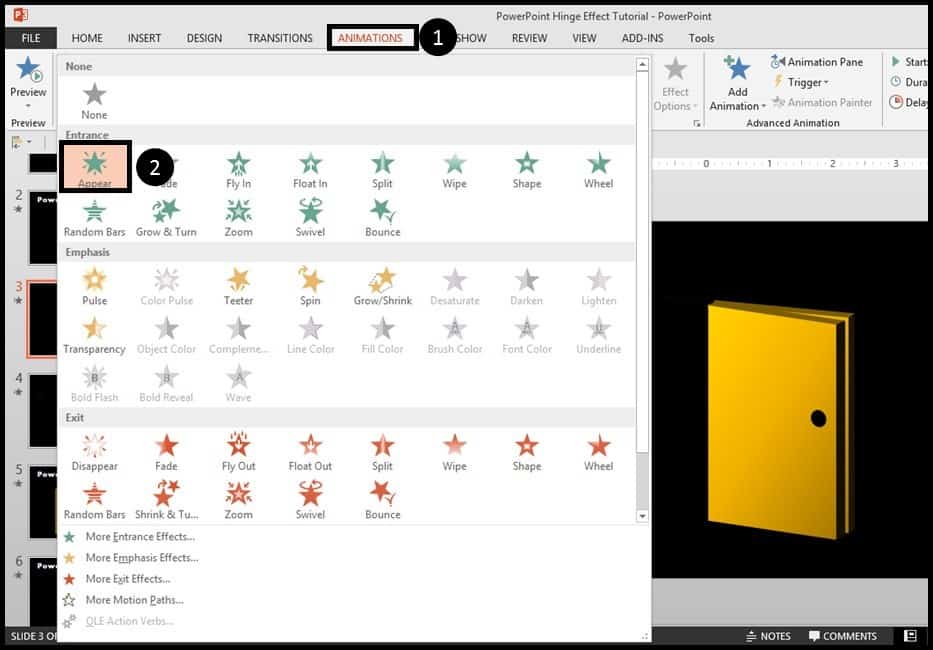
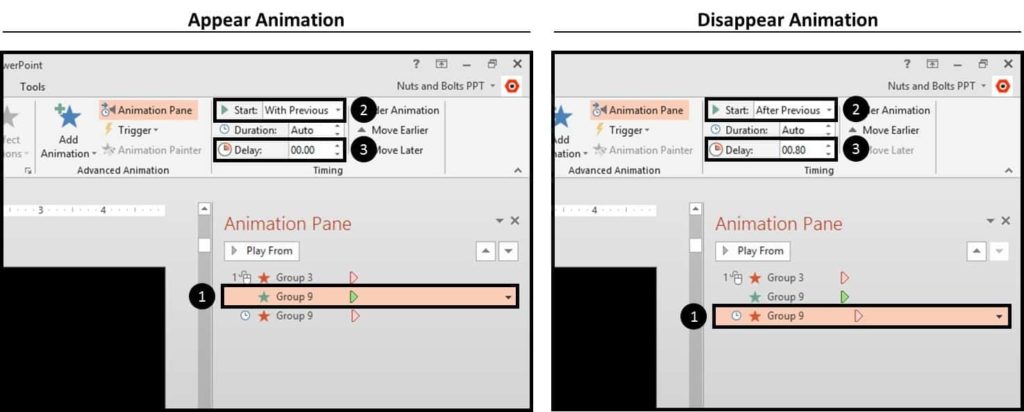
With the Appear animation added, go to the animation pane and set it to Start with Previous.
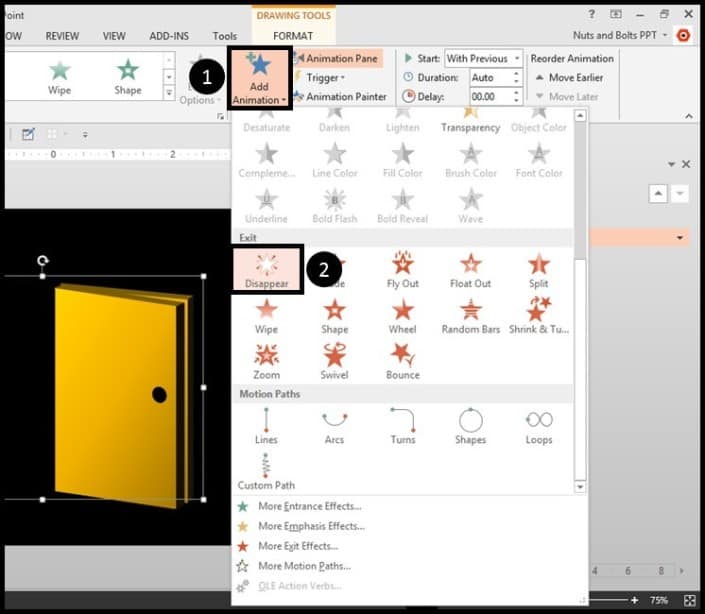
Now because we want this new door to disappear just as the following door appears, we want to add in a Disappear animation. So from the ‘Add Animation’ dropdown, add a Disappear animation.
This time, we make it start After Previous and delay it by 0.08 seconds (or 0.05 if you want to make the door open faster).
Step #3: Duplicate the Layers
Copy this last door again, add 10 more degrees just on the X axis and line it up approximately with the others.
Now you’ll just need to repeat this process (duplicating and adding 10 degrees) until you are happy with the way the doors open.
Step #4: Lining it All Up
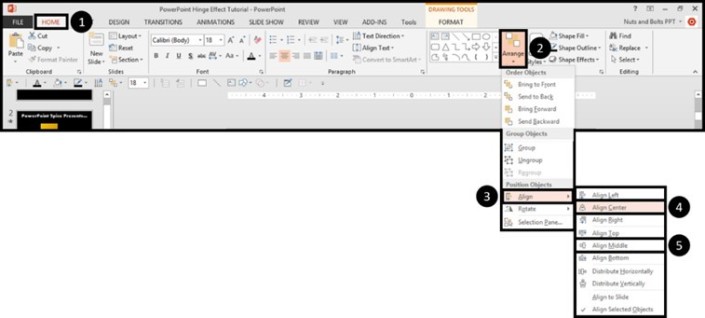
At this point, what we need to do is line up everything up evenly. So we highlight all the doors, and then from the Format menu, go to Arrange –> Align –> Center, then Align –> Middle.
Now everything is perfectly aligned for us. One last very important step is to remove the last Disappear animation because you want the door to stay on the screen after it opens.

And that, ladies and gentlemen, is the PowerPoint animation hinge effect!
What I Love About This Hinge Effect
What I love about the hinge effect is its versatility, as you can use it on any kind of door but also any sort of lid that you want to pop open during your presentation.
Think about some hinges in real life and try to replicate them.
If you want to download the the effect I created in this tutorial
THIS IS VERY COOL
Glad you enjoyed it!