1. Insert a 16-point star
The shooting star I like to use actually consists of two separate stars layered one top of each other. The first of which is a 16-point star (but you can of course experiment with other types of stars on your own). So from the insert tab, open up the shapes gallery dropdown and find the 16-point star near the bottom of the dropdown.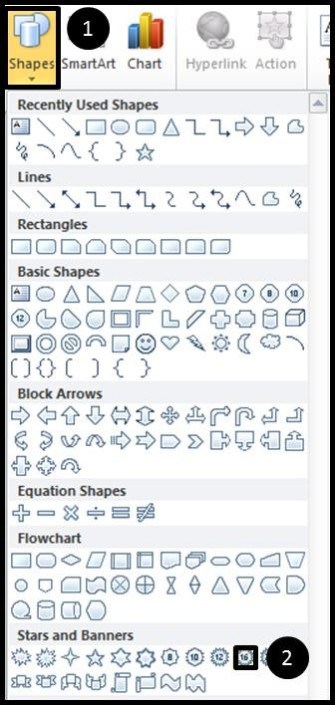
2. Stretch the 16-point star
With the star down on your slide, grab the yellow diamond on it and resize as you see fit. I always prefer skinner starts (as pictured below) but you can alternatively format yours anyway you like.
3. Insert a 4-point star
With the first star set, now we’ll insert the second star (I will use the 4-point start) that we will layer on top of our 16-point star. So again from the insert tab, open up the shapes gallery dropdown and find the 4-point star (or other start that you want to use).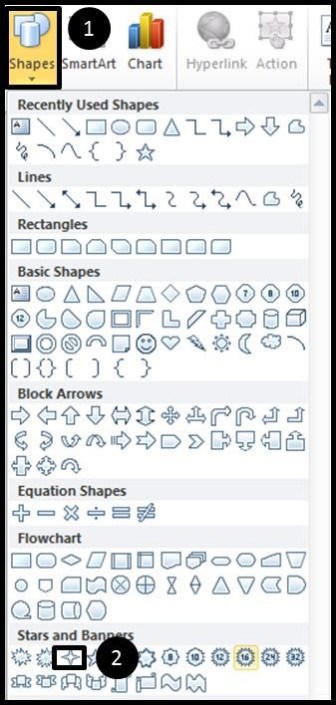 With the star down, let’s again adjust the points to be fatter or skinnier as you like (I’ve made them skinnier in this case).

4. Format your stars
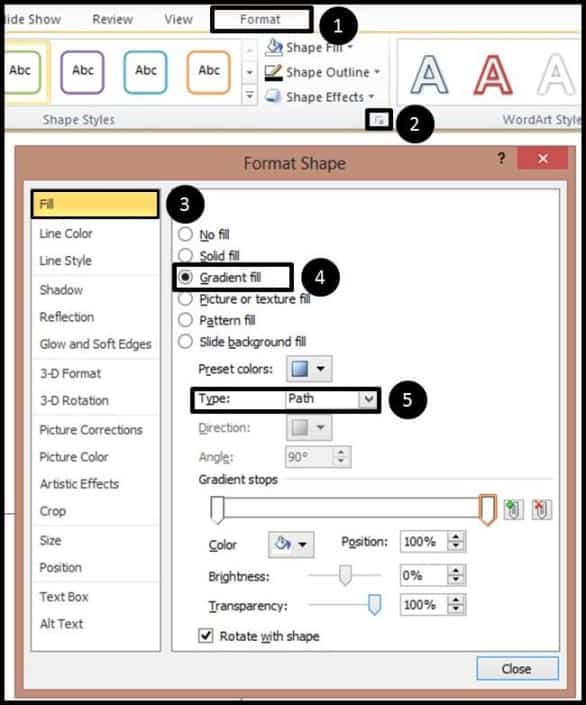
Now with both starts down and resized, let’s format them, starting with our 16-point star. With the 16-pint start selected, let’s first go to the ‘Format’ tab, then open the ‘Format Shape’ dialog. Within the Line Color section, let’s choose ‘No line’.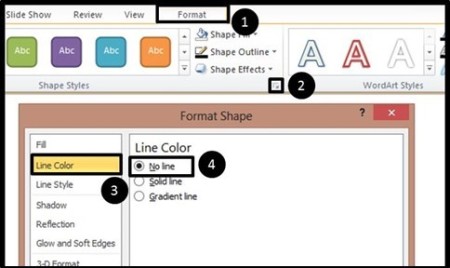 Next, let’s go to ‘Fill’ selection on the left, select ‘Gradient’, and make it a path gradient – and reduce it to just two colors
For the first color:
Next, let’s go to ‘Fill’ selection on the left, select ‘Gradient’, and make it a path gradient – and reduce it to just two colors
For the first color:
- Color – Inner most color (white)
- Position – 0%
- Transparency – 0%
- Color – Outer most color- white
- Position – 100% position
- Transparency – 100%
 Again, you can experiment with other colors as well but I really like the white-on-black look.
5. Copy and paste the formatting with the format painter
With our 16-point start now formatted, let’s use the format painter to copy the formatting and paste it onto our 4-point star to save some time. With the 16-point start selected, navigate to the ‘format’ tab, then to the ‘format painter’ on the far left (your cursor becomes a paint brush) and then click on the 4-point star. If done correctly, all of the formatting from our 16-point star is copied and applied to our 4-point star as pictured below.
 Once the formatting is set, next layer your stars, one on top of the other, so that you have a single star as pictured below (looking good).

Part #2: Animate your shooting star
Now that we have are stars all setup and formatted, we’ll start adding our animations.1. Add a Spin animation to the stars
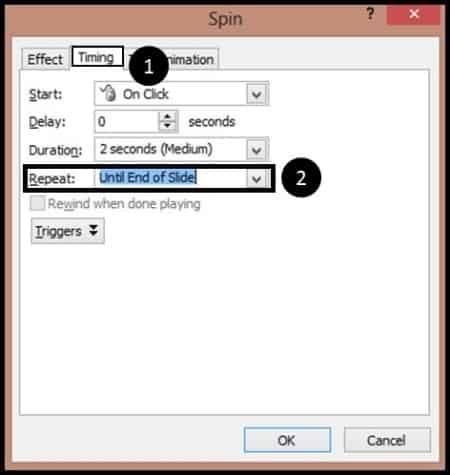
Let’s start by selecting the 4-point star and adding a spin animation. So from the ‘animations’ tab simply select the spin animation (which will automatically spin clockwise). With the animation added, next we want to adjust the effect options. To open the effects options dialog, you can simply click the diagonal arrow below ‘Effect Options’ (#3 in the picture below). Within the effects options dialog, in the repeat dropdown select ‘Until End of Slide’. This will make sure that the star doesn’t stop spinning while we are on this slide (which is what we want).
2. Add a counterclockwise spin on the 16-point star
For the 16-point start, we want to do the same thing except this time add a counter-clockwise spin for an extra spicy effect. So with the 16-point start selected, we’ll again navigate to the animations tab, add the spin effect and again open the effects option dialog box (#3 in the picture below). Within the Effects section, we’ll then set the animation to a 360 counter-clockwise spin in the amount dropdown. Next we’ll navigate to the timing tab within the dialog and set the animation to run until ‘End of Slide’ in the Repeat dropdown.
 Before we move on, make sure that your starts are still layered on top of one another as pictured below (somethings they get moved around when adding effects).

3. Speed up the 16-point star
I’ve found that this animation looks best when the 16-point star is spinning twice as fast as the 4-point star, so here we want to adjust the timing of the 16-point star’s duration to 1 second. To do that, simply select the 16-point star and manually adjust the duration to one second in the timing section of the animations tab on the right. For the 4-point star we’ll leave it’s duration at 2 seconds (which is what it should be by default).

Pro Tip: You can also make this same effect by spinning one of the stars at 1 second and the other at ½ second.
Part #3: Add the motion paths
Now that we have a spinning star, we will add the motions paths so that the star shoots across our screen.1. Setting the Motion Path animations
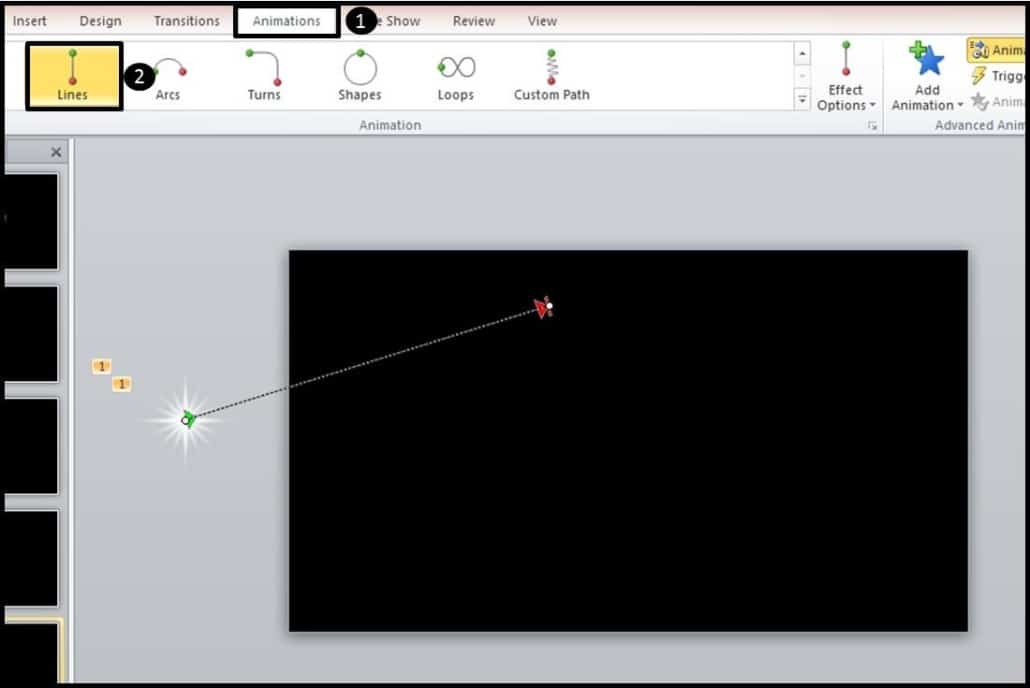
Selecting both stars (do not group them together), move them off of your slide area. This allows us to use motion paths to bring them back across our slide. With both starts still selected, navigate to the animations tab and select “Add Animation”… Note, if you don’t add an animation, you will copy over our previous animations, so make sure you select Add Animation, and then in the dropdown fin the basic line motion path for now. With the motion path added, adjust the line motion path to go across your slide AND that both motion paths are lined up exactly on top of each another.
2. Adjust the Motion Path settings
With the motion paths set, next we’ll adjust the motion paths to start ‘With Previous’ and change their duration to 3 seconds so that we have more time to see the stars. Custom Motion Path #1:
Now instead of using a straight line motion path you can alternatively use a custom motion path.
To do this, simply remove the straight line motion paths that we just added, and from the Add Animation dropdown, select the custom path and draw it across your slide however you like (I created a bit of a zig-zag below).
Custom Motion Path #1:
Now instead of using a straight line motion path you can alternatively use a custom motion path.
To do this, simply remove the straight line motion paths that we just added, and from the Add Animation dropdown, select the custom path and draw it across your slide however you like (I created a bit of a zig-zag below).
 Custom Motion Path #2:
For another motion path, let’s again remove the custom path, and this time, let’s make an angle (i.e. when you want to go straight in one direction and then straight in a different direction).
To create the angle, we’ll again by adding a straight line motion path. I’ll draw mine going up and then have it drop down sort of in the middle of the screen…but first I’ll start by angling it up.
Custom Motion Path #2:
For another motion path, let’s again remove the custom path, and this time, let’s make an angle (i.e. when you want to go straight in one direction and then straight in a different direction).
To create the angle, we’ll again by adding a straight line motion path. I’ll draw mine going up and then have it drop down sort of in the middle of the screen…but first I’ll start by angling it up.
 Now we’ll actually repeat the process and add two more motion paths (make sure that you have both of your stars selected) going down.
 But this time, we’ll grab them and place them right underneath the first two. Drag them down off the screen.
 Now make the first two start with previous and make the second two start immediately after them.
 And that’s it. So that’s yet another custom motion path you can use to create a more interesting shooting star effect in PowerPoint.