With PowerPoint 2016 on the horizon, let’s circle back and make sure that everyone is taking full advantage of all of the new features in PowerPoint 2013!
How to get PowerPoint 2013
Office 2016 Preview = Office 2013+
If you haven’t upgraded to PowerPoint 2013, you can see what’s new in PowerPoint 2013 by grabbing a FREE copy of the Office 2016 preview…which is essentially Office 2013 with a few added bells and whistles.
You can get the FREE preview version of Office 2016 HERE.
It’s a great way to upgrade from PowerPoint 2007 to 2013 or PowerPoint 2010 to 2013, as all of the new features demonstrated below work in the 2016 preview version…
…and are in the SAME EXACT place in the Ribbon, so it’s easy to follow along.
My top 10 favorite new features in PowerPoint 2013
Here are my top 10 favorite design and animation features of PowerPoint 2013.
You can watch the video below or scroll down the page to learn all of these new features and tricks. Okay so let’s start the countdown!
You are currently viewing a placeholder content from Youtube. To access the actual content, click the button below. Please note that doing so will share data with third-party providers.
More InformationFeature #1: New slide transitions
My number one feature, which is the new transitions. There are 11 new ones, and they’ve also brought back the random transition option.
![]()
Play around and experiment with these new transitions, as they can really add some spice to your presentation without too much effort. Don’t overdo it though.
Use these wisely – and avoid the Airplane and especially Origami ones unless absolutely necessary for your subject matter – otherwise, it will look super cheesy.
Here’s an example of using a the fracture transition in a particularly “unique” way (I almost BROKE my camera in the process):
You are currently viewing a placeholder content from Vimeo. To access the actual content, click the button below. Please note that doing so will share data with third-party providers.
More InformationFeature #2: Eye-dropper tool
The eye dropper tool allows you to color in objects with the same color as something that’s already on the slide.
For example, let’s say I have a hat, which I’d like to match to the rest of my outfit. All I have to do is go to ‘shape fill’ select the Eyedropper, then select my jacket to pick up the color.
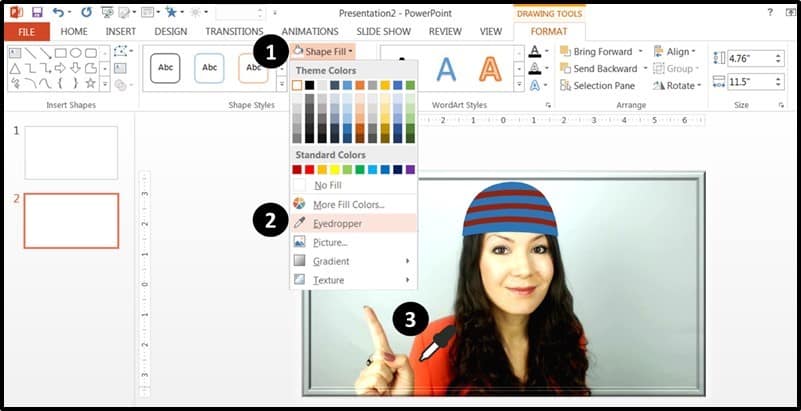
Now click on the hat to make the fill match my jacket color. Nice – a perfectly matching outfit, thanks to the eyedropper!

Feature #3: Animation preview
You can now preview your animations in a variety of ways. One of my videos, for example, shown below, has several animation sequences in a row.
If I want to show just one of those sequences, I can highlight a portion of the animations in the Animation Pane and hit Play Selected.

I can also see the entire thing starting from a certain place. For example, I could highlight Picture 2 below and then click Play From.
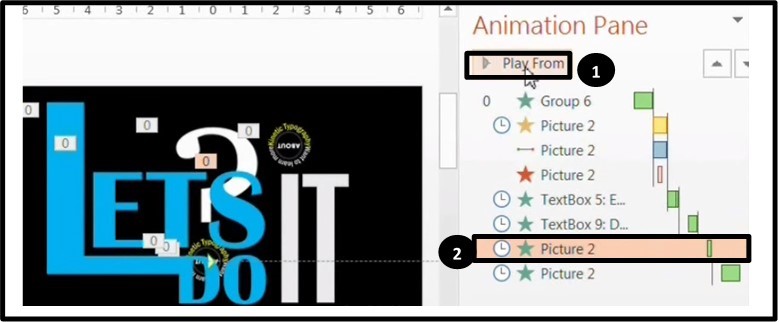
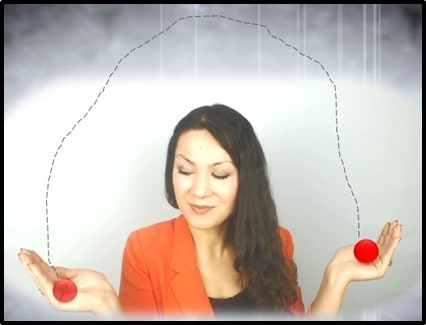
The really cool new feature though is the ability to preview your motion paths so that you can see where your animations will end.
Let me show you an example… let’s say I have a ball that I’d like to toss to my other hand. When I create the motion path, I have to make sure that the ball will land exactly into my other hand – and the preview feature can help me do that.
Feature #4: Expanded picture fill options
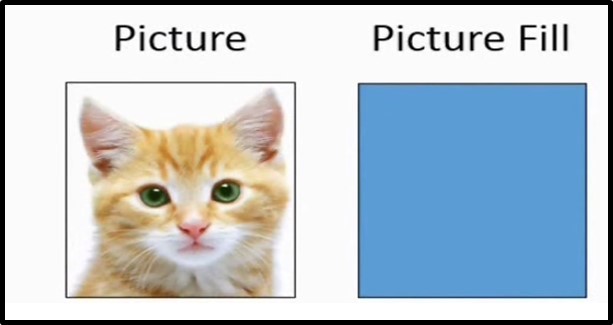
There are now expanded options for picture fills, which I really like. As an example, here’s a regular picture of a cat along with a rectangle, which we’ll fill in with a picture of a cat so that we can get additional benefits (as opposed to having a plain image).
One new feature is that if you go to, ‘shape fill’ and ‘picture’ option, you can now search directly on Bing for picture fills, although you’re just limited to the Creative Commons pictures.
I’m not a huge fan of this feature personally (I can just Google in a separate window, if needed), but some people may find it useful.
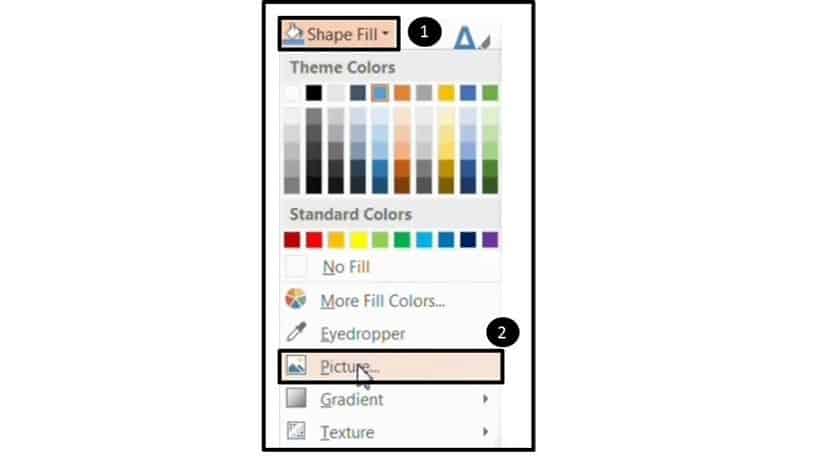
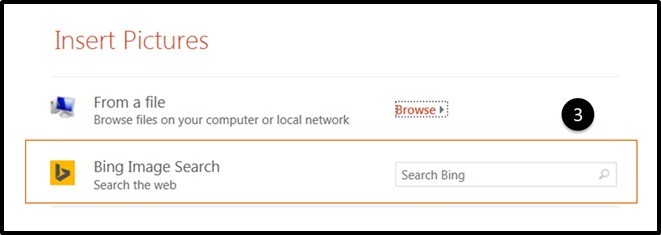
The other option that I really like is if you go to the ‘shape styles’ menu, you can scroll down and paste a picture directly from the clipboard so you don’t have to save anything to your computer first, which eliminates a lot of clutter on your hard drive.
Copy the cat to your clipboard so that you can use it as a picture fill in your rectangle. Click on Shape Styles, then Picture or Texture Fill, then click on Clipboard.

Now the two pictures look exactly the same, but the one on the right has the advantage in that I can change the transparency level and tile the picture. Let’s do a fun trick with the tile feature.
So go to Shape options, make sure the transparency level is set to zero, then tile the picture as a texture.
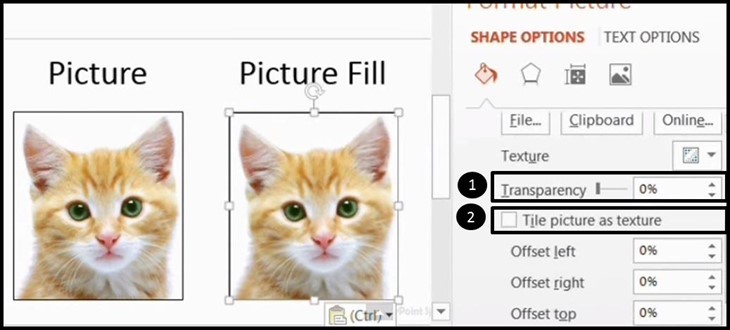
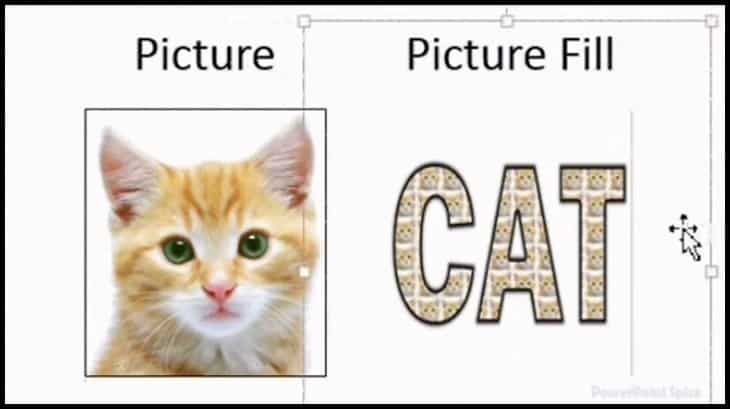
The tiling gives us a bunch of little kitty faces. After tiling, I can create a text mask that says CAT and then paste it over the tiled picture.
See how to make the mask in this Moving Text post.
A little bit silly, but this illustrates how a picture fill gives you more options than just a regular picture.
Feature #5: Merge shapes tool
What else is new in PowerPoint 2013?
Well, while the Merge or Combine Shapes option was available in PowerPoint 2010 by activating it in the Ribbon customization menu, it is now easily seen and accessed directly from the Ribbon (good job Microsoft!).
With objects or shapes selected, you can find this command under the Drawing Tools Format tab in your Ribbon.
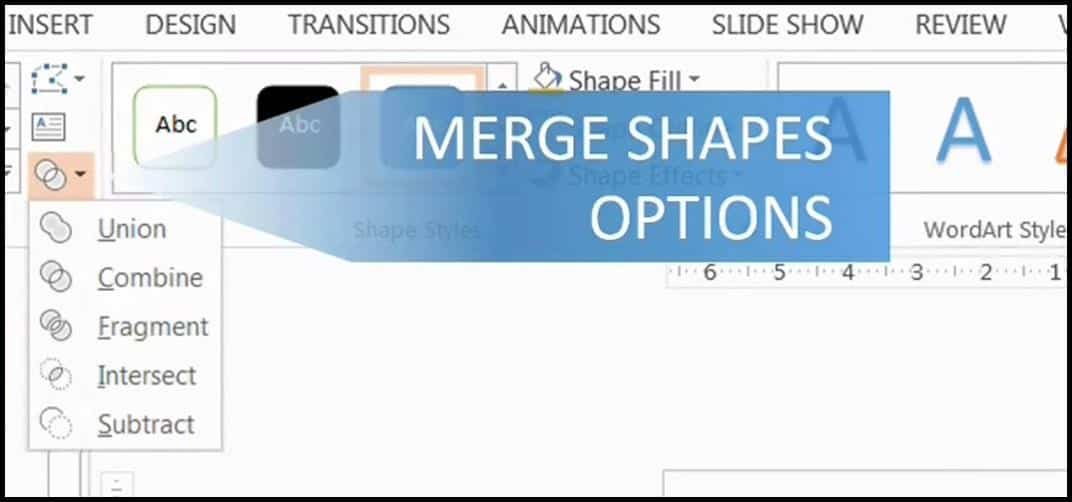
This set of features allow you to put multiple overlapping shapes together in various ways. Here is what happens when you use each of these options with two circles, for example:
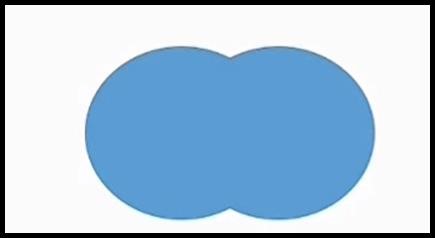
Union lumps them together into one:
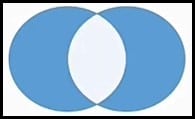
Combine takes away the overlapping area:
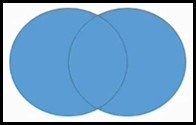
Fragment breaks them into three separate shapes:
Intersect only keeps the overlapping region:
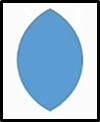
Subtract completely removes one of the shapes and any overlapping area:

How to use the Merge Shapes tool to create a mask
Now what can you actually make with this Merge Shapes menu? Well if you google this feature, you’ll see some interesting objects shown, such as cars, keys, and various circular shapes.
I’ve never seen anyone show a mask, though – so let me do it here. What I like about this mask is that it showcases multiple features shown above.
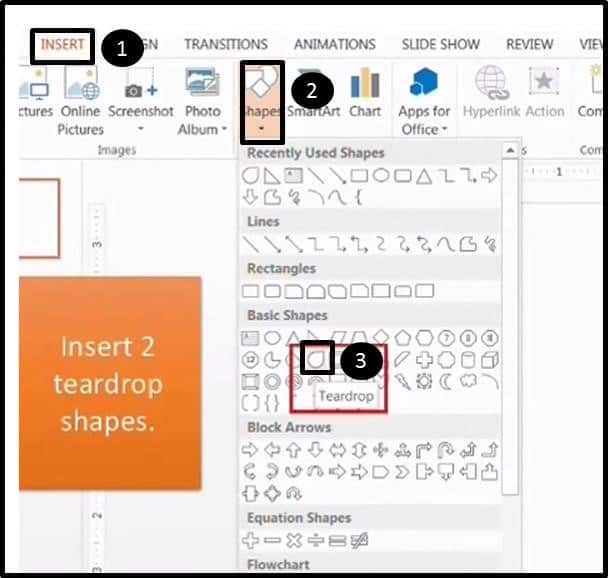
First, you insert two teardrop shapes:
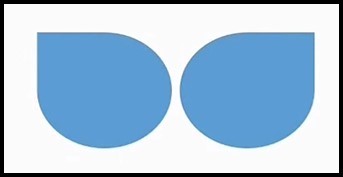
Then you extend the tip upwards using the yellow dots on the teardrops:
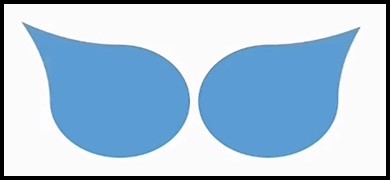
Put the two shapes together:
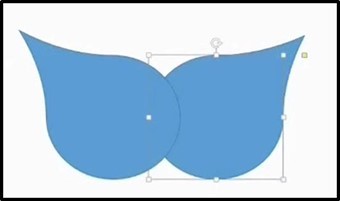
Select ‘union’ to merge them together as one:

Create two ovals for the eyes…
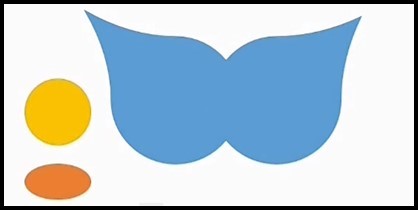
…and put them on top of each other.
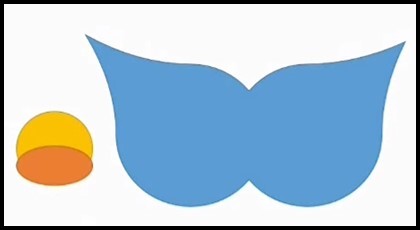
Select both the ovals and select ‘intersect’ to merge into the eye shape.
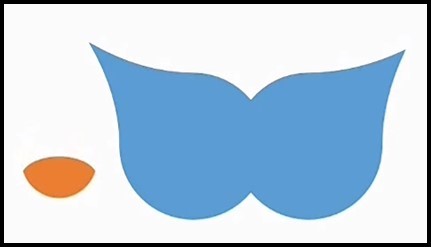
Enlarge the eye and put it on top of the mask, make a copy to make the other side match.
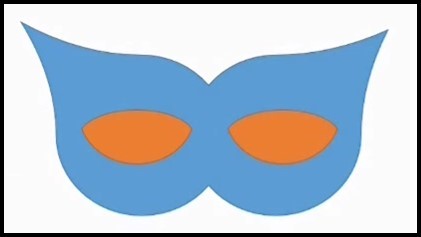
Select all three pieces and then select ‘subtract’ to cut out the eye holes.

Resize the masks, add a rectangular handle and merge it with the rest using the ‘union’ option:

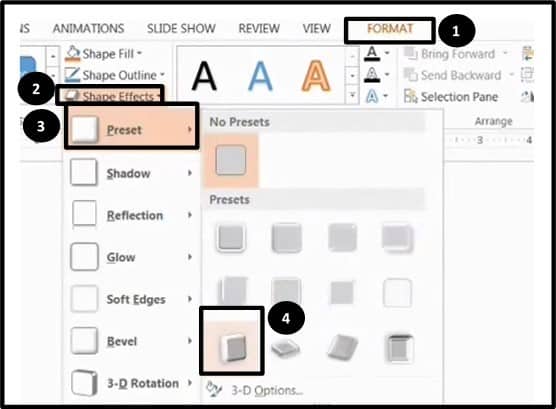
Now use one of the 3D preset formats to finish it off.
And here is your result…

Let’s try it on!

Feature #6: New video and audio options
There is a variety of newly-supported audio and video formats that can now be viewed in PowerPoint without having to download anything else. You can see the list below:
Supported video formats:
- Windows Media file (.asf)
- Windows Video file (.avi)
- MP4 Video file (.mp4, .m4v, .mov)
- Movie file (.mpg or .mpeg)
- Adobe Flash Media (.swf)
- Windows Media Video file (.wmv)
Supported audio formats:
- AIFF Audio file (.aiff)
- AU Audio file (.au)
- MIDI file (.mid or .midi)
- MP3 Audio file (.mp3)
- MPEG-4 Audio file (.m4a, .mp4)
- Windows Audio file (.wav)
- Windows Media Audio file (.wma)
You can now also export to MP4 video instead of just Windows Media Video (wmv).
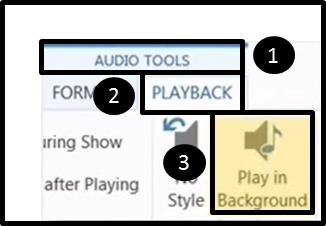
And music can be played in the background much easier with the ‘play in background’ feature on the ‘playback’ menu under ‘audio tools.’
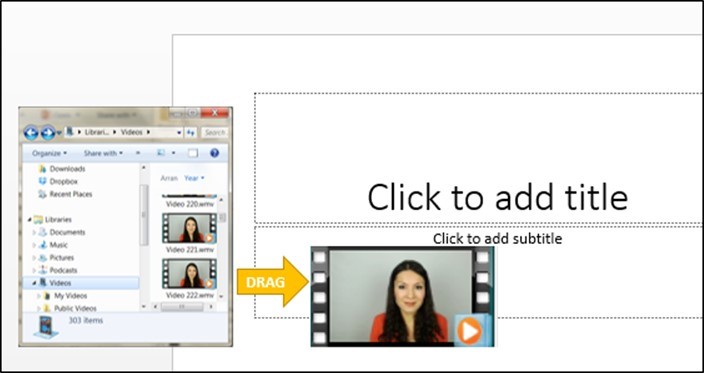
You can also now drag and drop media files from folders directly into the presentations.
Feature #7: New PowerPoint animations
PowerPoint 2013 features four new animations (some of them aren’t even technically new but are just brought back from previous versions).
There are two new entrance effects and two new corresponding exit effects. First, we have the ‘compress’ entrance effect and corresponding exit effect called ‘stretchy.’ Then, we also have the ‘stretch’ entrance and ‘collapse’ exit.
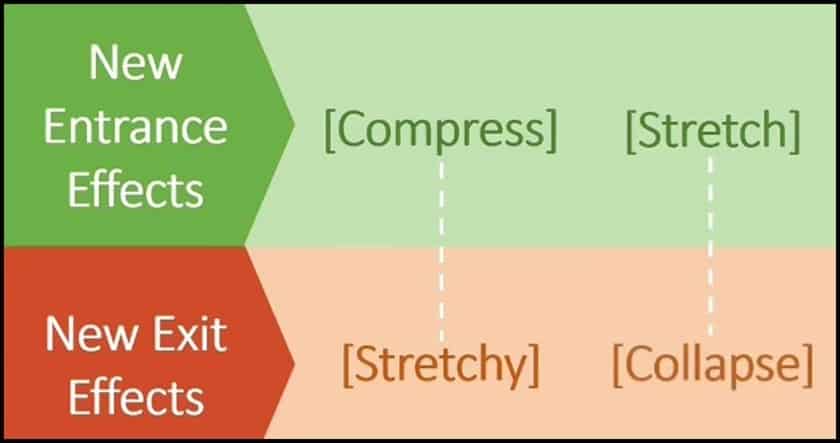
Let me show you a really easy but cool flip trick using the ‘stretch’ entrance and ‘collapse’ exit effects.
A quick and easy animation trick: The flip effect
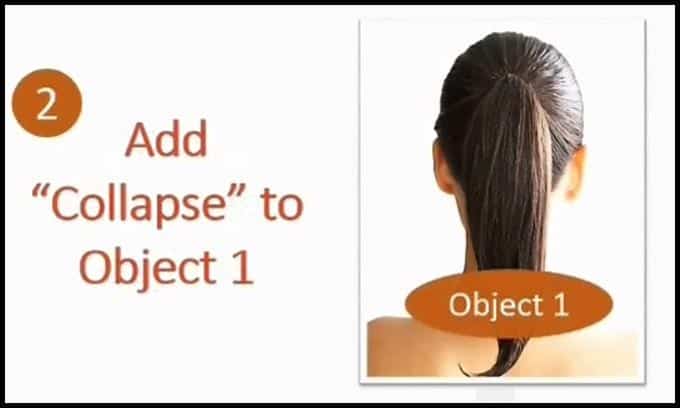
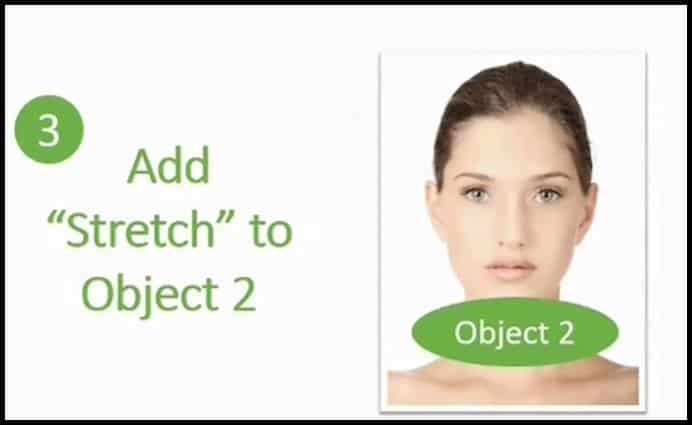
First, choose two objects of the same size – these will be the front and back of your object. I’ve chosen the front/back of a woman’s face here for illustration.
Then add a “collapse” exit effect to the first object.
And add a ‘stretch’ entrance effect to the second object.
Then make it start ‘after previous’ in the animation timing.

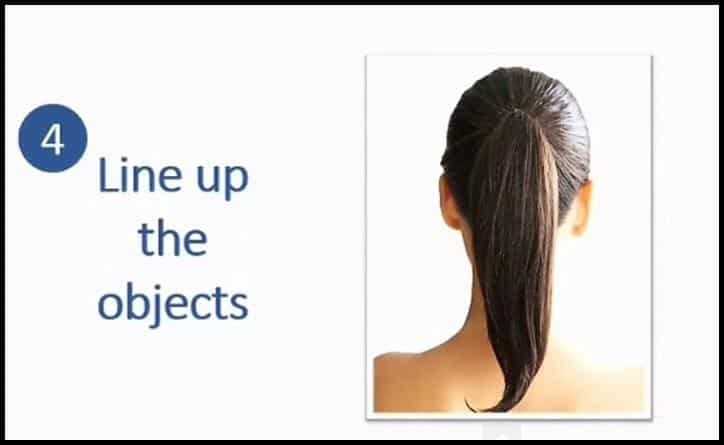
Then line up the objects so that one is behind the other – it doesn’t really matter which one is in front for the effect to work.
Feature #8: Improved Presentation Mode
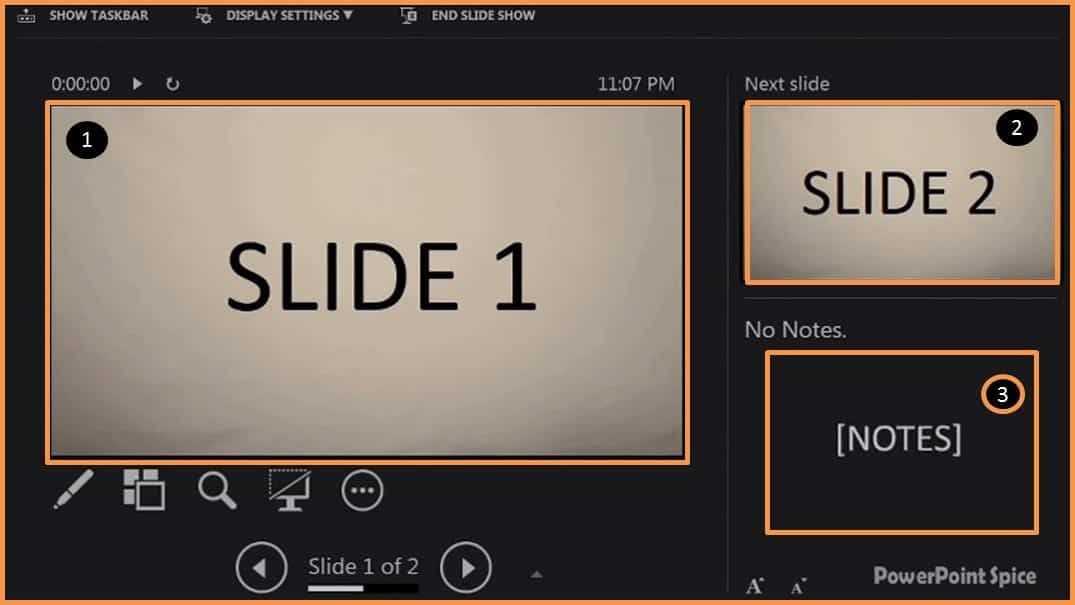
One of the best new features of PowerPoint 2013, is the improved presenter view, which allows you to EASILY see where you are, the notes for your current slide and a preview of the next slide in your deck.
To launch this presenter view, you can hit ALT + F5 to start your presentation from the beginning in presentation mode, or you can hit ALT + SHIFT + F5 to start presentation mode for the slide that you are currently on.
This was available on PowerPoint for Mac previously, so it’s great to finally see it on Windows.
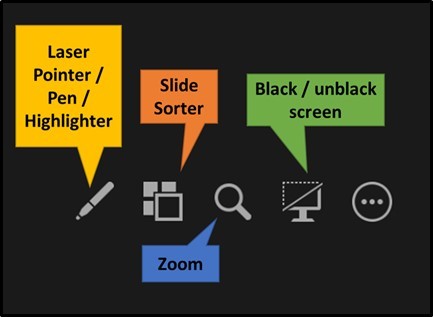
You now also have a variety of options shown below the first slide – a laser pointer / pen / highlighter on the left, as well as a slide sorter, zoom feature, and an option to switch on/off from black screen (which you can also do by hitting “b” anytime during a presentation).
Feature #9: New theme background options
PowerPoint 2013 gives you a lot more background theme options than PowerPoint 2010 did. If you go to the Design tab, you’ll be able to see all the themes that are available.
The really cool thing is that you can play around with the themes and change the fonts, effects and background styles, so everything’s a lot more flexible and customizable.

Feature #10: Default widescreen format
One of the first things you may notice when opening up PowerPoint 2013 (or 2016), is that the slide size is 16:9, or widescreen, as a default.
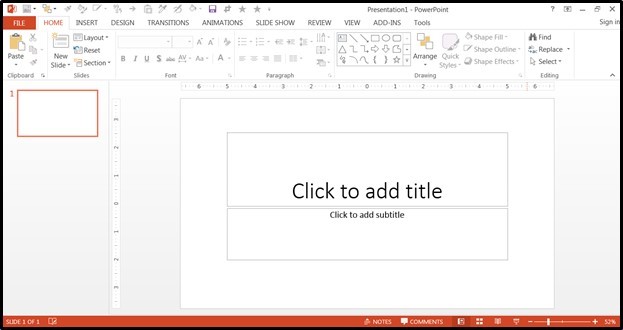
This widescreen view allows you to get rid of those black bars on the side when you view your presentation in slide show mode on widescreen monitors, which is what the industry standard is moving to.
However, watch out if you’re printing out slides, as they won’t convert to print size on 1 slide as easily as the 4×3 size (Microsoft recommends printing widescreen slides 2 per page).
I found this out the hard way when I had to redo an entire 16×9 presentation to 4×3 so we could print it 1 slide per page for a really important sales pitch. You can always change the slide size back to 4×3 by going to Design tab, then Slide Size.
Conclusion
So those are my top 10 favorite features of what’s new in PowerPoint 2013!
Again if you want to upgrade from PowerPoint 2007 to 2013 or upgrade PowerPoint 2010 to 2013, you can grab a FREE version by getting the Office 2016 preview HERE.
Just follow the instructions for installing it, if you end up not liking it, you can always go back to your previous version of Office (just make sure you have the CDs or download links ready to go).
Hopefully you learned a new trick or two from this article, whether you already have 2013 or you’re thinking to upgrade.
If you become familiar with all of the features shown here, you’ll be ready to take advantage of everything in PowerPoint 2016 when it’s released later this year!
