In this image-to-text trick, you’ll learn how to convert an image of a table into a FULLY editable table that you can use in Word, Excel or PowerPoint.
If you have the latest version of Microsoft Office (Microsoft 365), you do not (I repeat DO NOT) need any third-party software or applications to convert images to text like this.
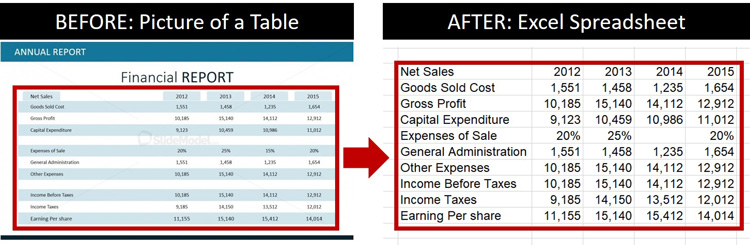
Instead, you can use a clever combination of Word, Excel and PowerPoint to quickly and easily convert any images you have (including images of tables) into fully editable text, as pictured below.
In this example, I’ve used a picture of a table from SlideModel.com and converted it into a fully editable table in Microsoft Excel (which you could then use in PowerPoint or Word).
Don’t believe me? Watch the video below or scroll down the page for details (this is an amazing trick!).
Table of Contents
Take your PPT skills to the next level
Converting an image of a table into text
Follow these steps to turn an image of a table into editable text that you can work with.
1. Copy your picture

Wherever your picture of a table is (Word, Excel, PowerPoint or other) select and copy it (you can use Ctrl + C to copy).
If your picture is in a file folder and not within a document, insert it into a Word document first and then copy it.
This might seem strange, but to make this trick work, you need to make sure you are working with a PNG file. By copying your picture, you can convert it to a PNG in one of the following steps, regardless of what file type your picture currently is.
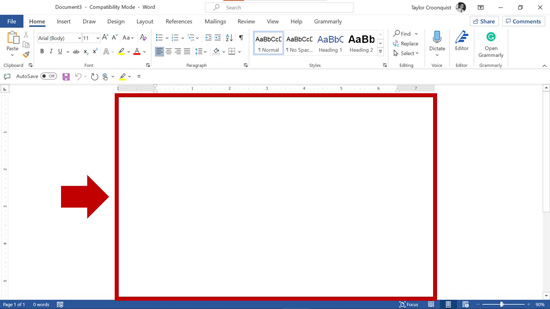
2. Open a blank Microsoft Word document

If you already have Microsoft Word open, hit Ctrl + N on your keyboard to create a new blank Word document. The only way this trick works is if you use a blank document.
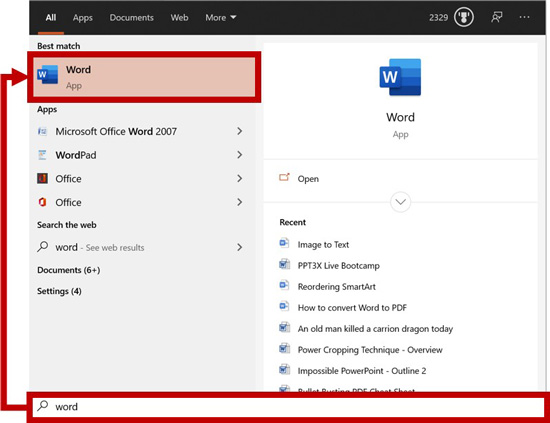
If Microsoft Word is not currently open, the fastest way to open it is to:
- Hit the Windows key on your keyboard
- Type Word
- Hit Enter
To learn more Windows 10 shortcuts like this that will save you a TON of time, read our guide here.
3. Paste your picture as a PNG file (very important)
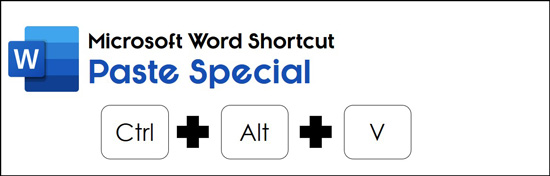
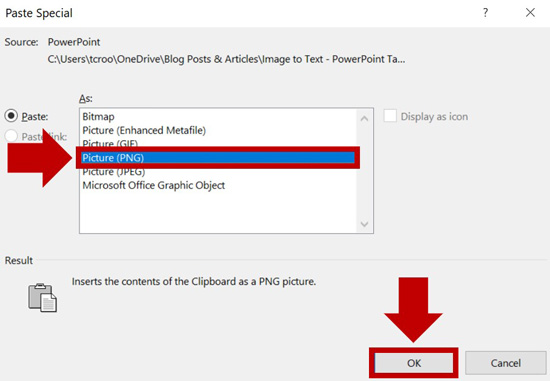
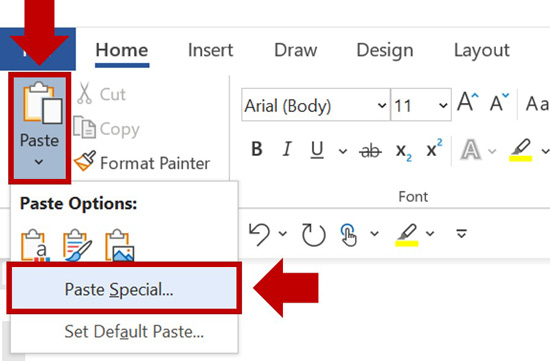
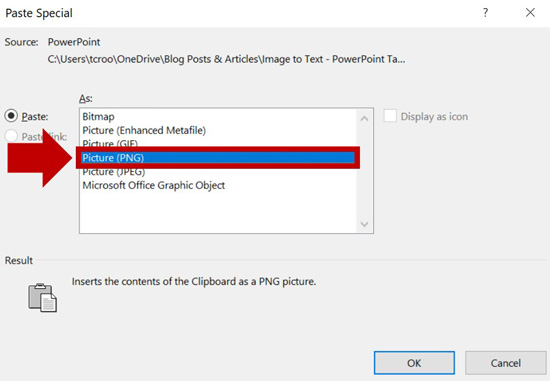
Inside your Word document, hit Ctrl + Alt + V on your keyboard to open the Paste Special dialog box. Then inside the dialog box, select the PNG file type and click OK.
If you do not select the PNG file type, Microsoft will try to default your image to a different Microsoft Office file format that will not (I repeat WILL NOT) work for this image to text trick. So please double-check that you select the correct image before leaving me a comment that this does not work.
If you do not like shortcuts, you can access the Paste Special command by opening the Paste dropdown, as pictured below.
4. Resize your picture to fit your Word document
Before you convert your image to text, double-check that the image fits within the boundaries of your Word document. If not, resize the picture so that it does not go past the document margins.
If you are working with a picture of a large table (lots of columns), it may be easier to fit it into your document by changing its orientation from Portrait to Landscape.
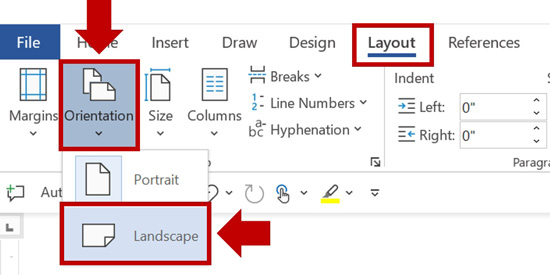
To change the orientation of your Word document, simply:
- Click the Layout tab
- Open the Orientation dropdown menu
- Select Landscape
5. Open the Save As dialog box

Now that you have the image you want to convert set up in Microsoft Word, you will need to save your file as a PDF, and then convert it back to text.
To kick this off, hit F12 on your keyboard to open the Save As dialog box.
6. Change your Save As type to PDF
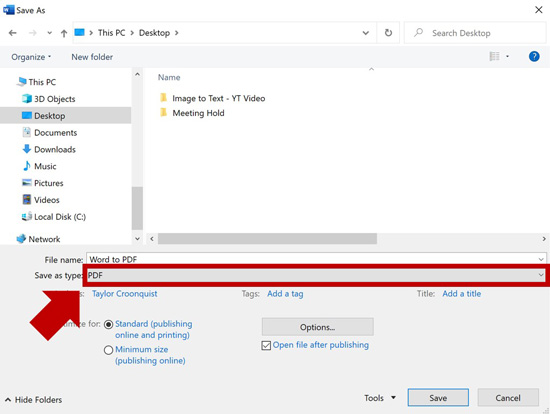
Inside the Save As dialog box, choose a location to save your file on your computer (I recommend your desktop for easy access) and then change the Save As Type to the PDF file format and then click Save.
To learn more about converting Word to PDF inside Microsoft Word, read our guide here.
7. Close your PDF

Once Word converts your file to the PDF file format, that PDF file will open.
Make sure you close out of that PDF file before you continue to the next step. If you leave the PDF file open, Word will not be able to convert it back into editable text in the next step.
8. Open your PDF from within Word

The fastest way to do this is to hit Ctrl + F12 on your keyboard to launch the Open dialog box.
Within the dialog box, navigate to where you saved your PDF file (if you followed my recommendation, it’s on your desktop), select it, and click Open. Word will likely give you the following warning.
“Word will now convert your PDF to an editable Word document. This may take a while. The resulting Word document will be optimized to allow you to edit the text, so it might not look exactly like the original PDF, especially if the original file contained lots of graphics.”

Simply click OK.
To learn more about converting a PDF to Word (and the issues you will face), read our guide here.
9. Double check your table numbers
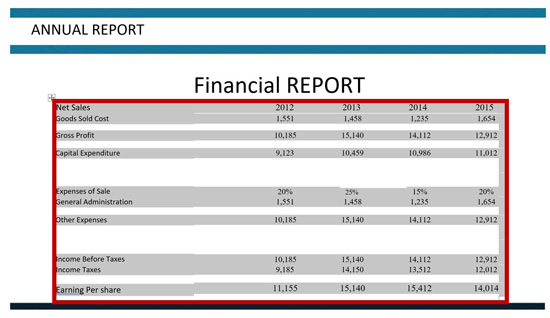
In the picture above you can see the final result of converting that picture of a table from SlideModel into a table, which you can then Ctrl + C to Copy and Ctrl + V to Paste into Excel.
Whenever you convert any type of image to text, I recommend reviewing your data to make sure it was processed correctly. For tables, I find it easiest to use Excel, as I can apply formulas. However, feel free to double-check your table any way you like.
Things to look out for are zeros that have been turned into o’s, ones that have been turned into i’s, etc.
Besides double-checking your numbers, I also recommend reading through your text for any spelling errors. Although it happens rarely, it’s best to catch these kinds of errors early so you don’t embarrass yourself in front of your client or boss.
Image to Text Issues (that I'm Aware of)
If you’ve followed the steps outlined above and it didn’t work, review the issues below to see if one of them helps you out.
When converting an image to text (especially a PowerPoint table), here are a number of issues I’ve noticed:
1. Need to paste as a PNG image
I have tried this trick a number of different ways and the only way that I’ve found to guarantee that it works is to copy and paste your picture into Microsoft Word as a PNG.
Not sure what file type your image is currently in? Simply use the Paste Special dialog box (Ctrl + Alt + V) and select the PNG file type.
BE WARNED.
If you do not use the Paste Special dialog box to specify the PNG file type, Microsoft will paste your picture using one of its office graphics formats. While it will appear you are doing this trick correctly, in my experience, the image of your table will not fully convert into editable text.
2. Need to use a BLANK Word document
In order to convert an image of a table into an editable table, you must use a blank Word document. That means a Word document with NOTHING in it. No text, no other pictures, nothing.
Why this is the case is beyond me; but if you don’t use a blank document, the image of your table remains an image even when you save it as a PDF and reconvert it back to a Word document as laid out above.
So if you try it and it doesn’t work, double-check that you are using a blank Word document.
3. Need titles for your columns
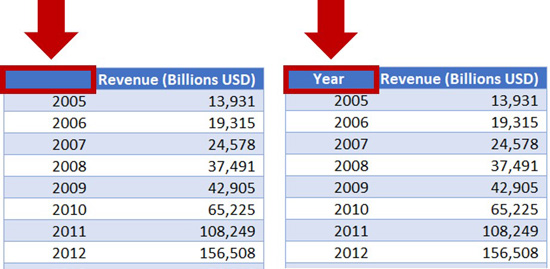
This conversion trick works best when your table columns all have titles.
Even if just one of your table columns does not have a title, Microsoft Word will convert your image of a table into a single column table with tabs and/or spaces separating your numbers. This is not the end of the world, but it is not a real table yet.
If this happens to you, you can use the Draw Table feature in Word to split your columns back out into a real table. While PowerPoint also has a Draw Table feature, it doesn’t work as well in Microsoft Word.

To use the Draw Table command, simply:
- Select your table
- Navigate to the Layout tab
- Click the Draw Table command
- Draw your lines down your columns to split them apart
4. Hide / Remove Excel gridlines
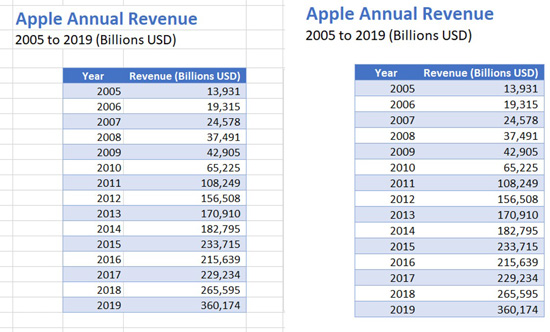
Pictures of tables with Excel gridlines in them (like the table on the left in the image above) will not properly convert to text.
For some reason, the extra gridlines confuse the image to text conversion process.
If this happens to you, you will need to hide the gridelines.
I do this by drawing in white lines on top of the image where the gridlines. Once you have hidden the gridlines are.
With the gridlines covered, you can then select your image, plus all of the gridlines, and copy it. Then, use the Paste Special dialog box to paste it as a PNG into Microsoft Word, and follow the rest of the steps laid out above.
Conclusion
So that is how you can convert an image to text using a combination of Microsoft Word, Excel and PowerPoint.
And while I showed you how to convert an image of a table into text, this trick works will all kinds of images with text. So don’t limit yourself to just converting tables.
If you enjoyed this article, you will love our training courses. Learn more by visiting us here.
🔒 Unlock the PowerPoint Shortcuts Trusted by Industry Leaders KKR, American Express, HSBC, and More!
Join over 114,880 professionals from diverse fields including consulting, investment banking, advertising, marketing, sales, and business development who have supercharged their PowerPoint game with our proven methods.
✅ Customize compelling presentations effortlessly.
✅ Master time-saving techniques for faster deck creation.
✅ Boost your career prospects with top-notch PowerPoint skills.
Get FREE access to the Critical PowerPoint Shortcuts module of our premium training course by entering your name and email below.
DISCLAIMER: PC Users Only!
We respect your privacy and will keep your info safe and confidential.