Before we learn how to make a cool cinemagraph in Powerpoint, let me tell you what it is.
A cinemagraph is a photograph where everything is still but there’s one subtle feature that’s moving, that’s been saved as an animated GIF.
Cinemagraphs are awesome because they add a surprising element to what you are showing your audience. To see samples of cool cinemagraphs, check out Tripwire Magazine’s examples of cinemagraphs.
Most people use Photoshop and After Effects to make them, but you can easily create cinemagraphs in PowerPoint alone!
I’ll show you exactly how in this video below. And if you prefer to read the instructions, just scroll down.
[Watch] How to Make a Cinemagraph
You are currently viewing a placeholder content from Youtube. To access the actual content, click the button below. Please note that doing so will share data with third-party providers.
More InformationCreating the Cinemagraph
The simplest way to make a cinemagraph in PowerPoint is to start off with a fully animated, full-screen video, then make everything else in the video still except the moving section.
Video with water is a great, fairly easy choice, to start with.
But not all videos work for cinemagraphs. From trial-and-error, I have developed the following tips for selecting a good video (which is a critical first step):
1. The camera should not be moving. If the video is moving sideways across subjects or zooming in / flying through something, do not choose that video.
2. There should be no other other movements in front or behind the motion you want to isolate. For example, if you want to work with the ocean at the beach, the section of water you’re using should not have people walking in front of it.
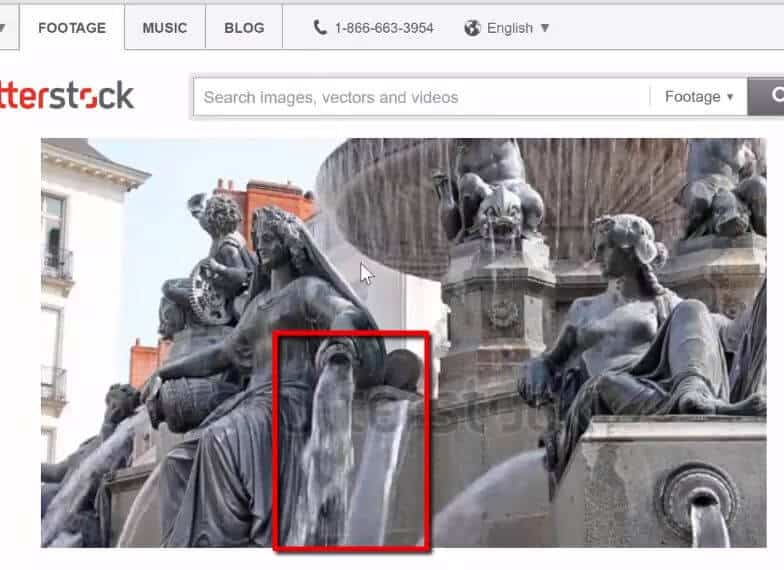
3. The movement you’re isolating should ideally be something that you can select or crop using a basic shape. For example, the water on this fountain can be selected using a rectangle is okay.

On the other hand, the water on the other side is not ideal.

4. Choose a video with a motion that is loopable. As mentioned earlier, water is one of the easiest to use for a looping video. If you choose blowing hair, for example, it will be much tougher (especially in PowerPoint) as you need to make sure that the first and the last frame matches.
The video I used for the tutorial was a boy drinking water. I got the video from Shutterstock. Most video vendors allow you to download a free (low quality, watermarked) preview of the video, which I highly recommend – to make sure it fits all the criteria and will look good.
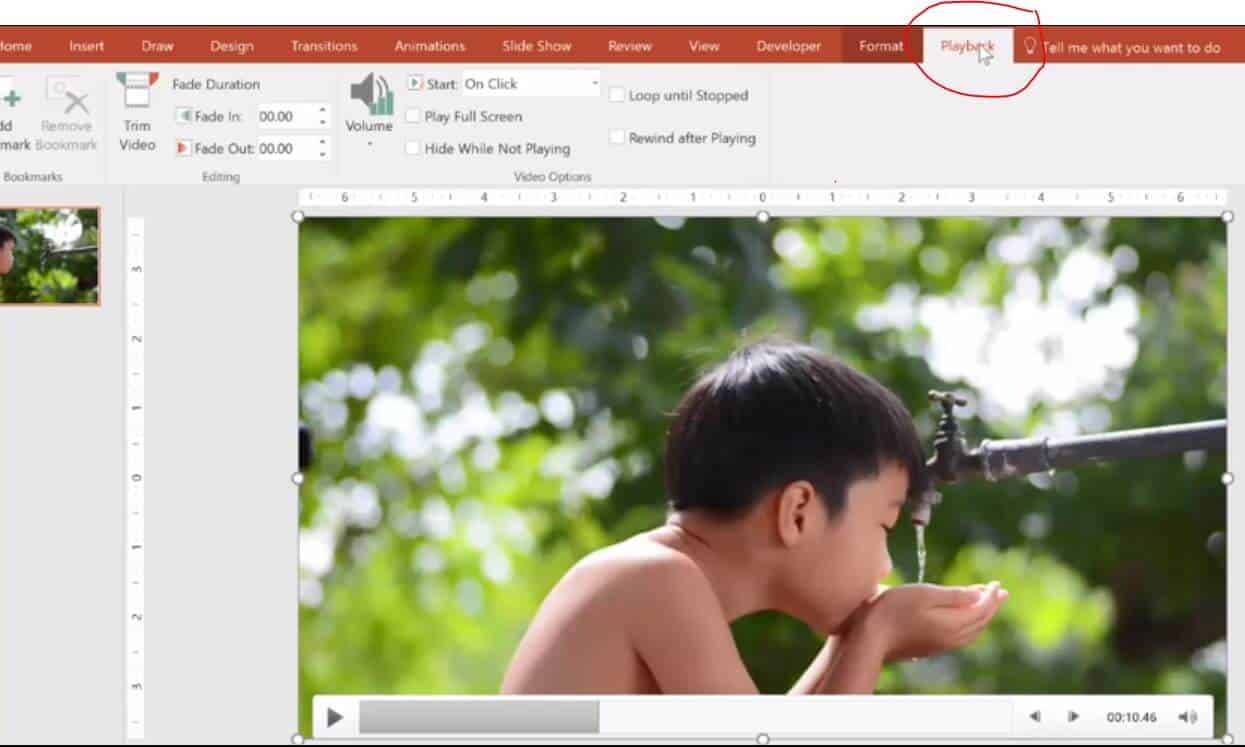
Click on the Playback tab. Choose Trim Video and once the pop up appears, make it start at 10:46. This way, the first frame of the video (and the automatic preview) will be what you want to appear.
Once you’ve selected your video, here’s what to do:
Step 1: Put the video on the slide and resize it. Decide which part will be moving, in this case, I decided it will be the dripping water that will be isolated and focused on this video.
To learn how to embed a video in PowerPoint so you can use it to make your cinemagraph, read our guide here.
Step 2: Play the video on the slide to find the frame that you want to freeze. In this example, I want to capture the the scene where the boy started drinking, which, in this case, is at 10:46.
Step 3: Click on the Playback tab. Choose Trim Video and once the pop up appears, make it start at 10:46. This way, the first frame of the video (and the automatic preview) will be what you want to appear.
Step 4: Copy the video to your clipboard by either using the Ctrl + C shortcut or right clicking and choosing Copy.
Step 5: Create a new slide (Ctrl + M) and paste the video as a picture. Right click, choose Paste, and choose the picture icon (or use Paste Special). You now have your picture base.
To learn more time saving PowerPoint shortcuts, read our guide here.
Step 6: Create the looping water next. To do this, go back to the first slide. Click the Format tab and crop around the water, just above his hand.

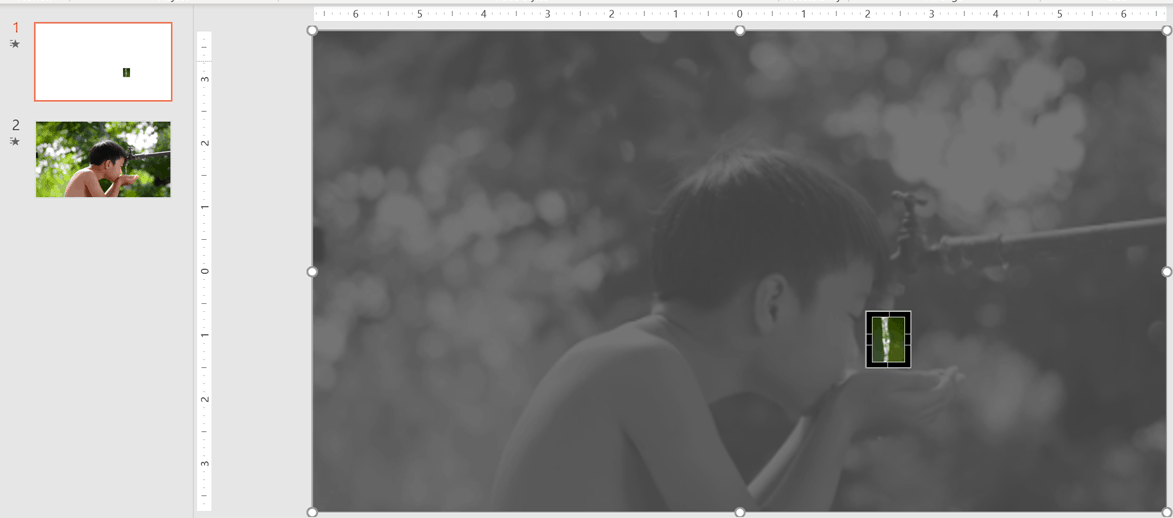
Step 7: Click Ctrl+C to copy and Ctrl+V to paste on the second slide, above the boy’s hands (it should paste automatically in the same spot in relation to his hands – so it looks seamless). You now have an image with a video square pasted over it. This is the beginning of your cinemagraph.
Step 8: Trim the end of the video. To do this, select your video and click the Playback tab again. This time, pull the end backward to capture as much of the dripping water as you can. In my video, the boy eventually starts drinking, so I cut off the video just before he moved his hands, which was at 11:58. This gives us just over a second of motion which is good. I wouldn’t recommend less than a second, as PowerPoint may crash when a video is too short.
Step 9: Click the tickbox that says Loop until Stopped. This will ensure a continuous looping motion, or water flow.
Step 10: Go to the Animations tab to change the animation settings so that the water will start dripping as soon as the slide starts. T
o do this, click on the name of the video on the Animation pane on the right, click Play and choose Start with Previous.
Step 11: Go to the Presentation mode and you’ll see your basic cinemagraph.
Exporting Your Cinemagraph
While this looks good already, I would not recommend stopping here because Powerpoint is not is not used to handling quick looping videos – an eventual crash is almost guaranteed.
To make it easier on PowerPoint, export this slide so that the picture and the video will be combined into one video file, which you can then turn into a GIF. Follow the directions below for the next steps.
Step 1: First, compress the video so that it only focuses on the small, shortened rectangle of video you created vs. the larger and longer file.
To learn how to compress videos in PowerPoint to reduce your file size, read our guide here.
Step 2: Go to Export, then Create a Video. Set the video timing. This is to control how long the slide is up before it ends. Because we have a one second loop here, I will set the transition time to at least 5 seconds (which means it will loop 5 times before it ends).
Step 2: Export and save the video by clicking on the Create Video button.
Once it’s finished saving, reinsert the video back into the slide so you can use in your presentation. You can now set it to Loop Until Stopped under Playback. Since the video is now at least 5 seconds long, PowerPoint should be able to handle it without crashing.
Cinemagraphs make excellent title slides or section dividers.
You can also convert your video into a GIF to make it even easier on PowerPoint, as well as share on social media if you want.
Converting to GIF
Here’s how to convert your video to a GIF for free:
Step 1: Go to the website Giphy.com.

Step 2: Click on Create.
Step 3: Click on Browse.
Step 4: Choose the cinemagraph video file you created from your computer.
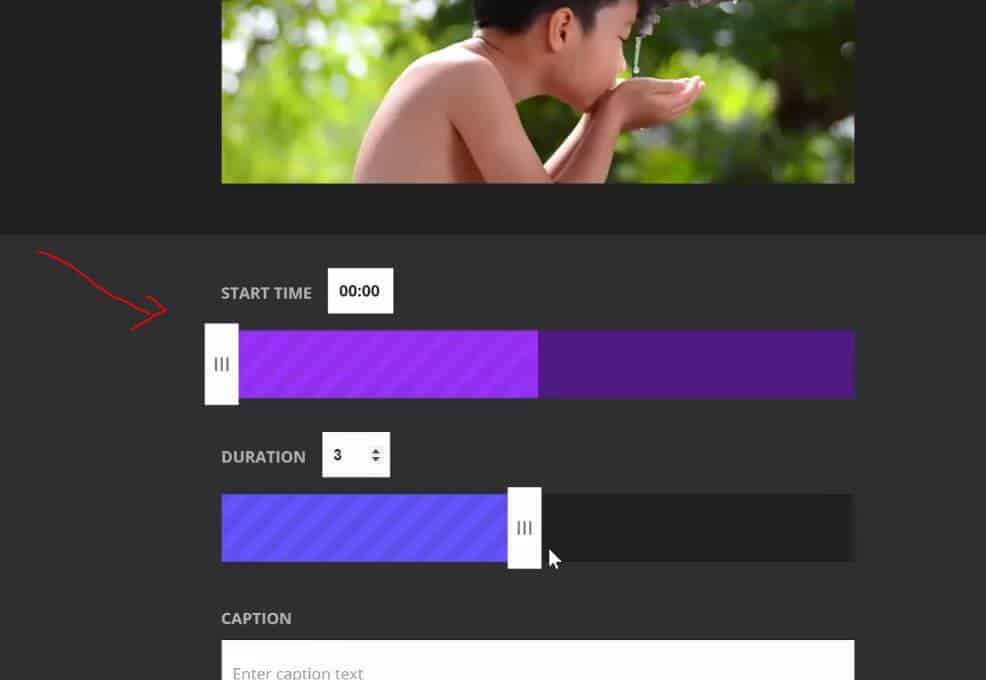
Step 5: Make some adjustments on the page if needed.

Step 6: Scroll down the page and click on the Create a GIF button.
At this point, the GIF can be shared to social media. You can also copy the image and paste it back to PowerPoint.
This will make for a much small total file size than using the video. It will play automatically when in Presentation Mode (though it will be of a lower quality than the original video).
Conclusion
And that’s it! Creating a cinemagraph is challenging especially when you’re doing it for the first time. But if you find the right video and follow the steps, you’ll end up with a stunning, eye-catching title page that will grab your audience’s attention right from the start.
To learn more about PowerPoint and find great resources, visit us here.
