In this article you’ll learn how to add music to PowerPoint, and the different playback and looping options that are available to you.
There are two main things to note about adding music (or other audio files) to PowerPoint:
1. Adding music to your presentation is slightly different than adding narration directly from within PowerPoint.
If you are trying to add pre-recorded narration files to your presentation, I recommend instead using the Record Audio or Record Slideshow features to narrate a PowerPoint.
That’s because the built-in narration tools make lining up your voice narration with your slides a lot easier. To learn all about how to narrate a PowerPoint using these tools, read our guide here.
2. Adding music to PowerPoint will increase the size of your PowerPoint presentation, as you can see in the picture below.
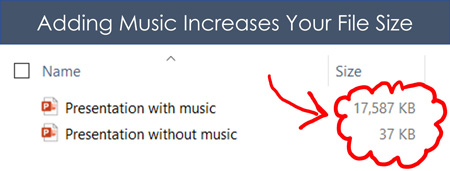
Because the MP3 music files are embedded directly into your PowerPoint presentation, the size of your presentation will increase by the size of the MP3 music file you add.
For example, if you add a 17MB song to your presentation, the size of your presentation will increase by 17MB. If you add two music files to your slides, it will increase even further.
Embedding lots of audio files can make sharing your presentation difficult. To learn different ways you can compress PowerPoint to reduce your file size, read our guide here.
How to add music to PowerPoint (MP3 or other)
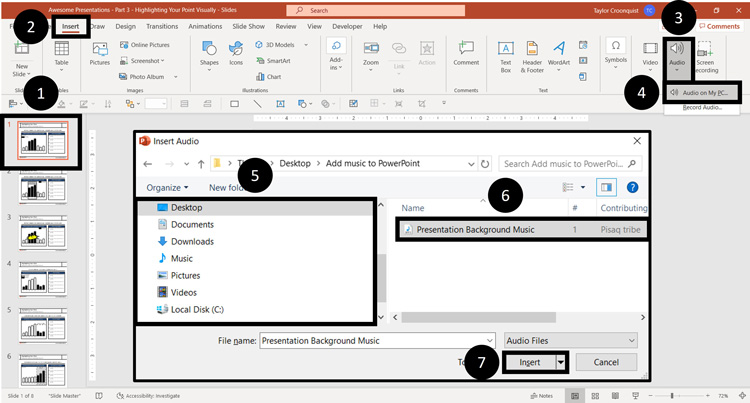
To add music to a PowerPoint presentation, simply:
- Navigate to your Title slide (or wherever you want your music to start)
- Click the Insert tab
- Open the Audio drop down (in the Media group)
- Select Audio on My PC…
- Navigate to the folder on your computer
- Select the Audio file
- Click Insert
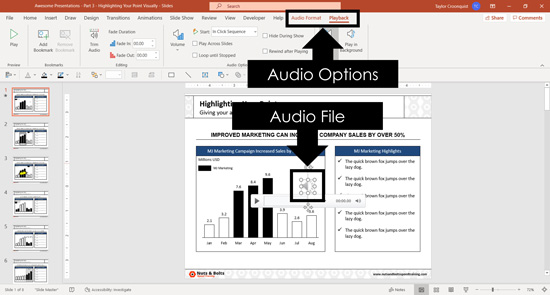
As a result, the audio file is embedded in your presentation as an object on your slide, and two new Ribbon tabs become available as you can see in the picture below.
Because the audio file is embedded in your presentation, anyone who now opens the presentation can access and play the music inside PowerPoint.
By default, your song will play within the Click Sequence of your presentation (see details below).
After inserting music to your presentation, you can then convert your entire presentation into a video and share it with your colleagues. To learn how to save your presentation as a video, read our guide here.
How to hide an audio file in PowerPoint
If you don’t want your audio file to be visible on screen during your presentation, you can either click and drag it off your slide space, or simply:
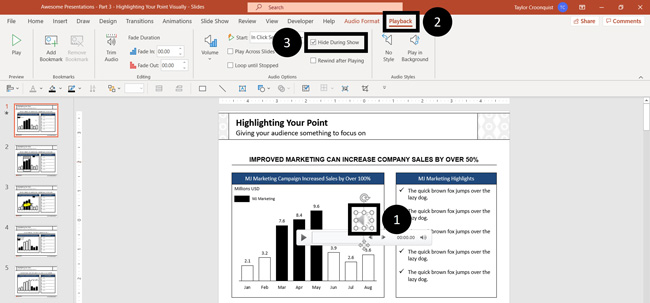
- Select the Audio File
- Open the Playback Options tab
- Select Hide During Presentation
Selecting Hide During Presentation hides the audio file object on the slide when running your Slideshow, so that it doesn’t display.
If you do this, make sure you are using either the In Click Sequence or Automatically play options for your audio file, otherwise your music will never play, as discussed below.
Note: Make sure you add your audio and music files to the exact slides on which you want them to play, because they can only be played once you reach the slide where they have been placed.
Adjusting when your music plays in PowerPoint
By default, your music files will play as part of the click sequence of your presentation which you can see and set within the Animations Pane (see In Click Sequence below).
However, like for most things in PowerPoint, you can change what triggers your music to play.
To change when your music file starts playing in PowerPoint, simply:
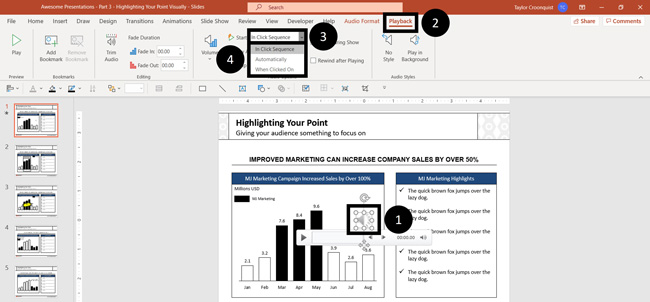
- Select the Music file on a slide
- Open the Playback Options tab
- Open the Start drop down
- Choose In Click Sequence, Automatically or When Clicked
Below is an explanation of what each of these different playback options means.
1. In Click Sequence
In Click Sequence means that your song will play based on it’s click sequence in your Animations Pane. If you have no animations or triggers set up on your slide, your song will play right before you advance to the next slide.
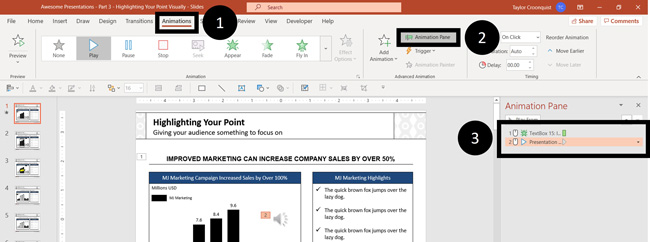
To change the order of your Click Sequence with other animations, simply.
- Open the Animations tab
- Click the Animation Pane
- Reorder your music file with your other animations
2. Automatically
Automatically means that your music plays as soon as you advance to that slide, and continues playing until either the song ends, or you advance to the next slide.
If you think you might be on this slide awhile and want the song to continue playing, simply select Loop Until Stopped.
3. When Clicked On
When Clicked On means that the music file will only play if someone physically clicks on the music file during your presentation.
This can be useful when you only want to play a song under certain circumstances, or when you want to control when the music starts or stops using your mouse.
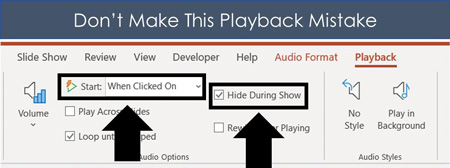
Just make sure that if you select When Click On that you don’t also select Hide During Show. That’s because Hide During Show hides the audio file when you are giving your presentation, which means that you cannot click on it to start your song.
How to loop music across your entire presentation
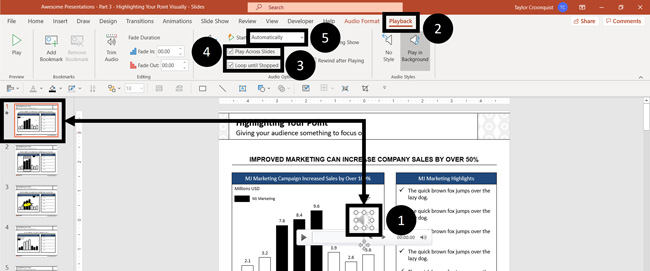
If you are turning your PowerPoint presentation into a video, or want your music to play across all your slides as you present them, follow these steps:
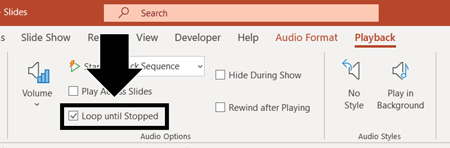
- Insert and select your music file on your first slide
- Open the Playback tab
- Check Loop Until Stopped
- Check Play Across Slides
- Set the Start to play Automatically
Doing so, your music will play as soon as you start your presentation (F5 on your keyboard) and will continue to loop and play throughout your presentation.

Your music will now only stop when you either exit slideshow mode (hitting Esc on your keyboard) or get to the end of your presentation.
To learn the different keyboard shortcuts for starting and stopping a PowerPoint slideshow, read our guide here.
How to trim music in an PowerPoint presentation
If you only want a section of your audio file to play, you can use the audio trimmer tool in PowerPoint.
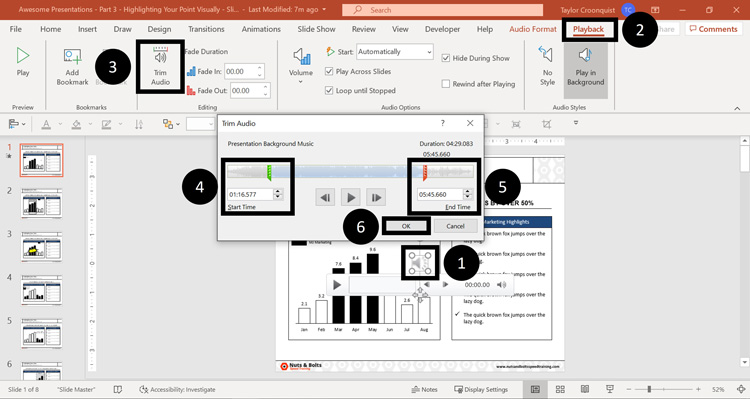
To trim an audio file in PowerPoint after you’ve inserted it, simply:
- Select your Audio file
- Open the Playback tab
- Select the Trim Audio command
- Adjust the Start time
- Adjust the End Time
- Click OK
As a result, your audio file will be trimmed to the new start and end times you set.
Note: If you later compress the media in your presentation, the parts of the audio file you trimmed away will be permanently removed.
This will decrease the size of the audio in your PowerPoint presentation, but it will also permanently alter your music file.
To learn a variety of different ways you can reduce your PowerPoint file size by compressing things in PowerPoint, read our guide here.
How to remove all music files from your presentation
Audio and media files can easily be removed from your presentation by simply selecting them and hitting Delete.
However, if you have a lot of audio, video or music files spread out throughout your presentation, you can remove them all at the same time by following these simple steps.
1. Find your presentation in File Explorer
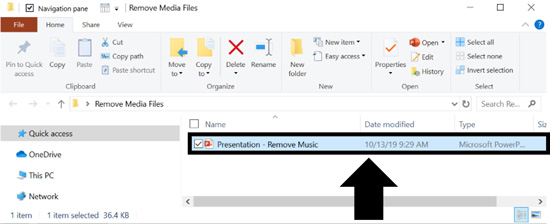
Save and close your PowerPoint presentation, and then open the file folder where your presentation sits.
If your presentation is on the Desktop, simply click and drag it into a folder so you can see it in File Explorer as pictured above.
2. Turn on File name extensions
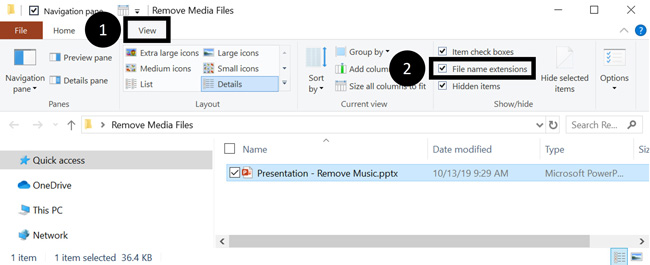
To turn on the file name extensions in File Explorer, simply:
- Click on the View tab
- Select File name extensions
This enables you to see (and edit) the file name extensions of your files. For example:
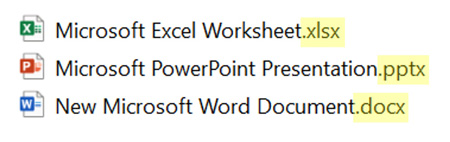
3. Turn your PowerPoint into a ZIP file
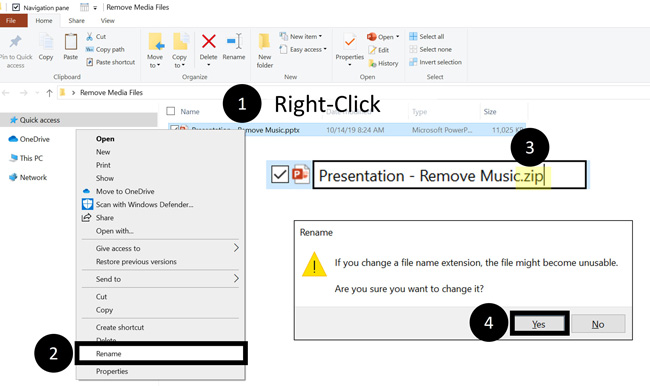
To turn your PowerPoint presentation into a ZIP file, simply:
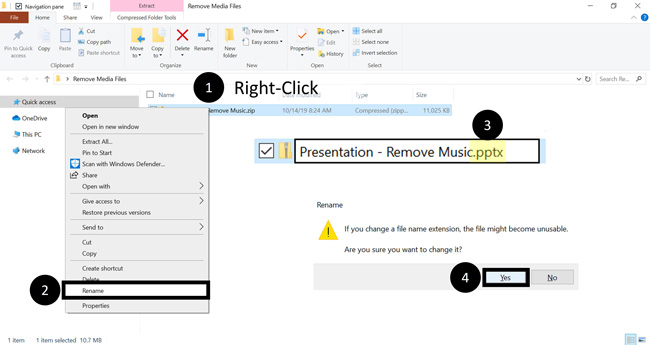
- Right-click your file
- Select Rename
- Replace the ‘.pptx‘ part with ‘.zip‘ and hit Enter
- Select Yes
This converts your PowerPoint presentation into a ZIP file with all your PowerPoint objects in it. As a result, you’ll be able to open the folder and edit its contents.

4. Delete any MP3 or MP4 files from your media folder
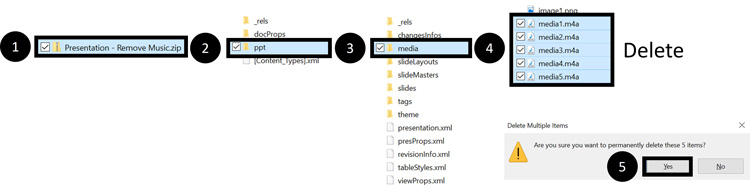
For example, if you want to delete the media files (MP3 and MP4) out of your presentation, simply:
- Open the ZIP folder
- Double-click PowerPoint
- Double-click Media
- Select the MP3 and MP4 files you want to delete and hit Delete
- Click Yes
This deletes all the selected files from your presentation, regardless of where they exist within your presentation.
Note: The media folder also includes any audio or video narrations you have added to your presentation, so if you delete all those file types, you’ll remove the narration as well.
Therefore, if you are not sure which MP3 or MP4 files you want to delete from the folder, double-click them inside the ZIP folder to preview them before you delete them.
5. Turn your ZIP folder back into a PowerPoint presentation
Once you’ve deleted your media files, turn your ZIP file folder back into your PowerPoint presentation, simply:
- Right-click your ZIP folder
- Select Rename
- Change the ‘.zip‘ to ‘.pptx‘
- Click Yes
As a result, you can now open your PowerPoint presentation without all the media files you deleted.

Note: If you don’t like seeing the File extension names in your file folders, you can simply turn them off in File Explorer, like this:
- Navigate to the View tab
- Uncheck File name extensions

Conclusion
In conclusion, there is a lot you can do with audio when you add music to your presentation.
If you followed the instructions in this article, you now know exactly how to add music to PowerPoint, and the different playback and looping options available to you.
Just remember to pay attention to how and when you trigger your music to play in PowerPoint… especially if you choose to hide your audio file in Slideshow mode, as otherwise it might not play.
If you enjoyed this article, you can learn more about how to improve your PowerPoint skills by visiting us here.