Time Saving Tip: You can save yourself a bunch of time by first buying a Professional PowerPoint template and then tweaking it to meet your needs.
To see the 4 best places I recommend finding professional PowerPoint templates online (and why I like them), read my template guide here.
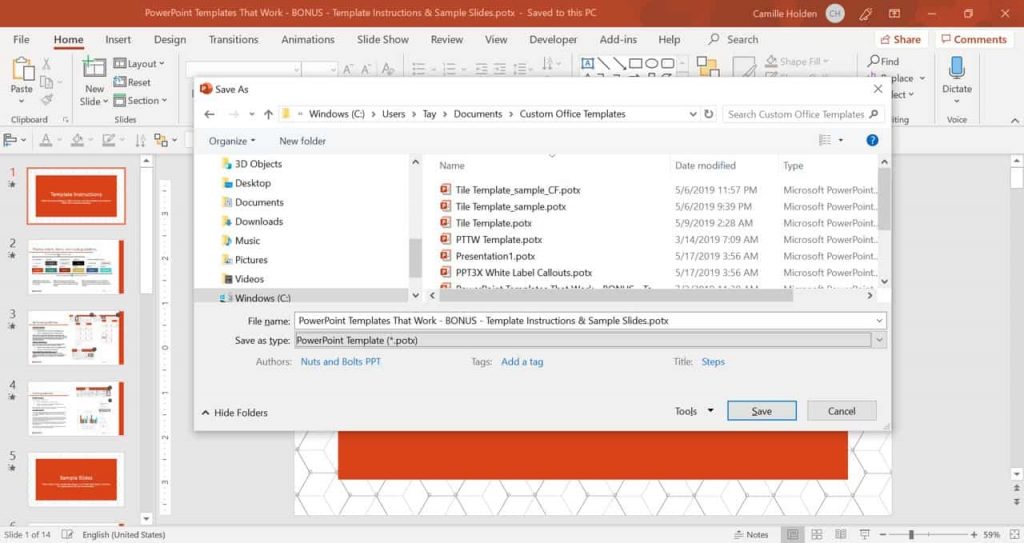
Creating and saving a PowerPoint template
Creating a custom PowerPoint template from scratch isn’t rocket science, but it does require a few steps.
To get started building your own custom template, simply open up a blank a blank PowerPoint file, format it to meet your needs (see sections further below), and then save it as a .POTX PowerPoint file.
Pro Tip: Name your template right
When saving your template, use a naming convention that will work for you in the long run.
Chances are pretty high that you’ll be creating more than one template, and keep your naming consistent will be massively helpful for you down the road.
I also recommend going into detail in your naming convention. Think of something like this:
“[Company Name] Template_2016_single client_dark background_live large audience”
and
“[Company Name] Template_2016_single client_light background_ small meeting or print”
What gets tricky is everything you do before you save it…all the formatting and settings decisions you make about your template.
This is where most people – even top-level graphic designers – make mistakes that cost them down the road. I’m going to help you avoid those mistakes and build a template that works for you, not against you.
Questions to ask before building your custom PowerPoint template
There are a few key things you need to decide before you even start building your template because they will affect the choices you make along the way, and to make sure the template meets your needs
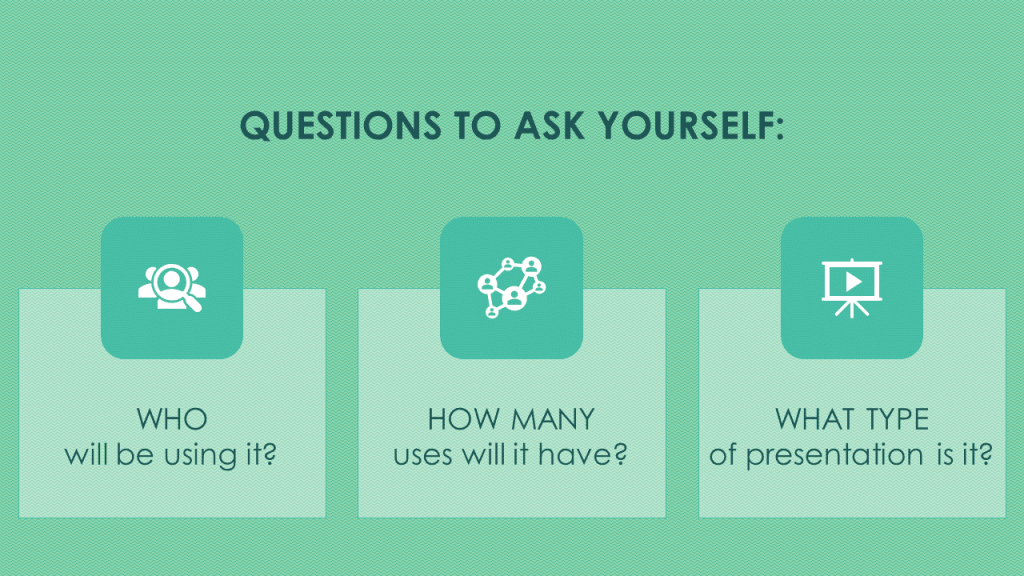
Some questions to answer are:
Who will be using this template?
If you’re the only one using a template, it will be built quite differently than if it’s going to be used by whole teams of people. And depending on the level of PowerPoint proficiency of the user, you may need to lock certain features down so that they’re harder for the end-user to fiddle with or break.
How many uses will this template have?
It’s crucial to define how your template will be used. If it just needs to set an initial layout for a creative deck, then it will need to remain very minimalist. However, if it needs to determine how virtually every single slide created in a company looks, for example, then it will have to be very robust.
How many types of presentations do you plan to build off of this template? And are they big live presentations (TED talk style) or are they printed presentations or more like board room meeting presentations?
Sometimes people say they need 1 template, but in reality, they need multiple templates. There’s no one-size-fits-all template for all decks, because almost every element in the template will be different based on how it’s presented…your fonts, your backgrounds, the animations and effects, whether you put the logo on the slides or not, partner logos or not, page numbers or not…everything!
The bottom line
A good template is a bit contradictory…it should be relatively un-flexible but also quite flexible. Here’s why.
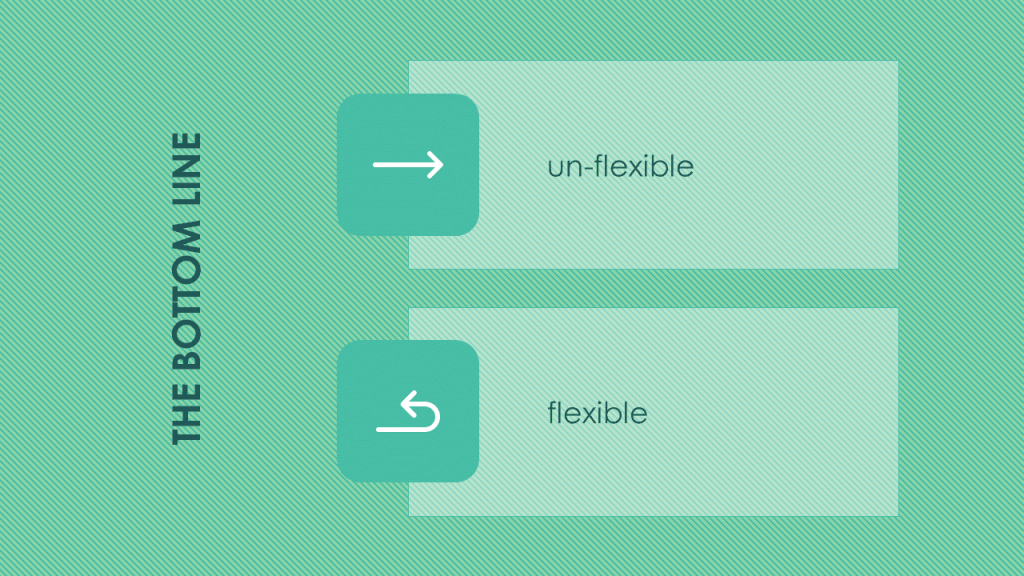
Un-flexible
It should not – and cannot – be everything and be everything to all people for all uses. If it’s too flexible, it will be too easy to circumvent, which defeats the very purpose of a template.
Flexible
At the same time, it needs to be flexible enough to give people a sense of ownership over the deck. Ultimately, if someone wants to make the font all lime-green, you can’t stop them within a template. But if you give them several better options, they’re more likely to choose a pre-determined one among them.
How many times have you heard people complain that nobody’s using the template properly? Well I’m here to tell you that as the template builder, the responsibility lies with you to make the template fit its use and user.
Chances are that you’ll find you have to build multiple templates, instead of just one, in order to meet the various user and presentation needs. It’s a bit more work upfront, but you’ll thank us later!
Pro Tip: Train your people
I always recommend that people train the end-user of the template in how to use it. A simple webinar demonstrating what to do and what not to do can help ensure that people not only follow the template guidelines but also feel more empowered with this tool.
In addition to that, I recommend putting thorough instructions and notes directly inside the template to ensure that the guidelines are crystal clear and visible each and every time someone opens the template to use it.
This is especially helpful if you can’t have any direct interaction with the users themselves.
Once you’ve answered these questions for yourself and determined whether you need more than 1 template, you can start to build it out.
Drafting out your own custom template
The order that you build out your template is important.
What I usually start with, after I’ve thought through the questions listed above (in the ‘What you need to think about before you build a PowerPoint template’ section), I determine the slide dimensions and whether I need margins on the sides (for printing).
Next, I take a piece of paper and a pen and I sketch out the general layout that I want the presentation to have.
- Do I want the look/feel to be?
- Are we going super minimalist and modern? Or are we trying to be more warm and fuzzy?
- Do I want big titles at the top, small on the right, or standard the left?
- What design elements do I need/want to incorporate? And so on.
Answering these kinds of questions will help you draft out some layout ideas and come up with a structure for your slides. Once you’ve established these elements for your template, I open up the program and start formatting and setting things up.
Pro Tip: Get inspiration for template design
If you need inspiration, there are many places you can look in your everyday life, from magazine ads, to movie posters, and even twitter images.
For slide-specific ideas, I would go to slide sharing sites and the websites of presentation gurus. Places like SlideShare, Canva, TerbergDesign, or even Pinterest (type in ‘slide design’).
Also, check out Information Is Beautiful for ideas on data visualization and infographics; and DesignIsHistory for examples of graphic design through the ages.
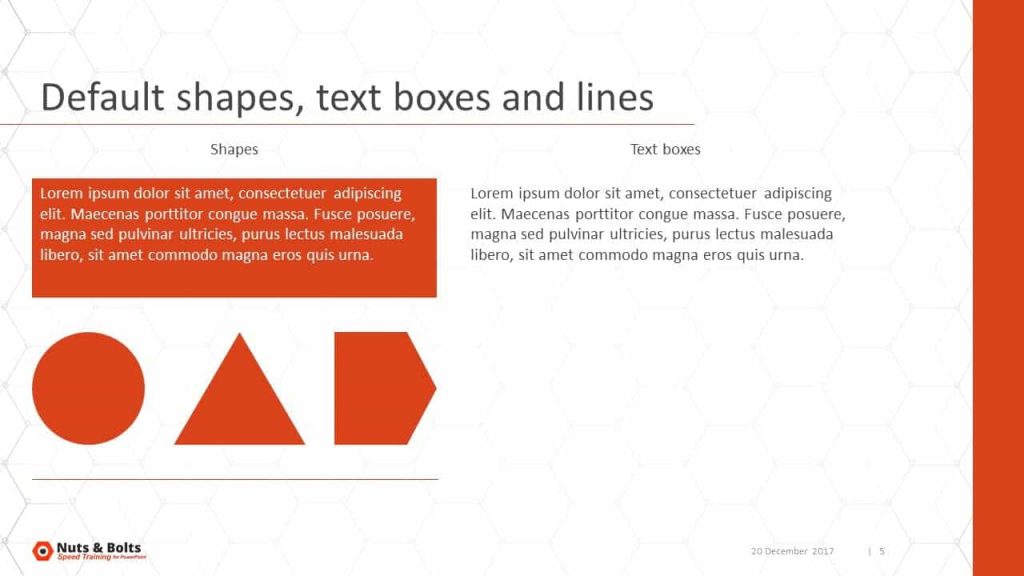
There are many individual elements that need to me formatted in a template. Here are all the elements you can (and should) set:
- Slide dimensions
- Slide margins (gridlines)
- Color palette (to learn more about this, see our article here)
- Fonts (to learn more about this, see our article here)
- Effects (to learn more about this, see our article here)
- Placeholder text font, size and format (italics, etc.)1
- Bullet point type, size, color, etc.2
- Paragraph spacing
- Shape internal margins
- Shape and text effects (shadows, bevels, etc.)
- Picture effects
- Footer formatting
- Transitions
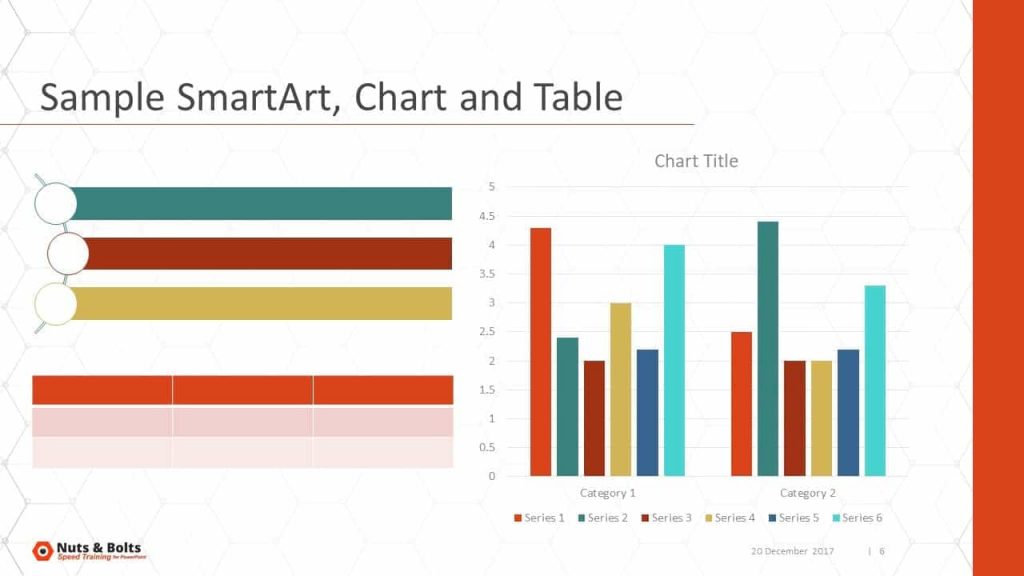
- Some table, chart and SmartArt formatting
1 There is a trick for making titles All Caps in your Slide Master is to use the Font dialog box (CTRL + T) to set the All Caps. To see how to do that, check out our templates tips and tricks article here.
2 Bullet points should be left in place. If you want to start a placeholder without a bullet point but have bullet points pop up for the sub-levels, you need to use the List Level commands. To see how to do that in your template, read our article here.
Now each company, situation, presentation, and even speaker is different. So I can’t tell you exactly how to set up the template that will work for you. But I can show you how I would set up mine (video pending).
Once you’ve made all of the formatting and setting adjustments you want, simply save your presentation as a .potx file (to see how to do that, scroll up to the “Creating and saving a PowerPoint template” section), and you’re all set!
Pro Tip: Learn from the experts
Why reinvent the wheel? To avoid making all those costly template mistakes at the outside, consider learning from the pros who do this for a living.
To learn more about how to build a custom template, I highly (HIGHLY) recommend the following book by Echo Swinford and Julie Terberg: “Building PowerPoint Templates Step by Step with the Experts”.
They walk through virtually every detail of what goes into building, editing, and sharing a PowerPoint template, as well as solutions to some quirky issues that may come up in the process.
And they’re about to release a second edition, with some key updates, which we’ll keep you posted on.
[Watch] How to create a PowerPoint template
To help you build your own custom template faster, Camille created the below 3-part series where you can watch over her shoulder as she builds a PowerPoint temple from scratch.
If you would prefer to see how to create a PowerPoint template in blog post format, see my step-by-step template guide here.
1. How to create your own slide background
You are currently viewing a placeholder content from Youtube. To access the actual content, click the button below. Please note that doing so will share data with third-party providers.
More InformationIn this first template series, you’ll learn how to get started by creating your own slide backgrounds.
On top of that, you’ll learn a number of common mistakes to avoid to ensure your PowerPoint template actually works.
For more additional help with creating PowerPoint backgrounds for your slides, read our guide here.
2. How to create PowerPoint placeholders
You are currently viewing a placeholder content from Youtube. To access the actual content, click the button below. Please note that doing so will share data with third-party providers.
More InformationIn this second part of this template series, you’ll learn about adding and formatting placeholders on your Parent Slide.
When done properly, this ensures that all of the slides within your presentation have the correct and properly formatted placeholders.
3. How to create your own custom slide templates
You are currently viewing a placeholder content from Youtube. To access the actual content, click the button below. Please note that doing so will share data with third-party providers.
More InformationIn the last part of this template series, you’ll learn how to edit the Child Slide layouts on your Slide Master.
This is how you create your own custom slide templates that everyone on your team can use. As you will see, this involves formatting your layouts to fit your own individual company and client needs.
Free PowerPoint templates and where to find them
First, the bad news. The only free PowerPoint templates I can 100% recommend that you use are:
- The default Office templates (and themes)
- Custom ones you build yourself (does cost you time though)
That said, there are a few sources for free templates:
But as the saying goes, you get what you pay for. That’s why when it comes to templates, unless you’re building a presentation you don’t care about (that is, no one, right?), then you should expect to pay for a quality template.
The main problem with free PowerPoint templates is they are not real templates. They are what we call fake templates.
Here are a few places you can find paid PowerPoint templates online:
- SlideCow (pay per template)
- Creative Market (pay per template)
- Envato (subscription)
- Slide Model (subscription)
- Slide Team (subscription)
To see a list of the top 4 places I recommend looking for templates, read my guide here.
If you have a large organization and need a new corporate template, I would seriously consider hiring a professional (I recommend Echo Swinford and Julie Terberg) to build one for you.
Getting an expert to build your template and train your team can be invaluable. This is especially worthwhile if your organization uses PowerPoint heavily and brand consistency is important to you.
How to use a custom template
Using a PowerPoint template is simple. Once you’ve saved your presentation as a template file, you can use it in two ways:
Method #1 for using your template
Open PowerPoint up and in the start menu, you should see your custom template there among the other default Office templates.
Note: Custom templates should be at the very top, but if you’re not finding yours, you can use the search box to look for your custom built template.
Once you find your custom template, click it and PowerPoint will start a new presentation with that template.
By default, it will be named “Presentation 1” (unless you already have a presentation open with that name). If that is the case, it will be named “Presentation 2” and so on. You can edit the slides and create your presentation based on this template, and then save it (rename it if you wish) as a .pptx file.
Doing this does not alter the original template (.potx file) in any way.
Method #2 for using your template
Find your template file and double-click it to open it in PowerPoint. A new blank presentation will start, based on that template.
By default, it will be named “Presentation 1” (unless you already have a presentation open with that name, in which case it will be named “Presentation 2” and so on). You can edit the slides and create your presentation based on this template, and then save it (rename it if you wish) as a .pptx file.
Doing this does not alter the original template (.potx file) in any way.
How to distribute a custom template
Once you’ve built and saved your template, all you need to do is send it out and let people start using it. But wait! There’s one last thing you should always do, and that’s include user instructions and a sample slide deck.
How to make user instructions and a sample deck for your custom template
The key thing here, is to know your users. How are people going to use your template and what are they likely to stumble on? What mistakes will they make that are likely to throw a wrench in the whole template?
Figuring out what gets people stuck is a critical element of making a template that will actually work. The goal of the user instructions and sample slide deck is to explain and show to people the proper usage of the template.
Here is a sample of some user instructions we’ve created in the past:
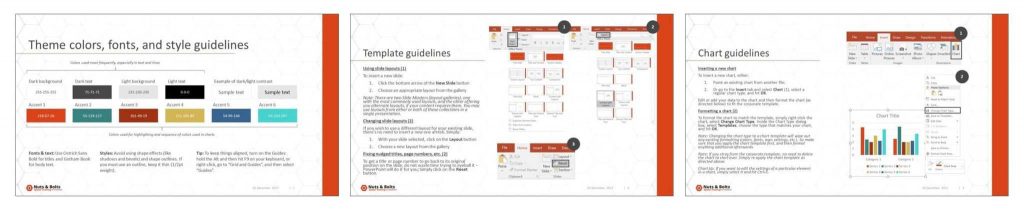
The key here is to spell out everything very clearly. Never assume a user knows something, whether it’s a command in PowerPoint (like the Reset button) or the corporate colors.
Here are some basic example slides from a sample slide deck that we’ve created in the past:
The key here is to make a slide or two for each layout, with multiple variations (with picture, without picture, etc.) so that someone can get a sense of how to use one layout to create many slides.
Recommendation: Make as many generic types of slides as you can think that your users will need. If they use a of of “Our Company” or “Thank You” slides, make those. That will be helpful to them, and will ensure that they know they have something they can pull from that’s matched to the template already.
Just don’t overwhelm them with a 100 slide sample deck.
You won’t be able to hold their hand as they use the template, but giving them these instructions and sample slides should help them get a leg up on the process.
Pro Tip: Train your people (again)
I always recommend that people train the end-user of the template in how to use it. A simple webinar demonstrating what to do and what not to do can help ensure that people not only follow the template guidelines but also feel more empowered with this tool.
I also recommend walking them through the user instructions and notes to ensure that the guidelines are crystal clear to them.
How to apply a custom template to an existing presentation
If you have an existing presentation and want to change it to another template, you will need to change the theme (I know, it’s confusing, but that’s how it is).
To do that, simply click on the ‘Design’ tab in the Ribbon, and click on the ‘More’ arrow to open up the Theme options dropdown menu. Here you can choose another Office theme, or you can choose a custom theme.
If you don’t see your custom theme in the ‘Custom’ area of the dropdown, that means it was saved in the wrong place on your computer. All you have to do is find that file (.thmx) and put it in the appropriate folder on your computer (see the list below for folder locations).
Where to put your theme files:
- In Windows XP: C:\Documents and Settings\%USERPROFILE%\Application Data\Microsoft\Templates\Document Themes
- In Windows Vista, and Windows 7 and later: C:\Users\%USERPROFILE%\AppData\Roaming\Microsoft\Templates\Document Themes
- On a Mac (2011): ~/Library/Application Support/Microsoft/Office/User Templates/My Templates
- On a Mac (2016): ~/Library/Group Containers/UBF8T346G9.Office/User Content/Themes/Theme Colors
Conclusion
Creating your own custom PowerPoint template is possible, it just requires getting clear on your goals and executing on them.
Most PowerPoint templates floating around the world are NOT real templates. They might look like a template, but they are often not properly set up on the slide master and is one of the reasons that so many people struggle in PowerPoint.
To learn more about our PowerPoint training courses and services, visit us here.
Dear Taylor and Camille – what a *wealth* of information, this is outstanding. Together with Camille’s 3 part video – just a fantastic amount of information. You two are just the best! And I’d love to join you for happy hour … your background looks lovely! ha ha